Tire Removal/Replacement Ideas
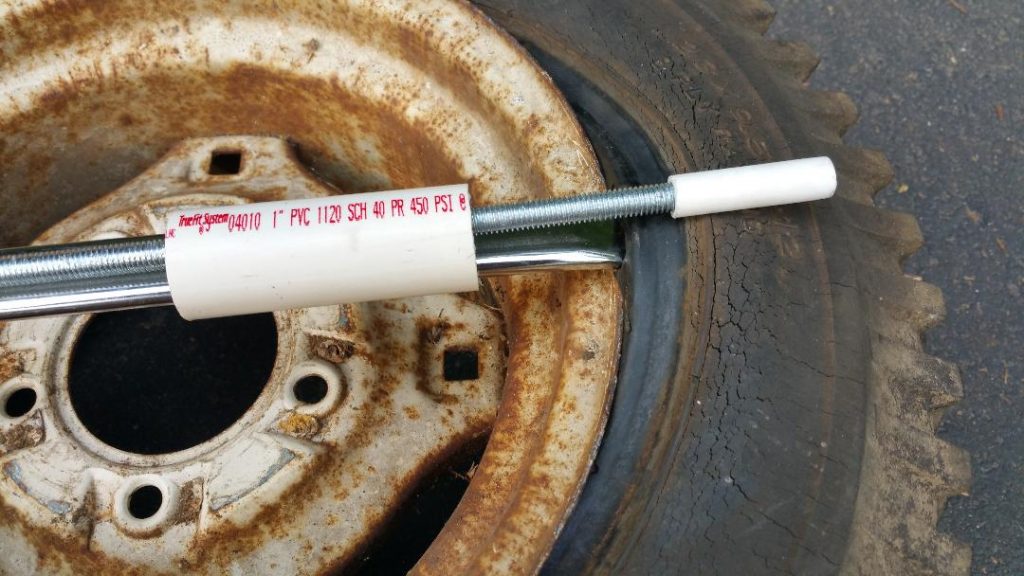
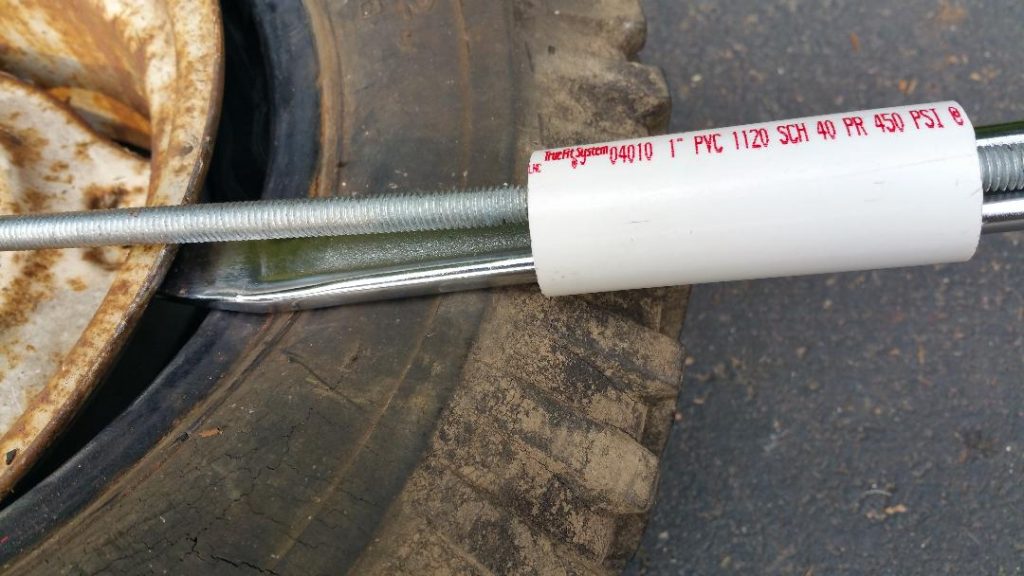
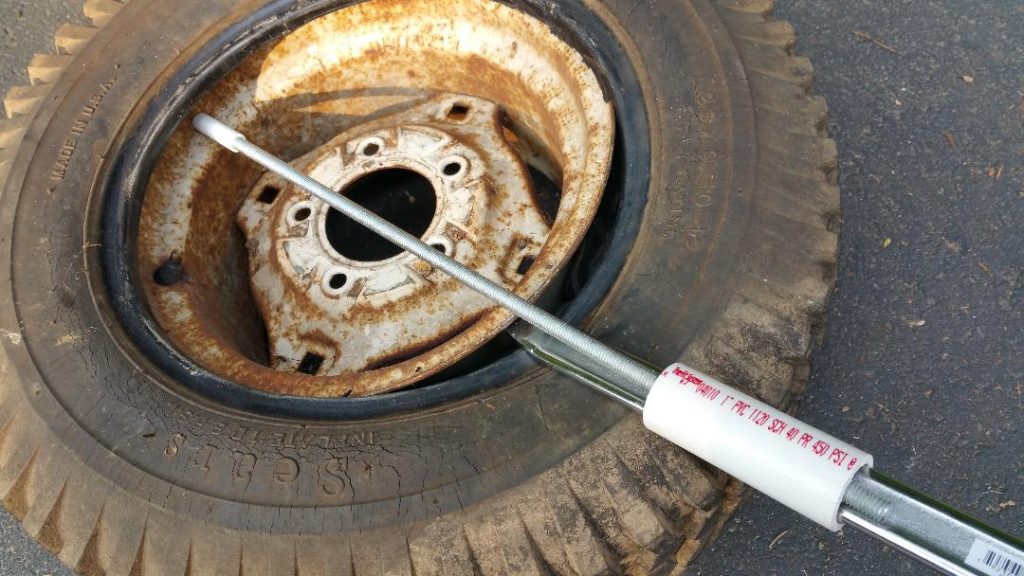
Here is how to hold a tire iron(s) in place using a 3-1/2″ piece of 1″ PVC pipe and a length of 3/8″ threaded rod. I also added a short piece of 3/8″ PEX pipe on one end of the threaded rod to protect painted and alloy surfaces.
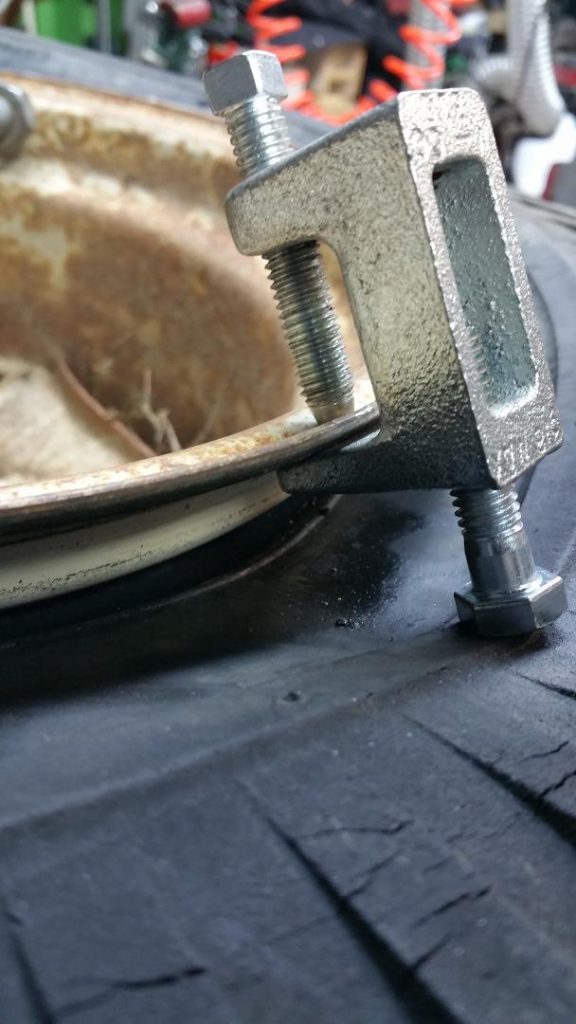
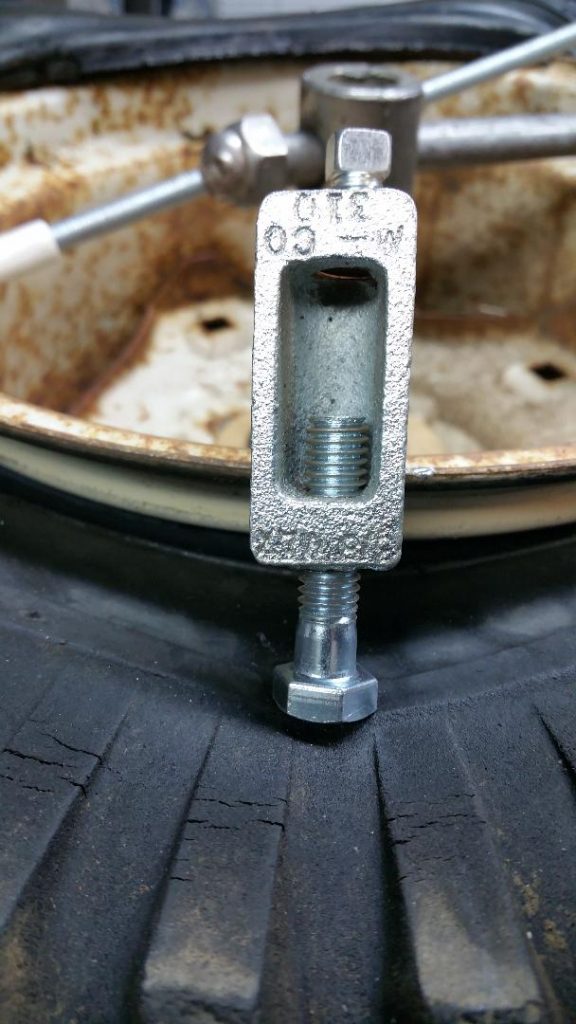
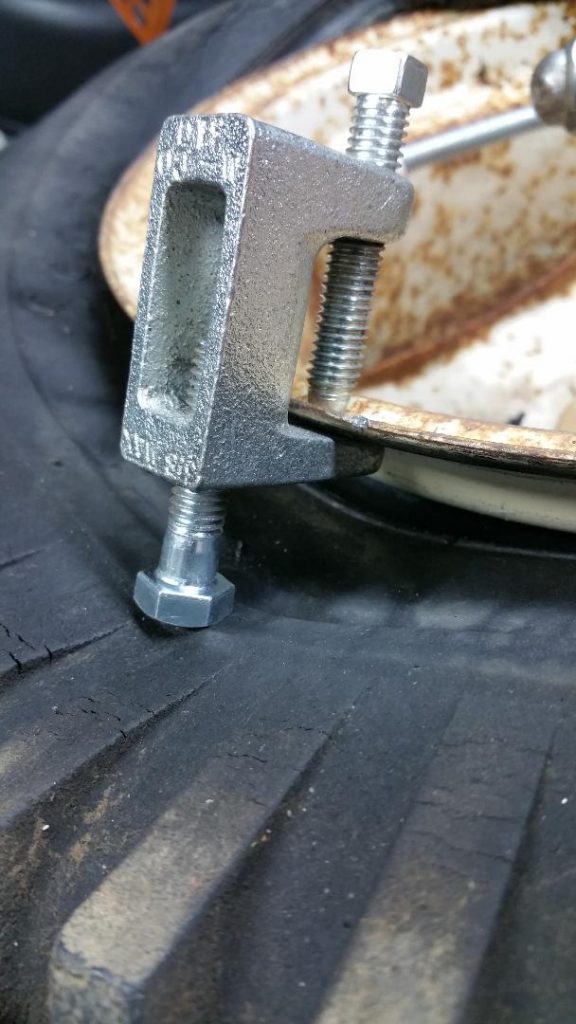
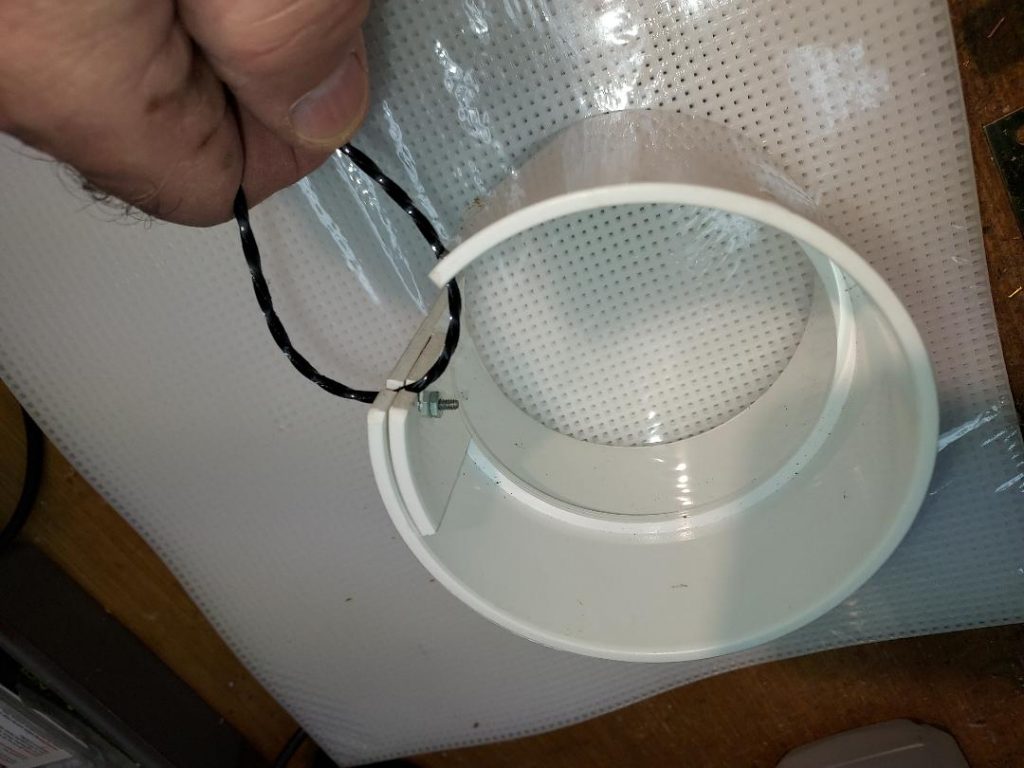
Small beam clamps are very useful to hold the tire bead far below the rim level by adding a second 3/8″ bolt to the beam clamp. More so than using locking pliers. Simply squeeze the tire sides together by hand and then extend the bolt to hold the tire bead in the valley of the rim. Use two or more opposing beam clamps to really squeeze the tire sides closer together.
When you have a difficult tire bead that refuses to seat and other mechanical seating methods fail, try my non-flammable solution.
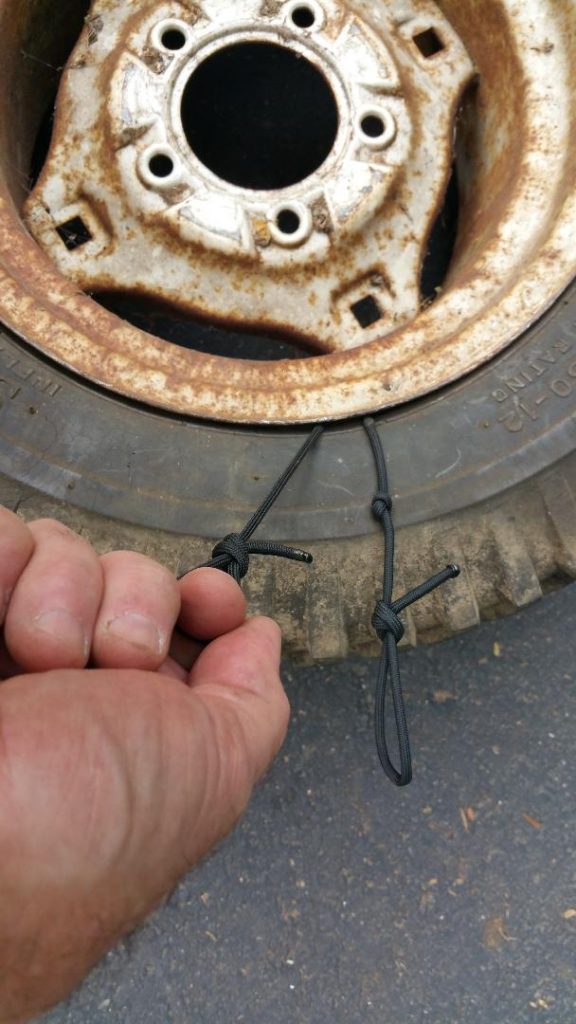
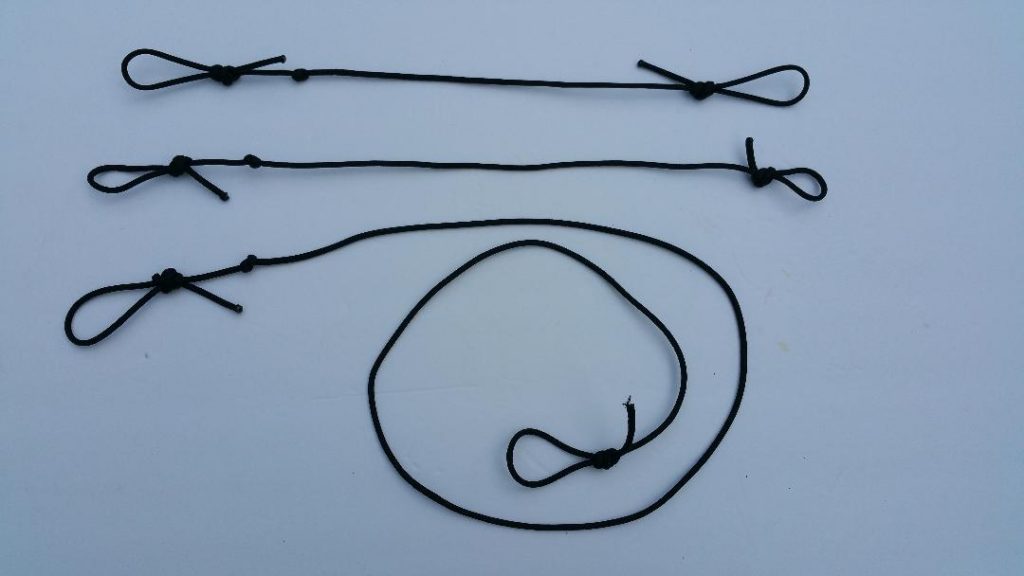
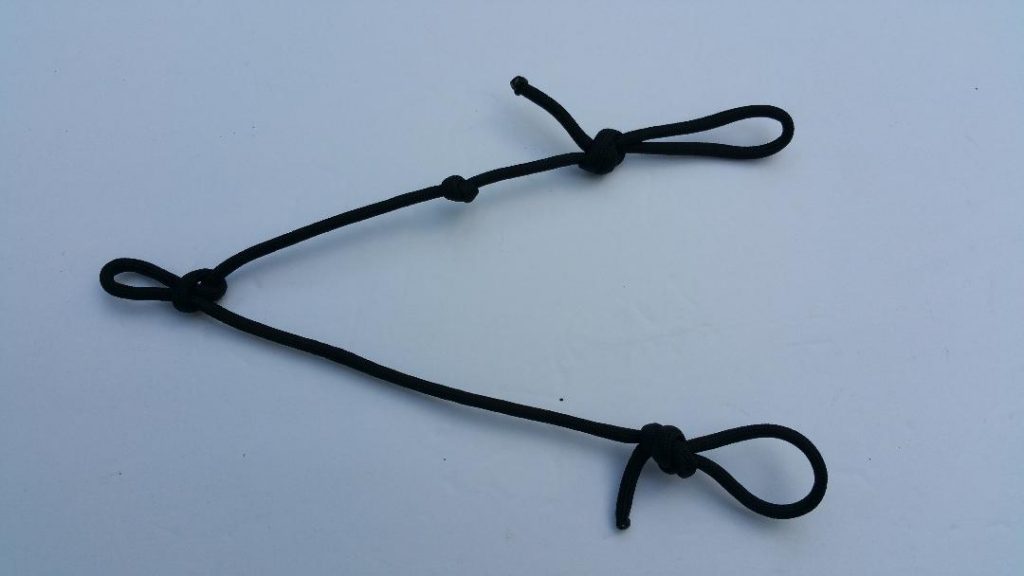
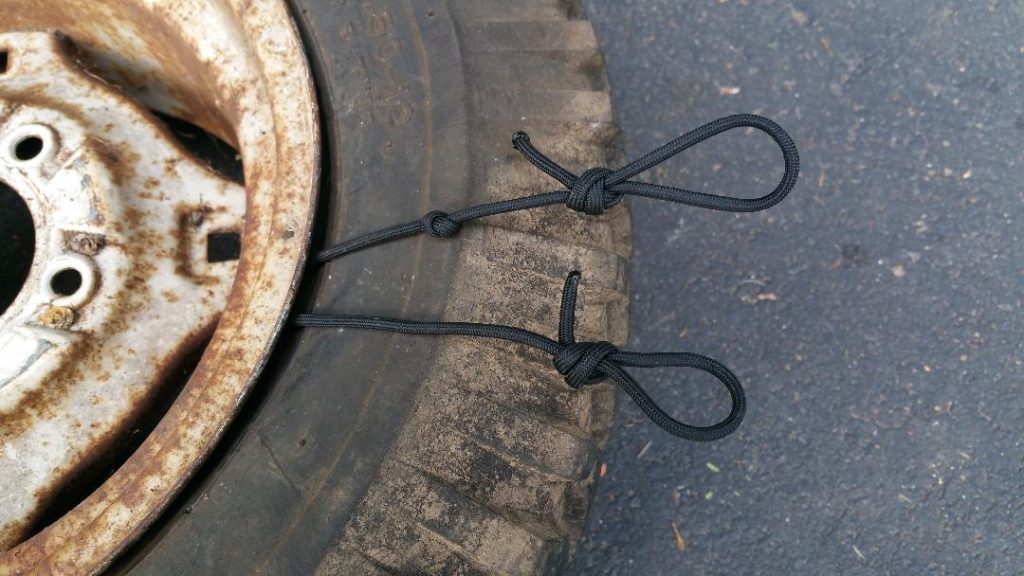
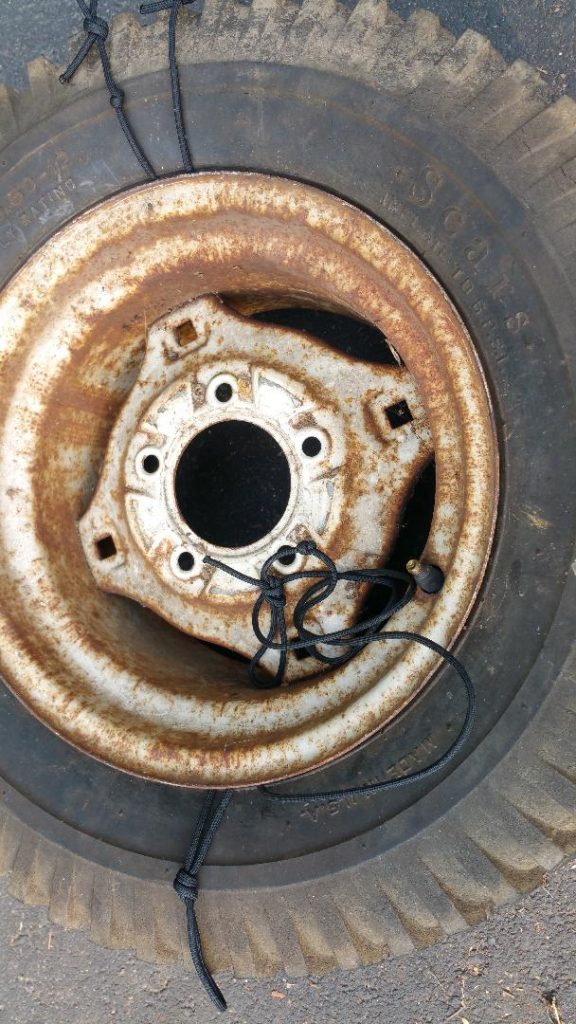
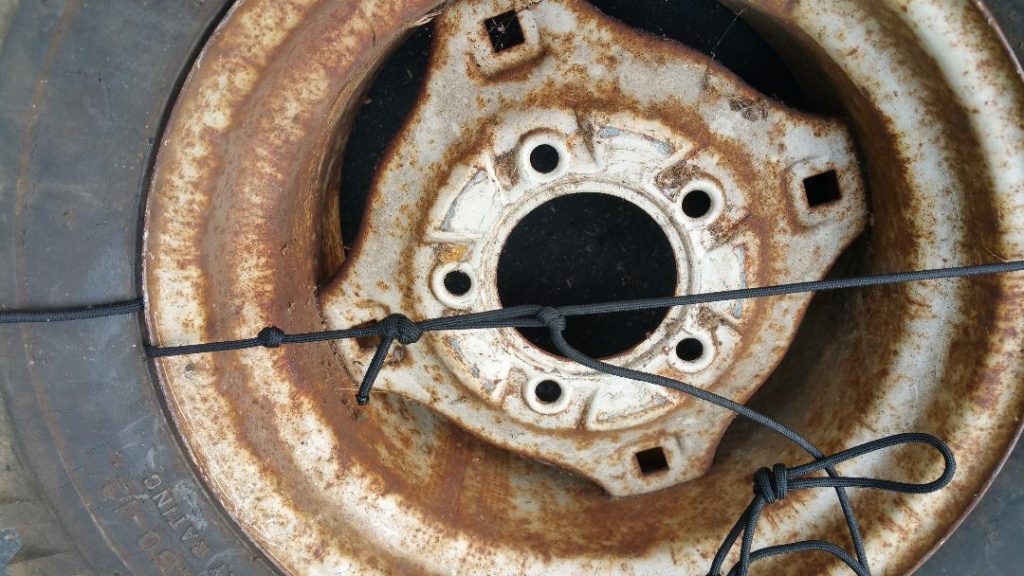
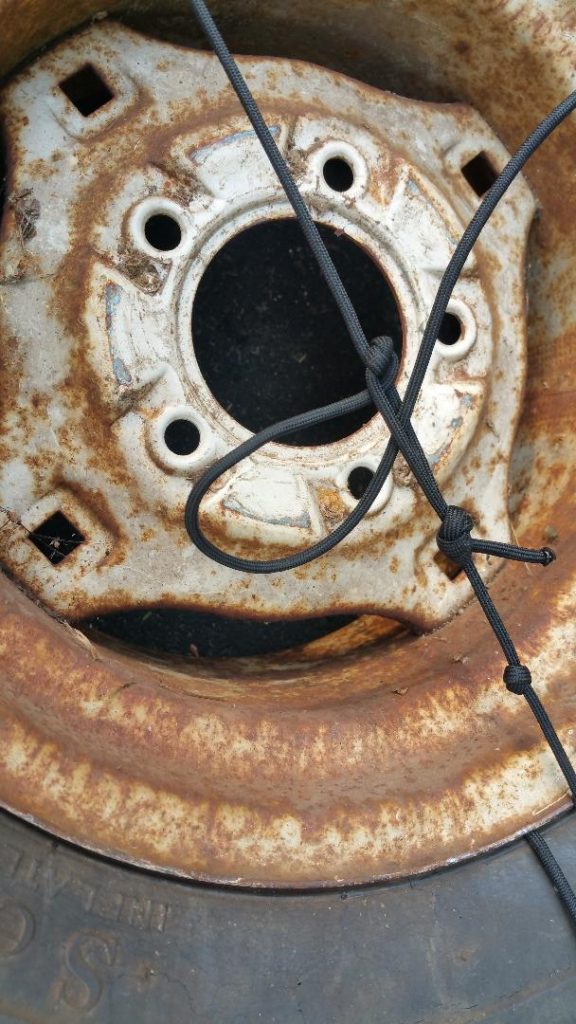
Use a slip knot to hold the inside of the tire bead tight against the inner rim so you can easily seat the bead with a lower volume of compressed air. This technique minimizes the air gap leakage around the circumference of the tire bead and rim. After the bead is seated, reduce the tire pressure and release and remove the slip knot by pulling against the slip side of the slip knot. Make a set using 3 foot and 6 foot lengths of paracord. The longer length is used to tie and securely hold it and a second shorter length in place. For example, use this on the bottom side of the wheel and tire while you work on securing the top side with a single length.
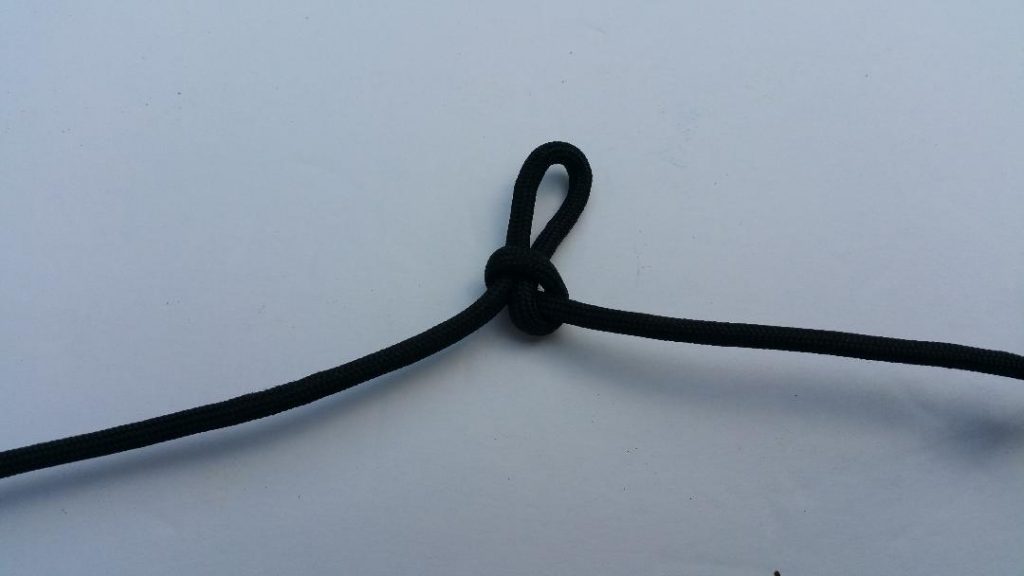
The slip knot tightens when pulled from one end of the paracord and releases when pulled from the opposite end. Tie a fixed loop at each end to pull the paracord from. Tie a single fixed knot by one loop to identify the loop end to pull to tighten the slip knot and pull up the tire bead with. Depending upon the severity of the air gap you are trying to minimize, one length of paracord alone may suffice.

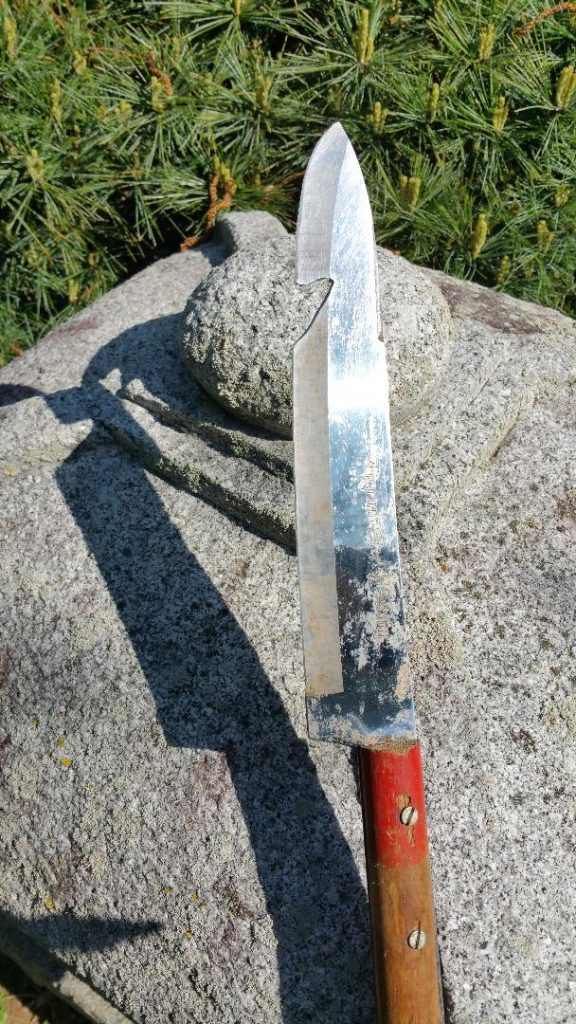
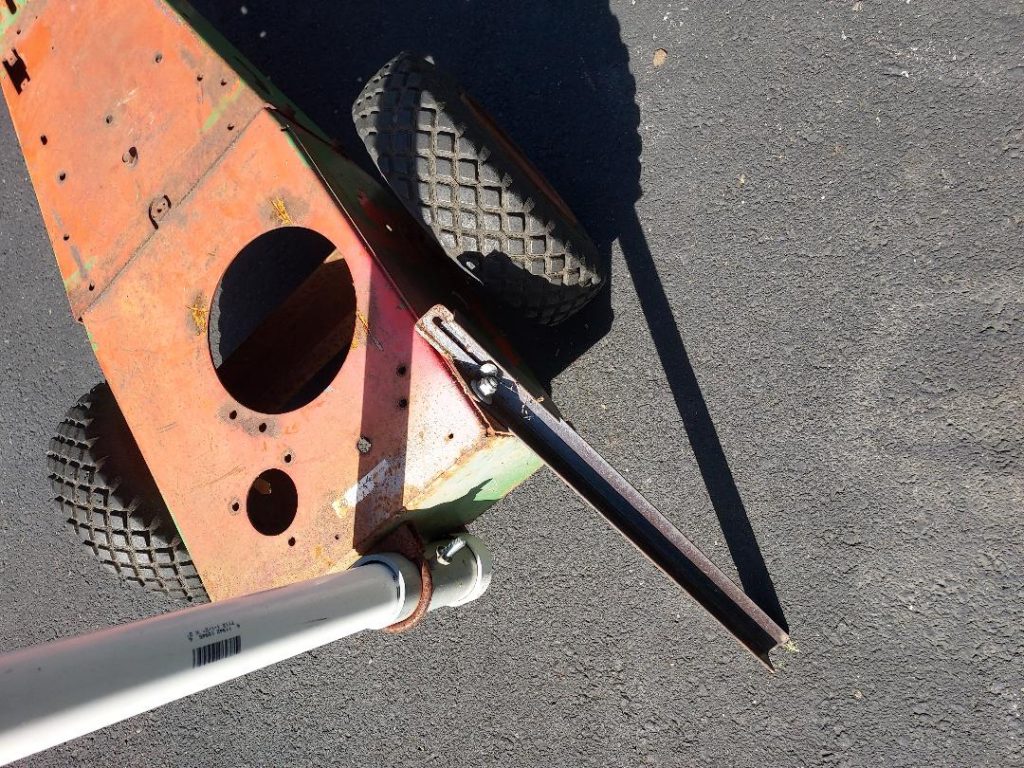
The Vine Lance
I made the Vine Lance so I didn’t have to bend or kneel down to cut vines at ground level using traditional pruning shears or branch loppers and to reach, sever and pull out vines growing deep within shrubbery and on trees.
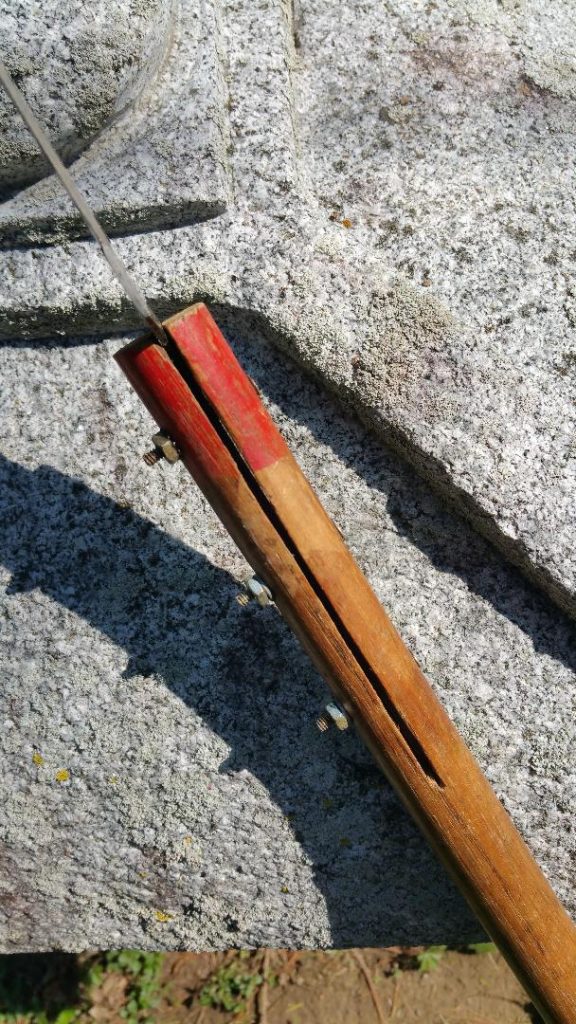
I attached an old kitchen knife to a wooden pole using the existing holes in the knife tang. I used a small grinder (Dremel tool) to cut a notch in the knife’s blade near the tip. The Vine Lance is lightweight (15 oz.) and very effective at cutting and chopping vines and light brush at ground level or up to 10 feet or more above ground. The thin blade easily slides between the vine and the tree branch or trunk that it is attached to.

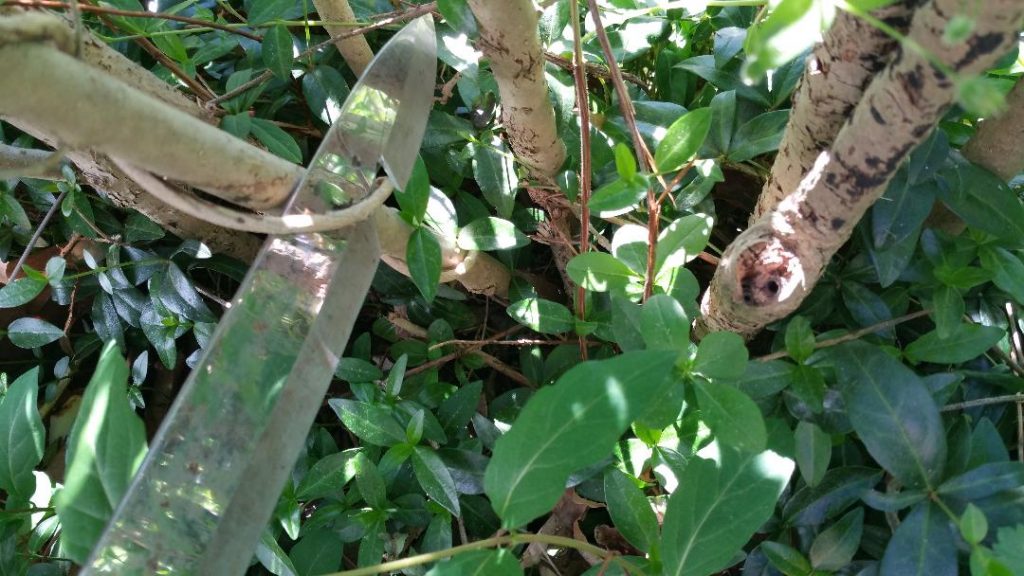
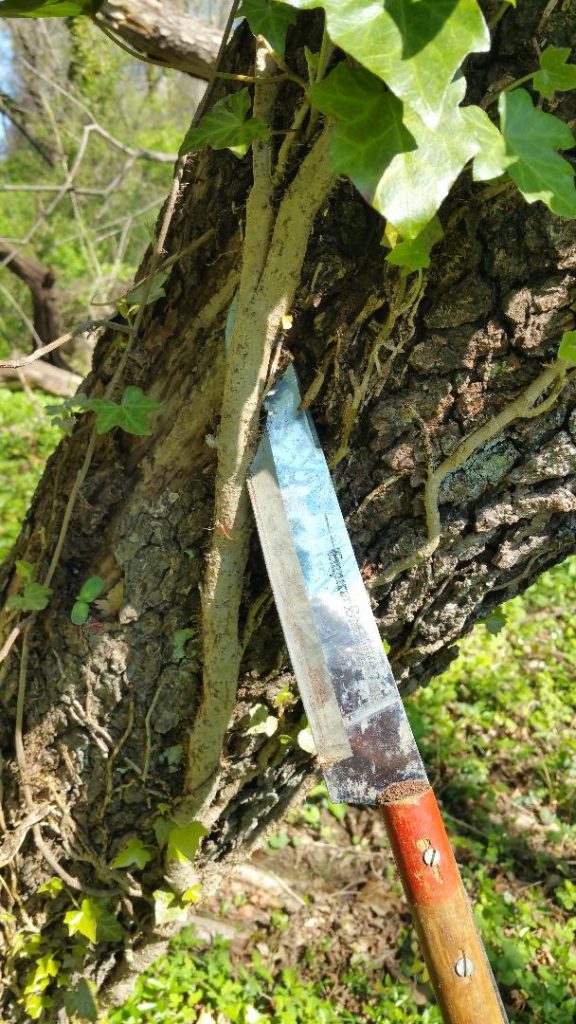
Hooking English Ivy vine to separate it from the tree trunk bark. 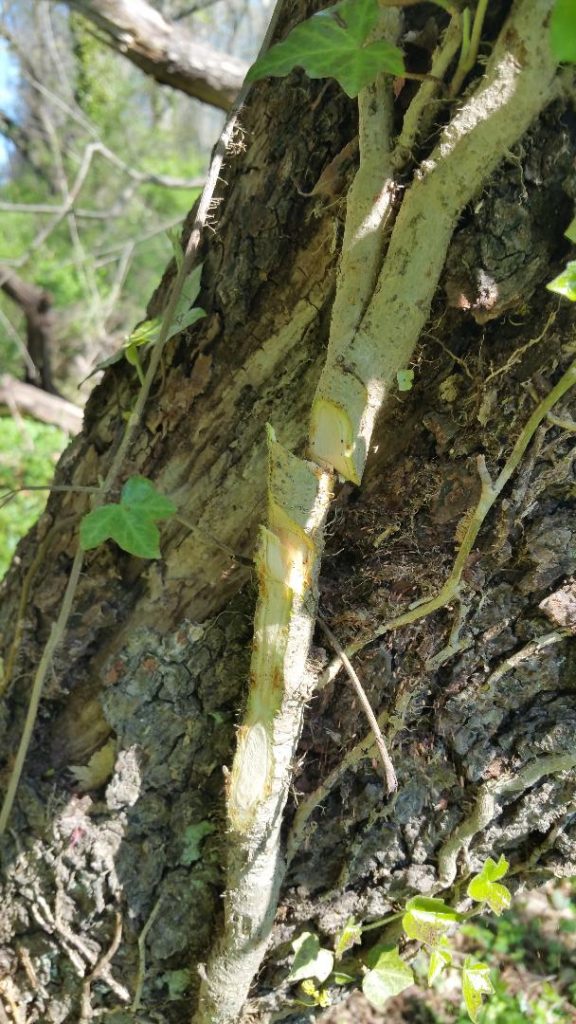
Chopping English Ivy vine with the knife blade after it has been pulled away from the tree trunk.

Hooking and cutting Japanese Honey Suckle that is wrapped around tree branches.
Spare Trimmer Line Holder
Your almost done trimming the lawn and you run out of trimmer line! At this point you’re tired, hot and really don’t want to walk back to the garage to refill the trimmer spool. Yes, it has happened to me all too often so this is what I’ve come up with to save some time:
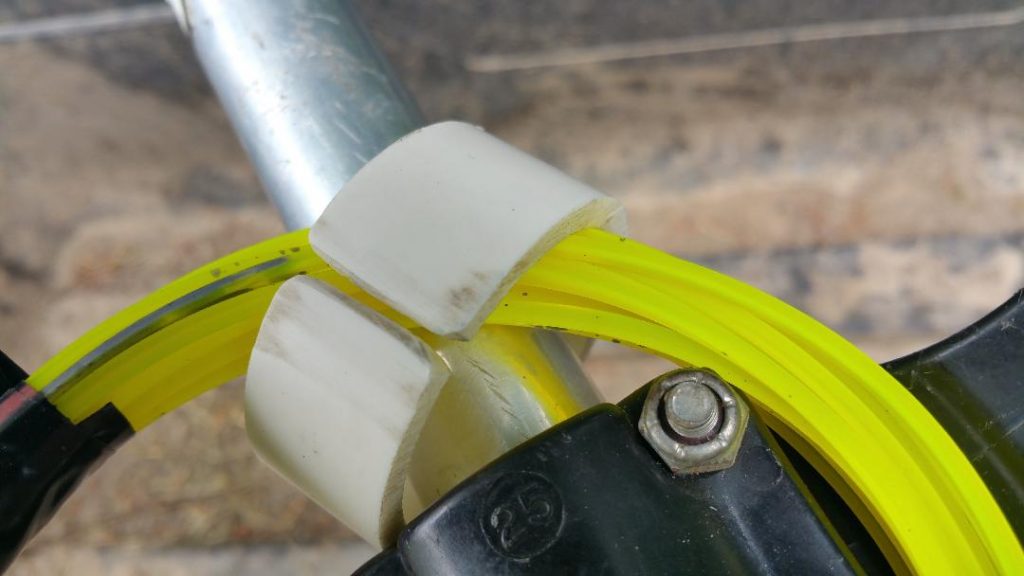
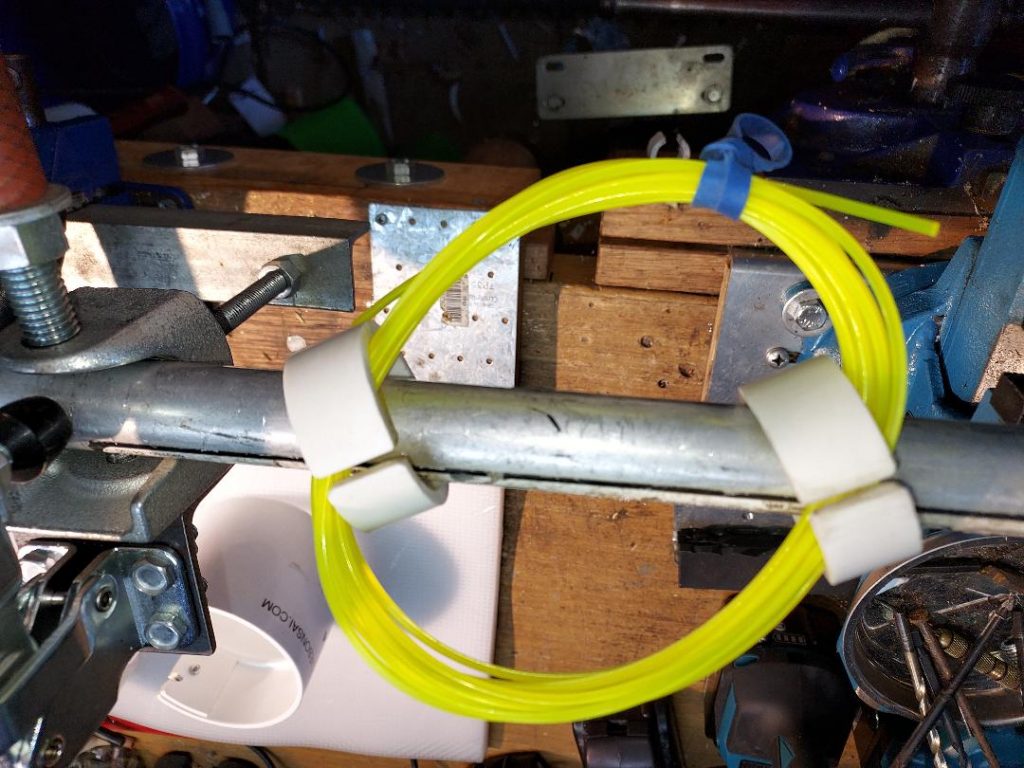
I attach a spare roll of pre-cut trimmer line to my trimmers using two 1-1/2″ PVC pipe clips.
Cut 3/4″ pieces of the PVC pipe and then cut an open slit on one side. Sand or file the sharp corners in the slit. The clips are weatherproof and never get lost.
Attach the clips on the shaft above and below the handle, or, on each side of the handle if you prefer. Open each clip slightly and squeeze the trimmer line roll into the clip. To remove the trimmer line roll just pull it out of each clip through the slit.
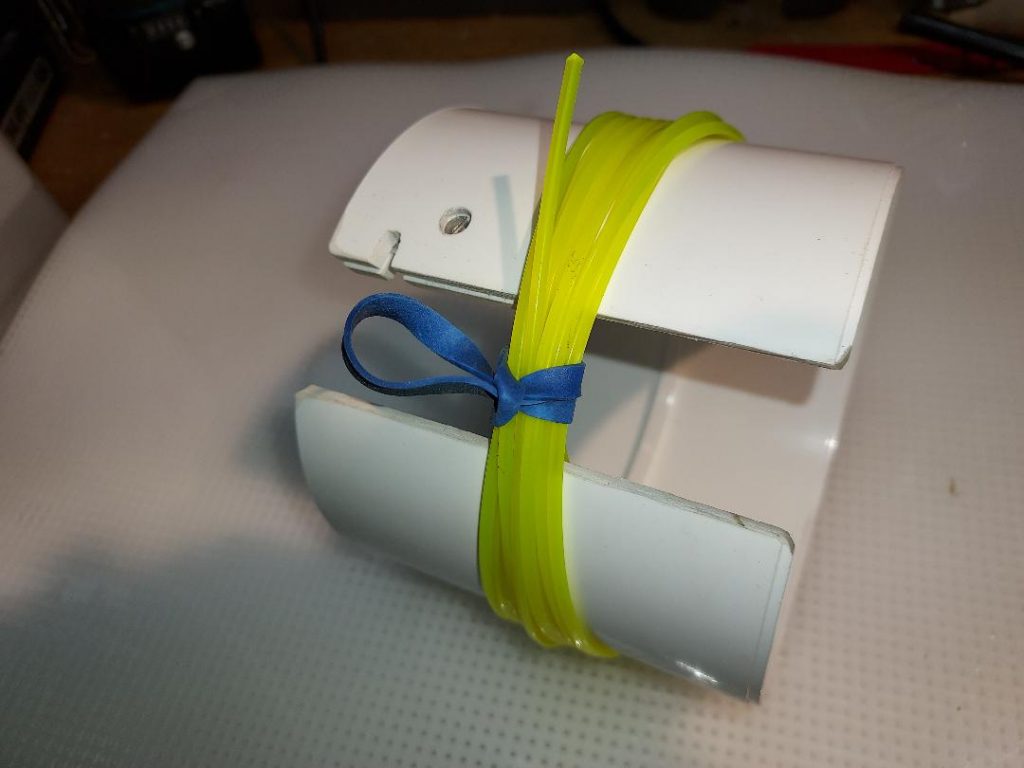
Wrap a 15 to 20 foot length of trimmer line in a 6 inch roll and tape it tightly with electrical or painters tape. Fold over one end of the tape to make it easier to remove. While you are making the roll you can mark the middle of the string with an indelible marker or bend the middle point to kink the line. This saves you from having to find the middle during re-spooling. In addition, the clips have the capacity to hold two spare rolls of .095″ trimmer line should you be in the professional lawn care business.
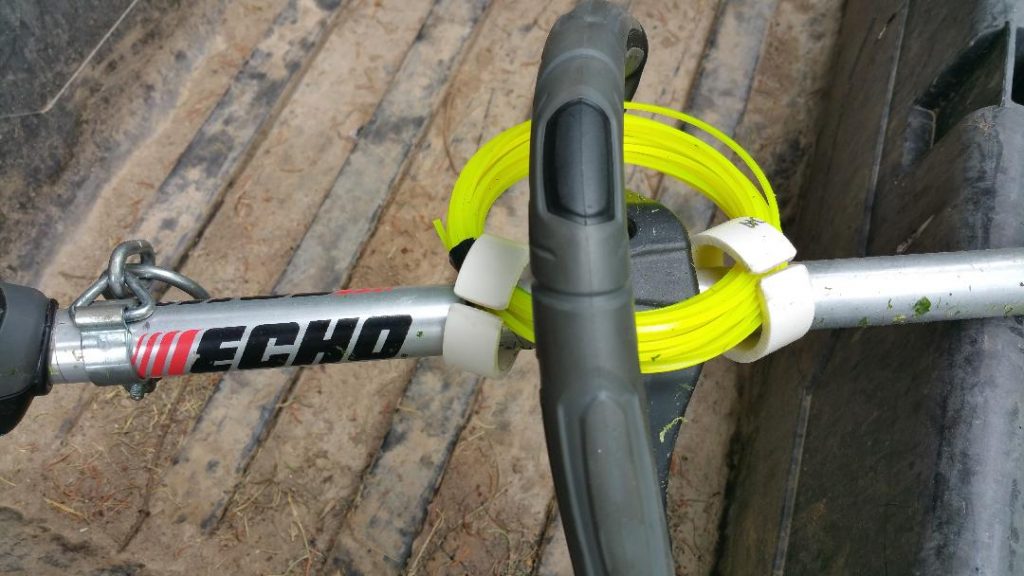
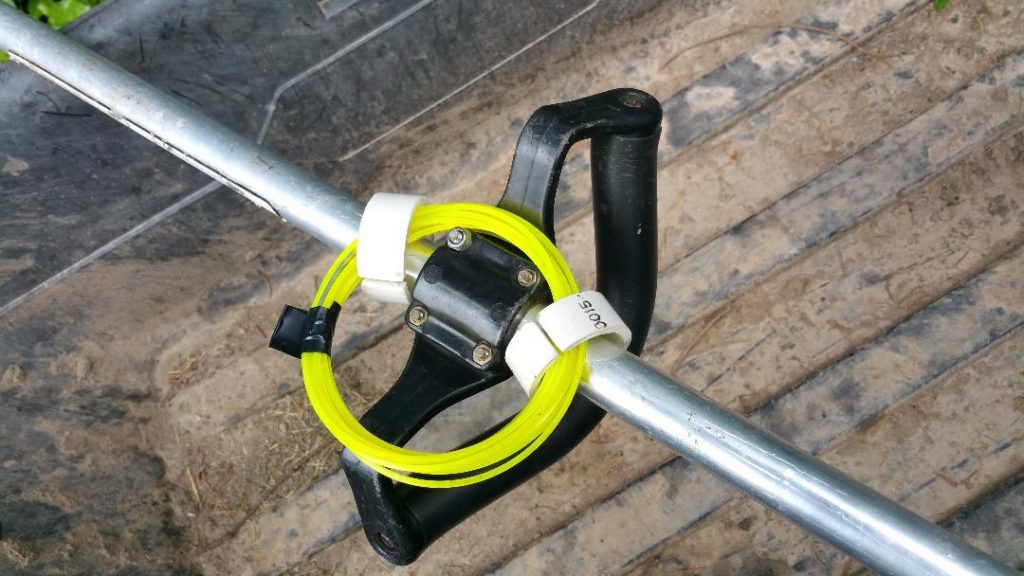
You can store the trimmer line roll inside the handle or below it. Or, use one clip above the handle on the shaft to suspend the roll. Use what works best for you!
Trimmer Line Winder
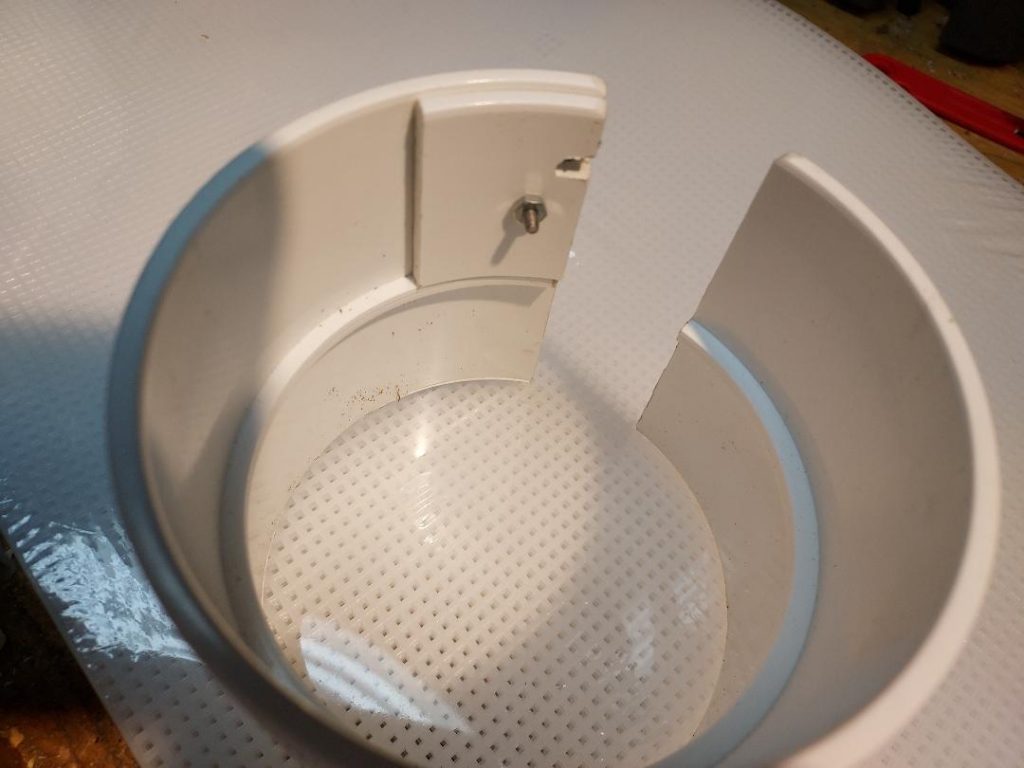
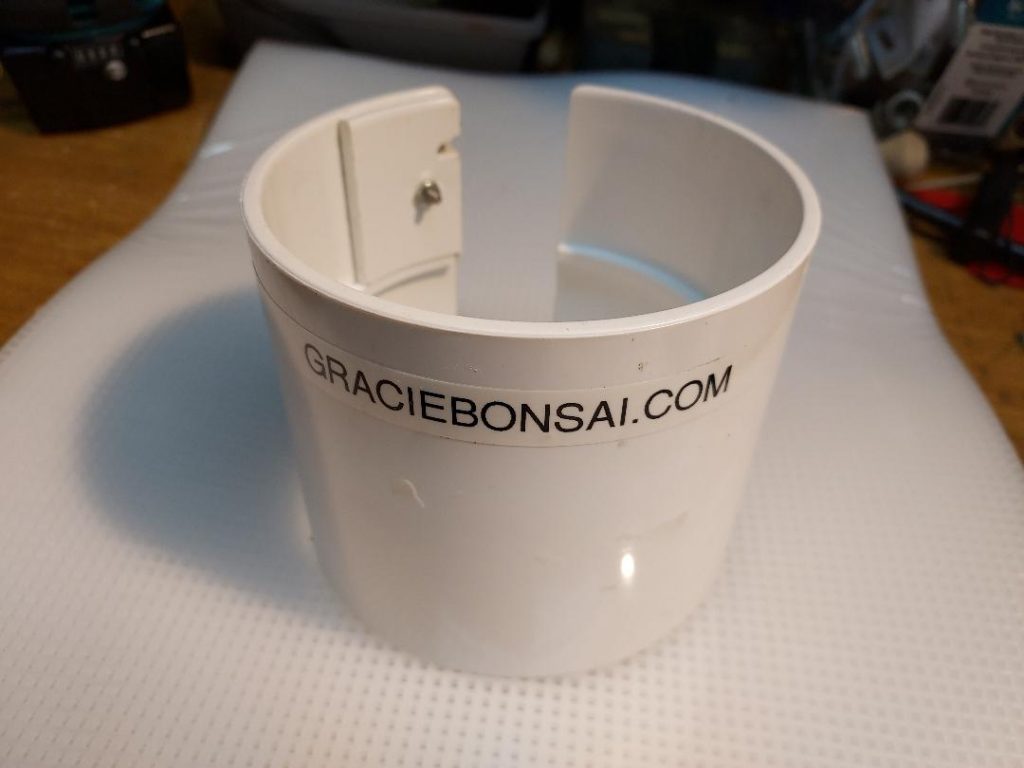
To make up consistently sized trimmer line rolls I used a 4 inch PVC coupler* with a wide slot cut out so the coupler can be squeezed to easily release the roll of 20′ trimmer line and to tape or wrap the roll with a rubber band to keep it from unwrapping. I also incorporated a trimmer line cutter using a left over piece of the cut out section to hold a single edge razor blade. Remove the metal spline from the blade and then sandwich it between the pieces with a small nut and bolt.
* This a thinner version of a standard schedule 40 PVC coupler. You will find them in the storm drain pipe section, not the plumbing section of the store.
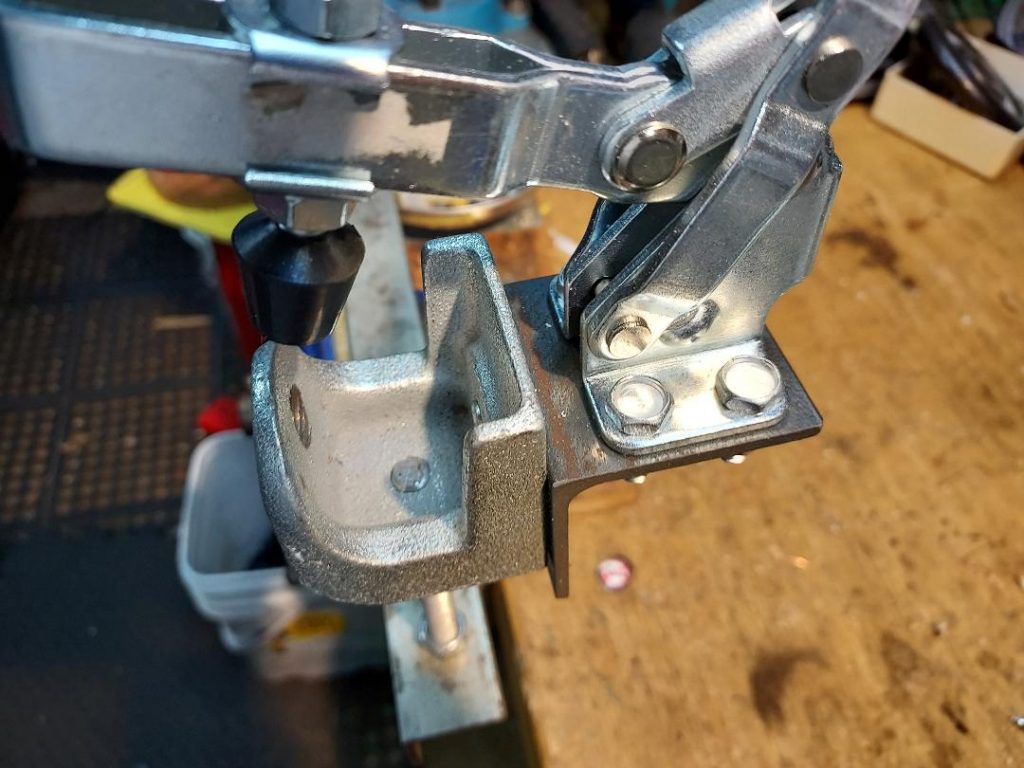
Trimmer Service Mount
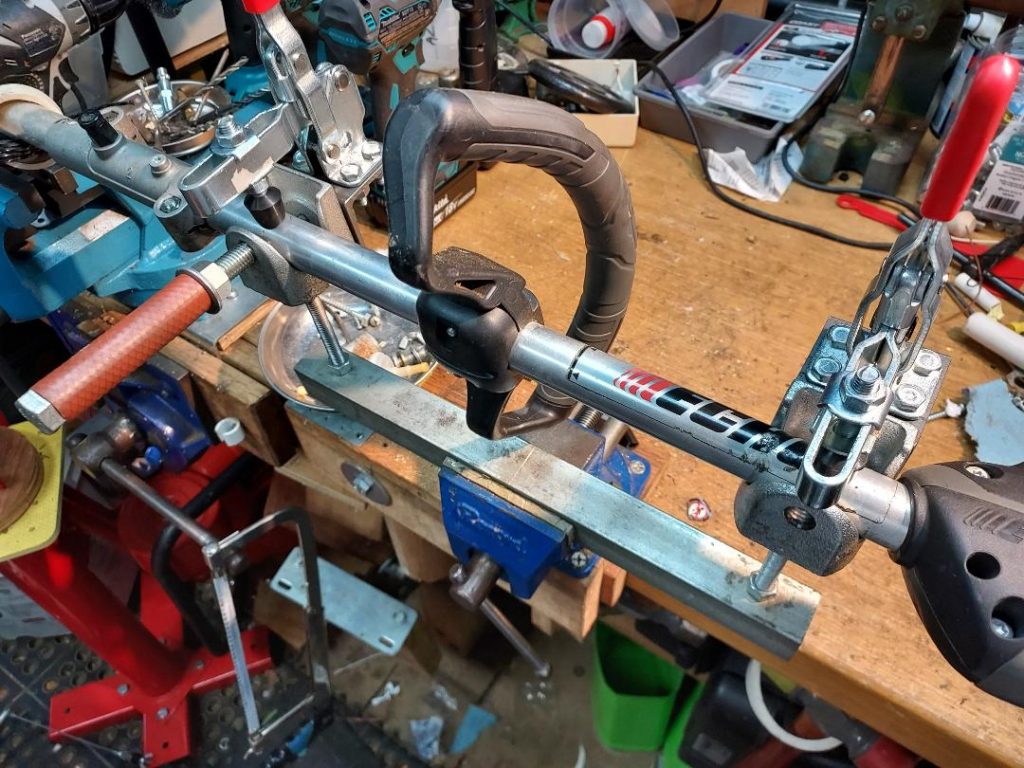
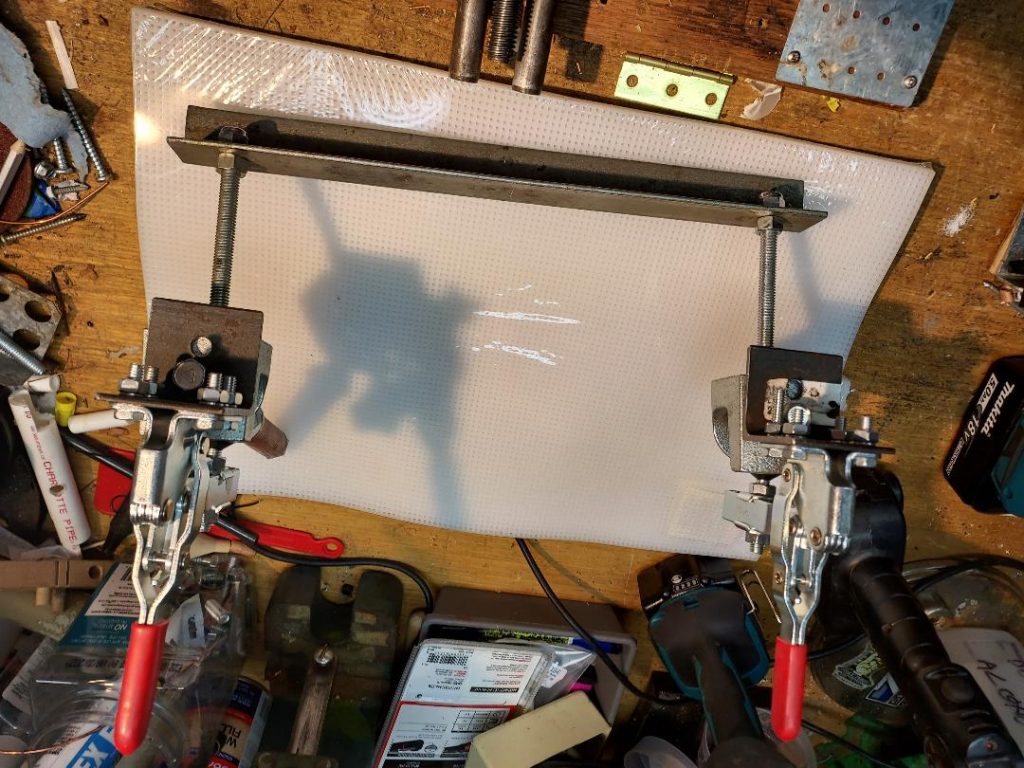
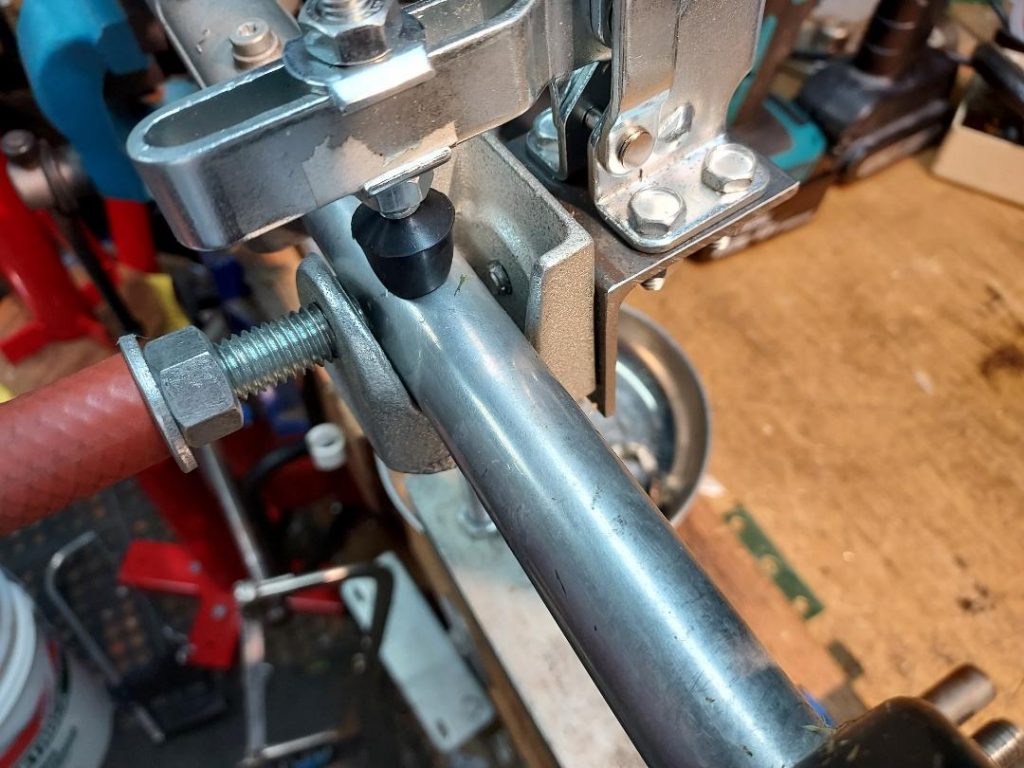
I made this temporary mount to securely hold string trimmers horizontally on my work bench for service work. The hold down clamps were sourced from Harbor Freight. I’m using two beam clamps as the support saddles. Just hold the fixture in place with your bench vise.
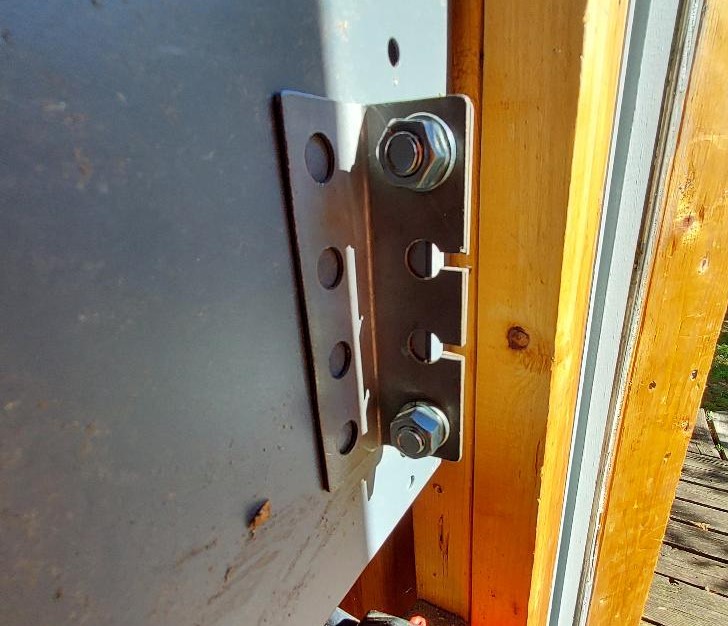
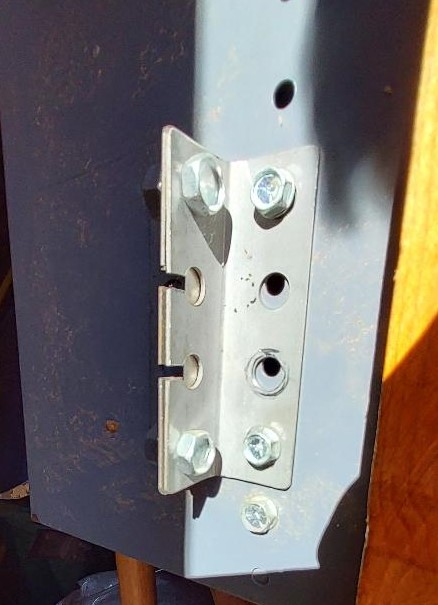
Trimmer Line Cutter
Make a heavy duty stationary trimmer line cutter using a few nuts and bolt, perforated metal angle stock and a singled edged razor blade. Cut two slots into the existing center holes so the razor blade cutting edge is exposed within the two holes. Note how the razor blade is positioned and securely sandwiched between the metal angle. Squeeze the trimmer line in a tight U shape and press it against the blade to cut it. Mount one in your garage, shed or lawn equipment trailer and you will always have a means to cut string trimmer line without looking for a knife, side cutters or small trimmer cutting tool.
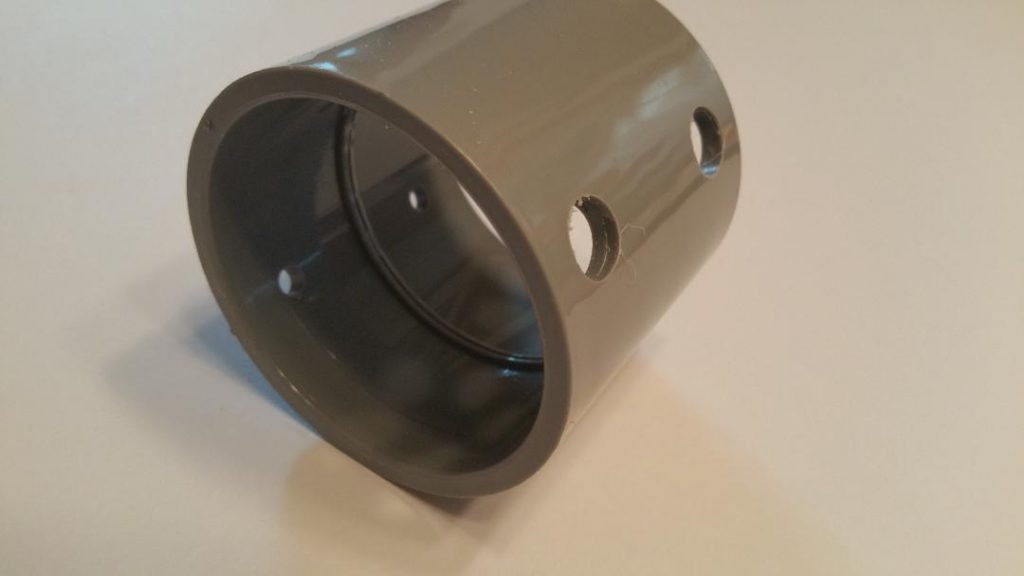
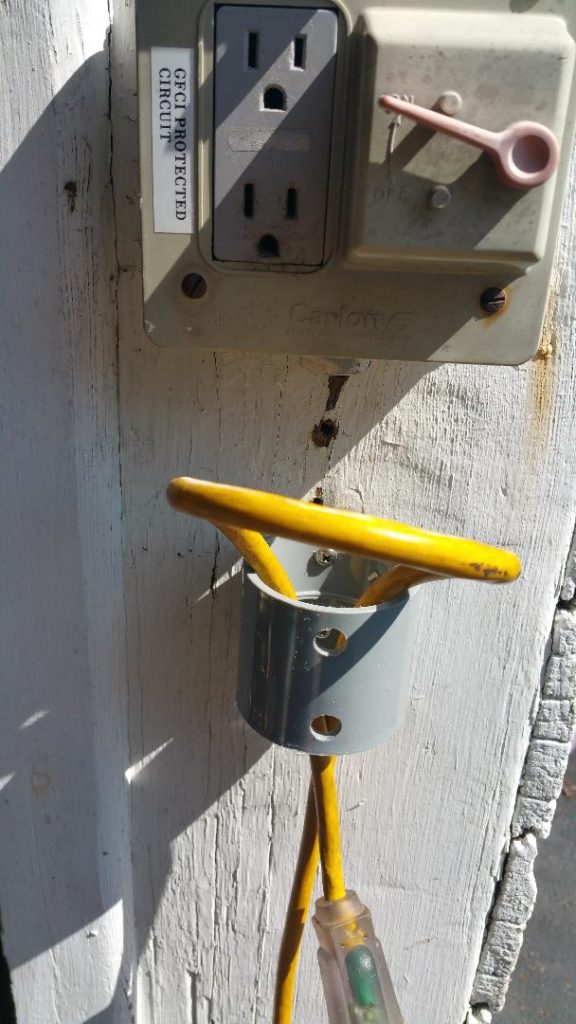
Extension Cord Strain Relief/ Holder
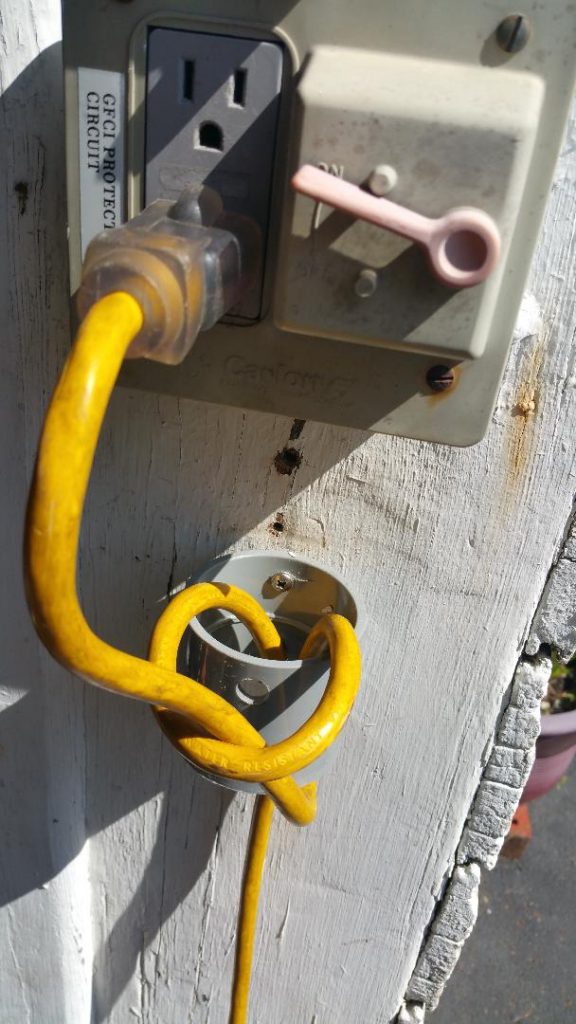
It is very frustrating when you pull too hard on the extension cord while you are working and it becomes unplugged, or worse, damaged. So this is how I solved the problem using a weatherproof 2″ PVC electrical conduit coupler. Drill two 7/16″ holes and two smaller, opposing holes for the mounting screws and mount it about 3-1/2″ below or beside your outdoor outlet boxes.
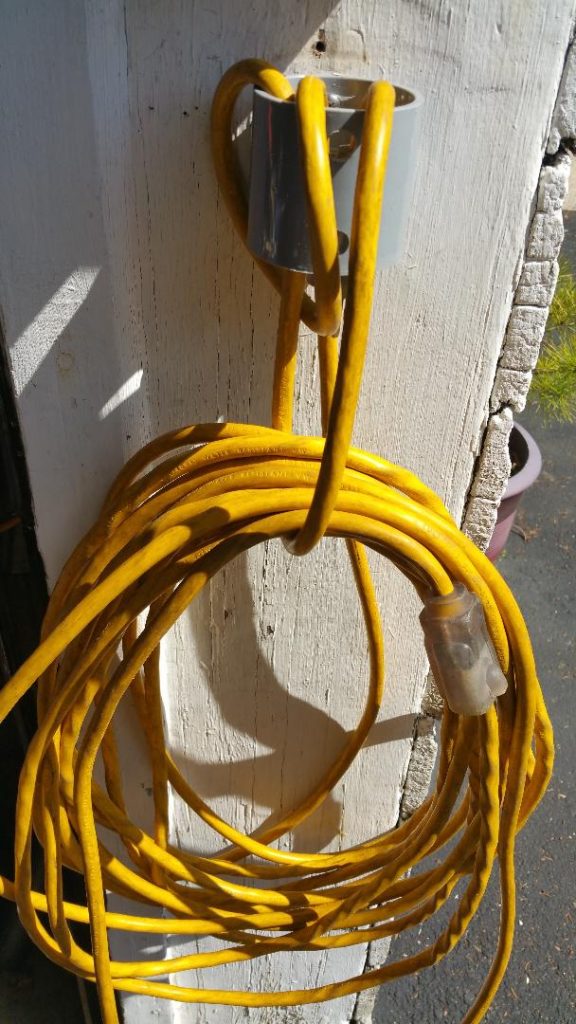
You can also hold a coiled extension cord with the plug end of the cord. Run the plug end through the coil and place the plug into the top of the PVC coupler.
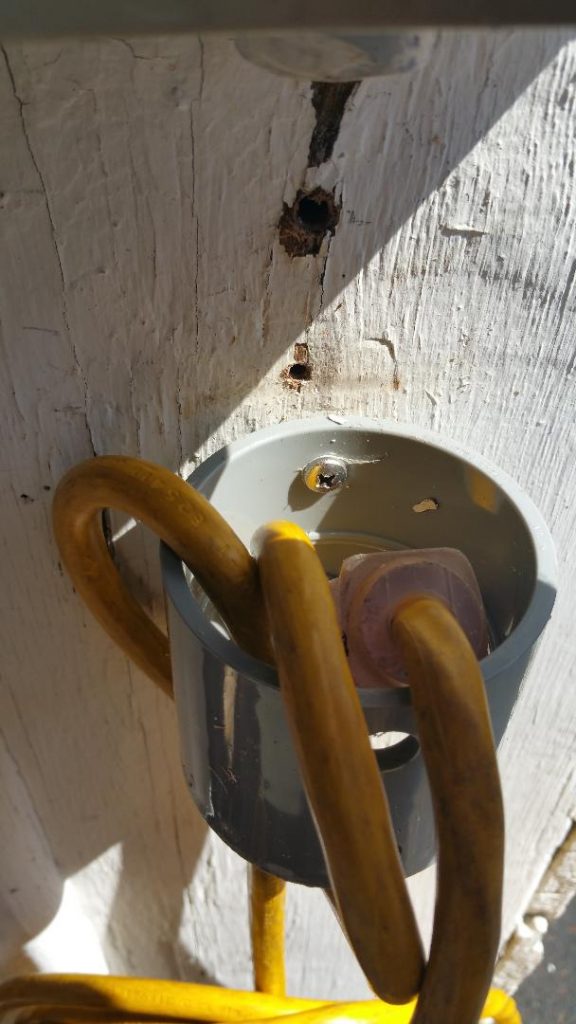
The PVC coupler is also useful to hold a shop rag/towel, to temporarily hang an air hose or battery charger terminal clips from.
Long Reach Deck Scraper Tool
Use a 2 foot piece of 1-1/4″ PVC pipe and a round cap to make a powerful non-scratching deck scraper. Cut a 45 degree angle to make the scraper end. The angled, cylindrical scraper end lets you easily clean inside corners and crevices. Hold the angled end flat against the deck surfaces and scrape from side to side to remove bulk clippings.
Drill a hole in it to store it on a wall or keep it with your mower or trailer so you always have it in the field to safely clear a clogged deck chute and remove clippings. To keep it sharp file, sand or re-cut the angled as needed.
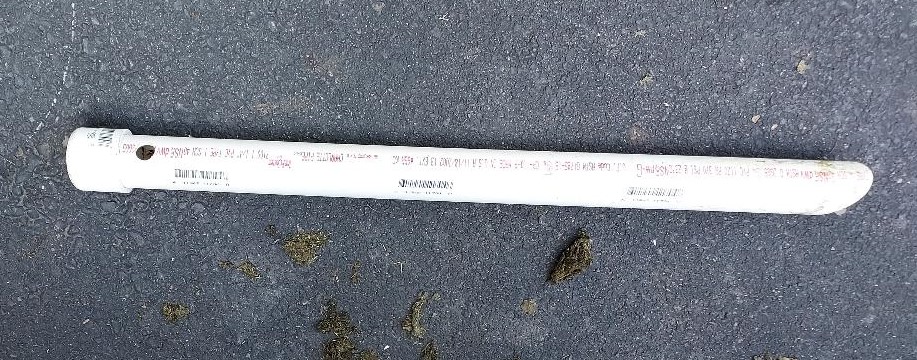
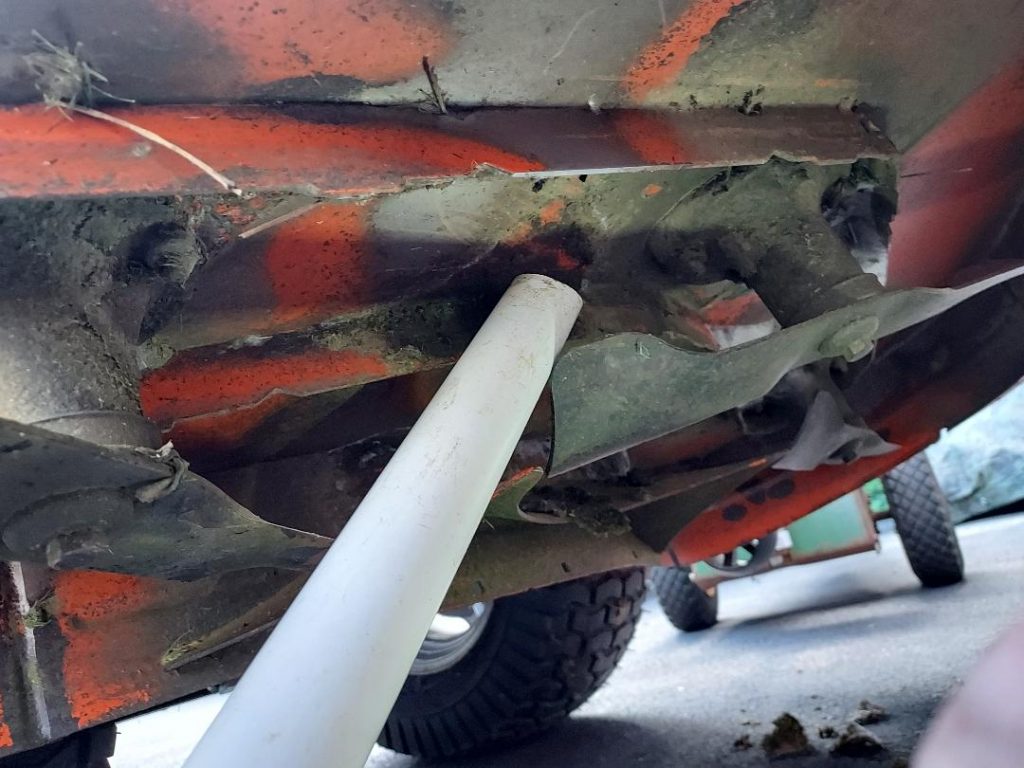
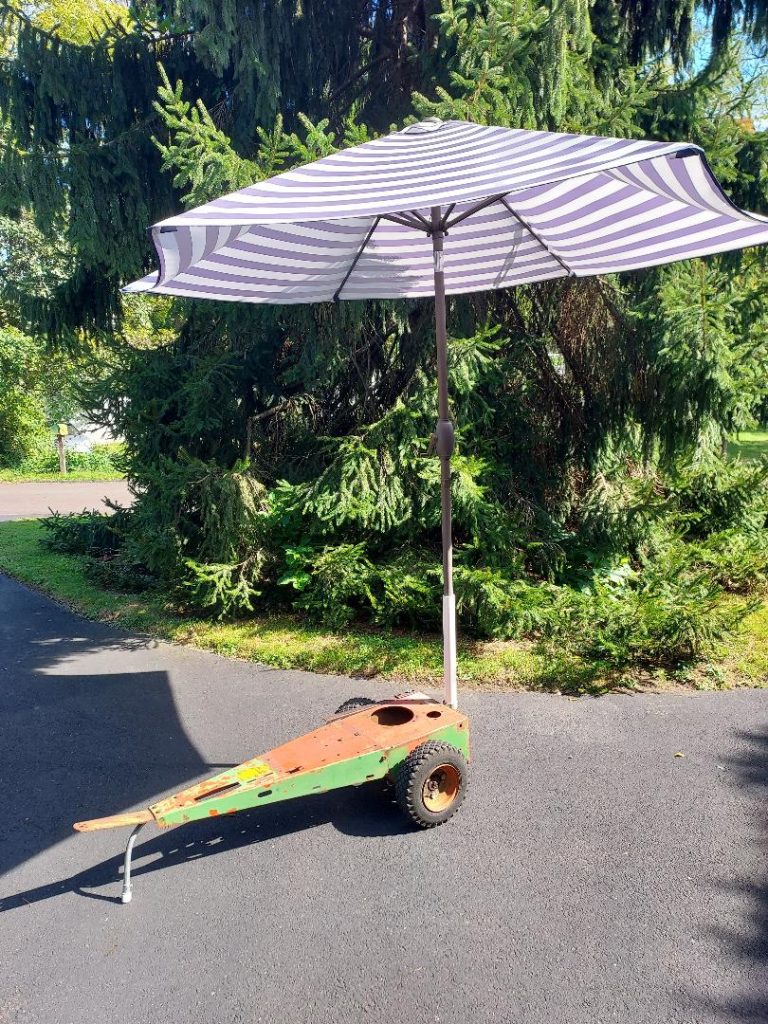
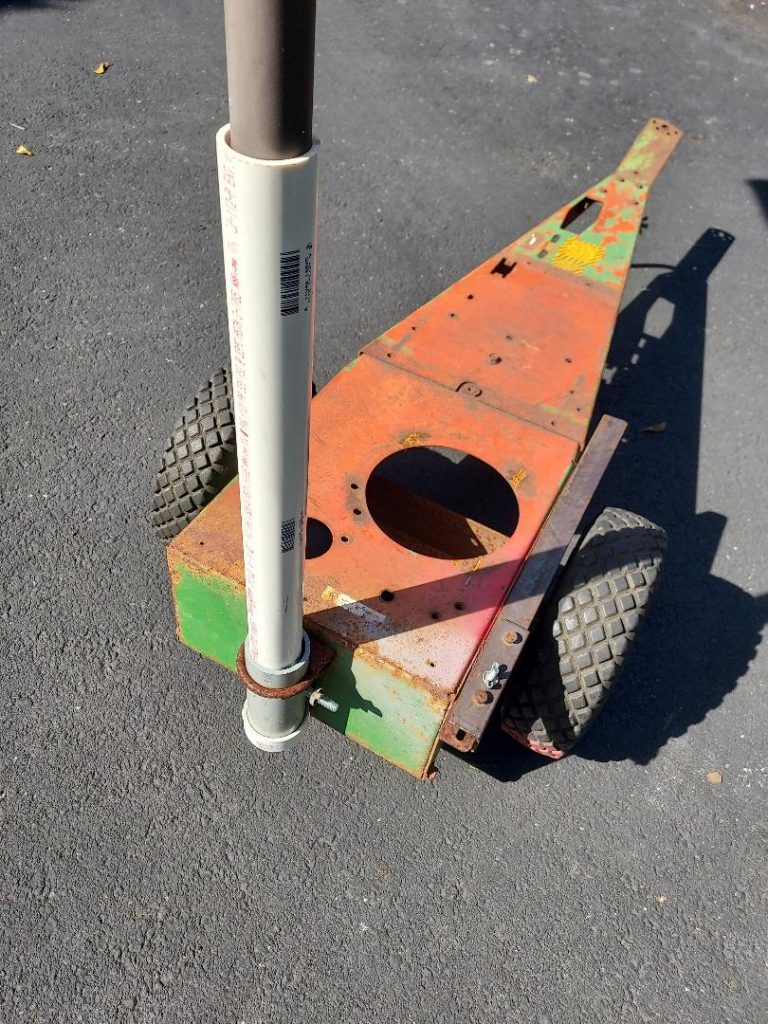
Portable Shade
No more sweltering in the blazing sun for me while servicing the cars, mowers or cooking on the barbie. I made this using the frame of an old Ariens riding lawn mower, some scrap PVC pipe, angle iron, electrical conduit and a muffler clamp. It it really nice to have shade anywhere and a place to rest your hand tools, chainsaw, etc. above ground level.
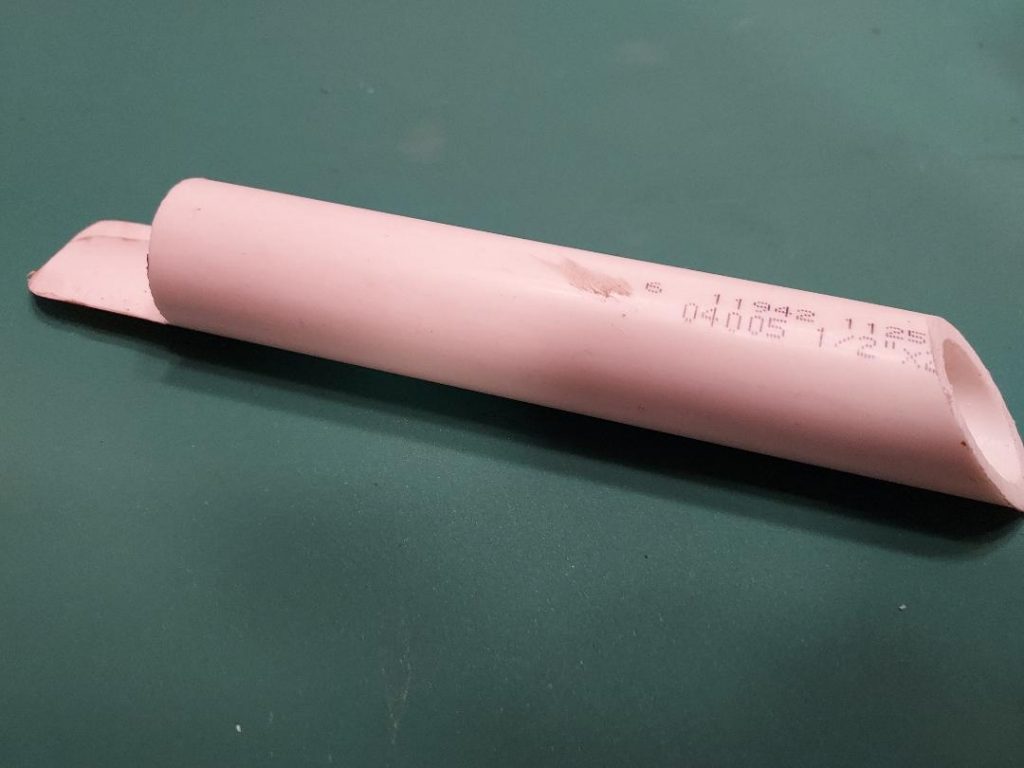
Cleaning Tool Ideas for Small Engines
Make a strong, hard plastic scraping tool to help safely remove crud from carburetor bowls, exhaust ports, carbon buildup in heads and gasket removal. Custom make them to conform to your particular needs. I cut the 1/2″ PVC pipe using a band saw but a handsaw or small grinder with a cutting wheel will work.
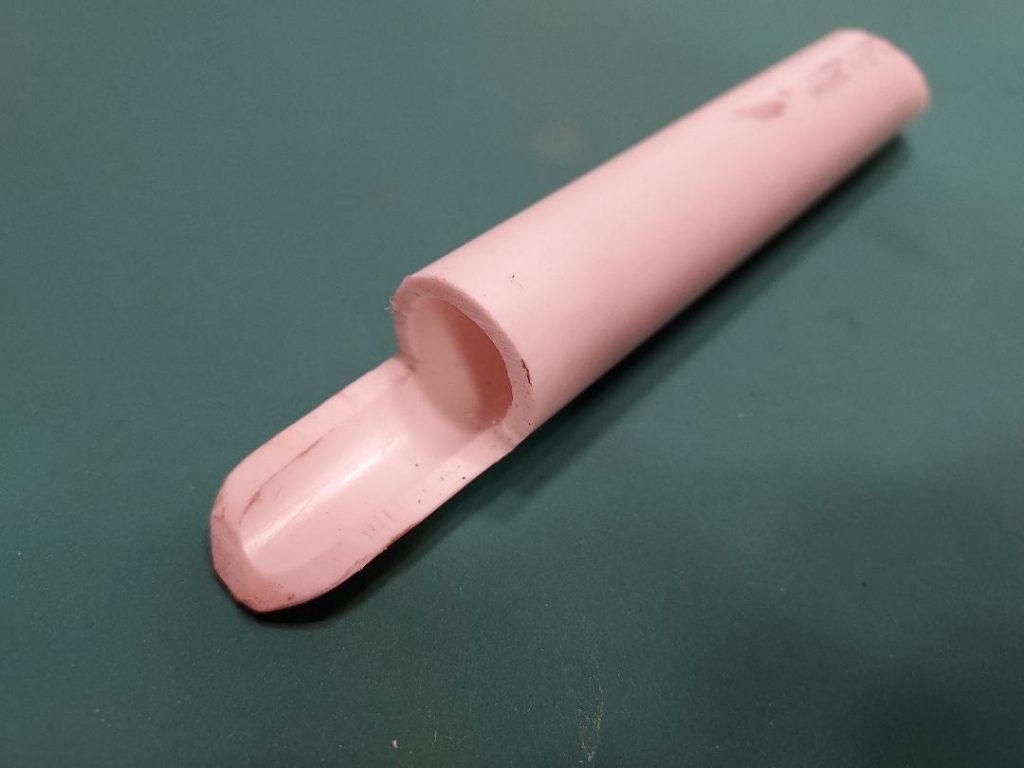
Scraping the side wall of the bowl with the parallel edge of the tool.
Use different size and shaped string trimmer line to probe or clean hoses, tubes and passages. Put one end on a drill to spin the line within the opening for a good cleaning. Cut a blunt or pointed end on the line for the cleaning application. Use care so you don’t damage screens, seats or check valves.
To clean concave surfaces or wide openings use a looped piece of twisted string trimmer line in a drill. I’m using a 9 inch piece of 0.095″ Echo Black Diamond string trimmer line in this example. It behaves like a cylinder honing tool and conforms to the shape of the inside surface when it is spinning.
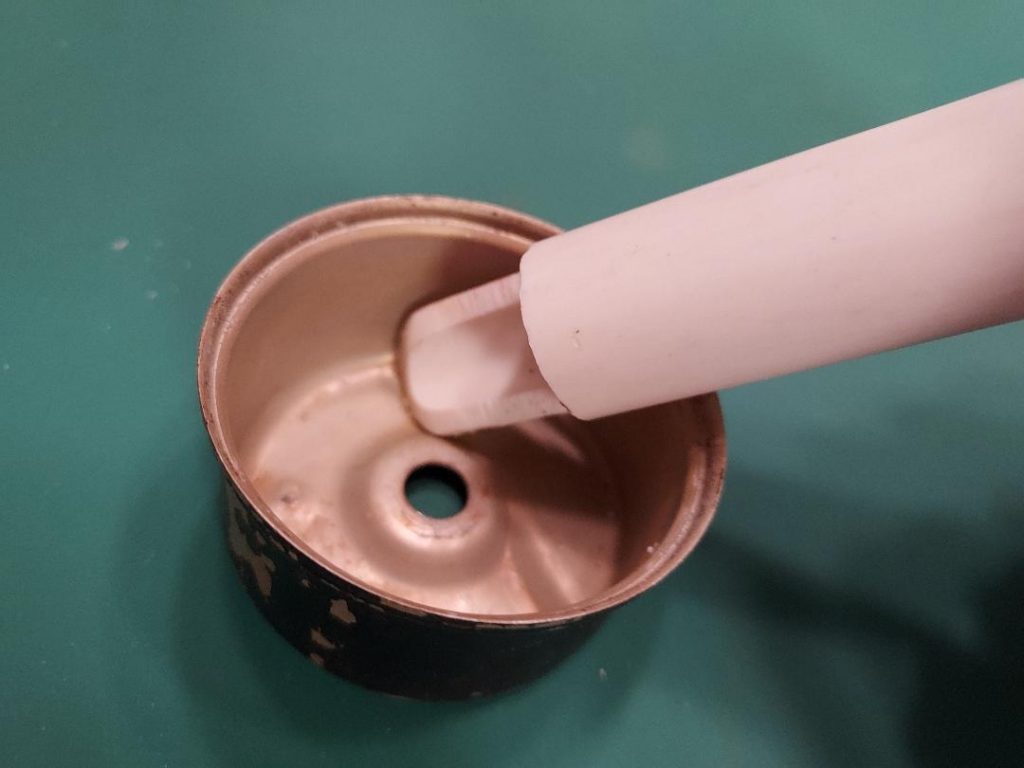
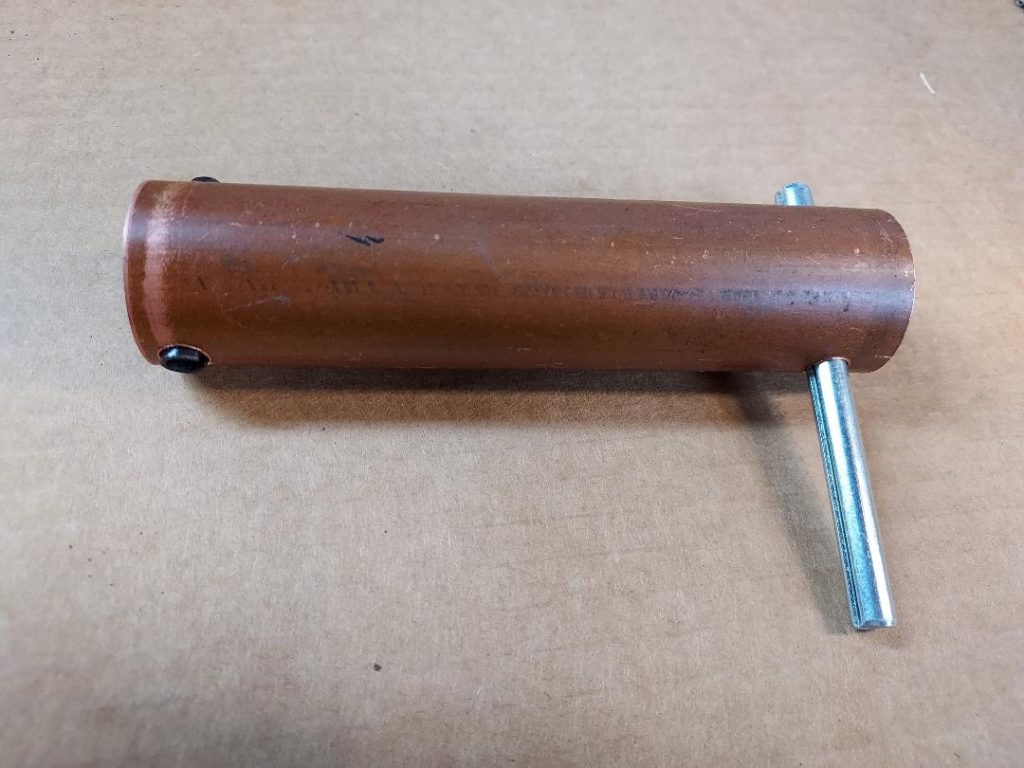
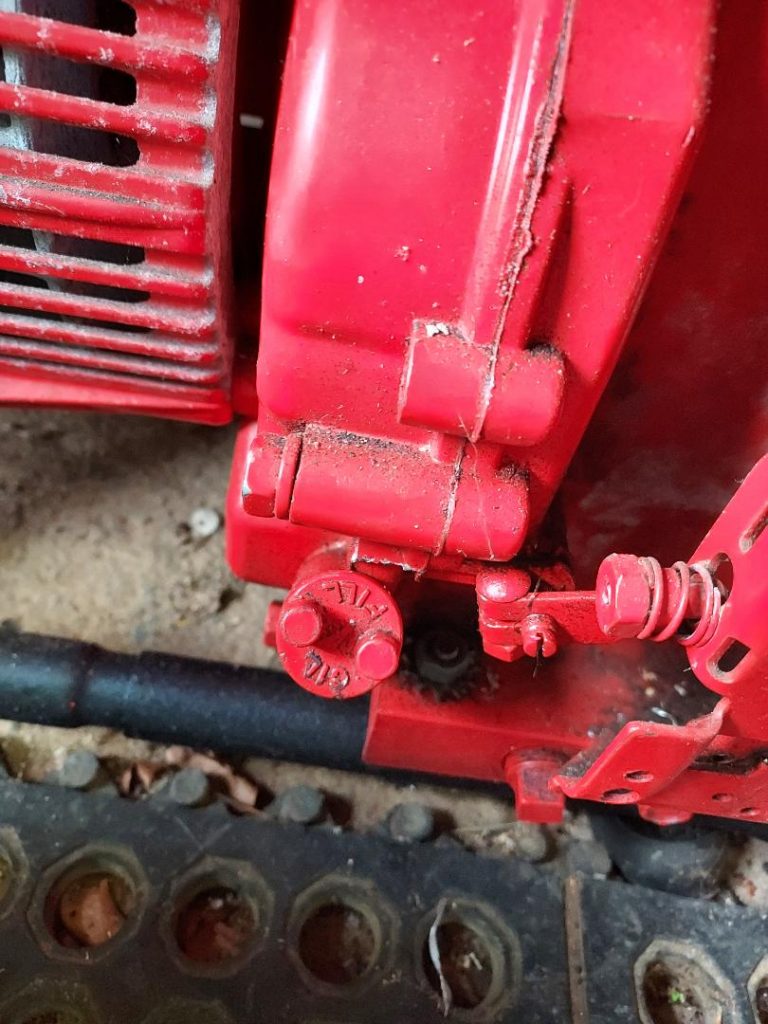
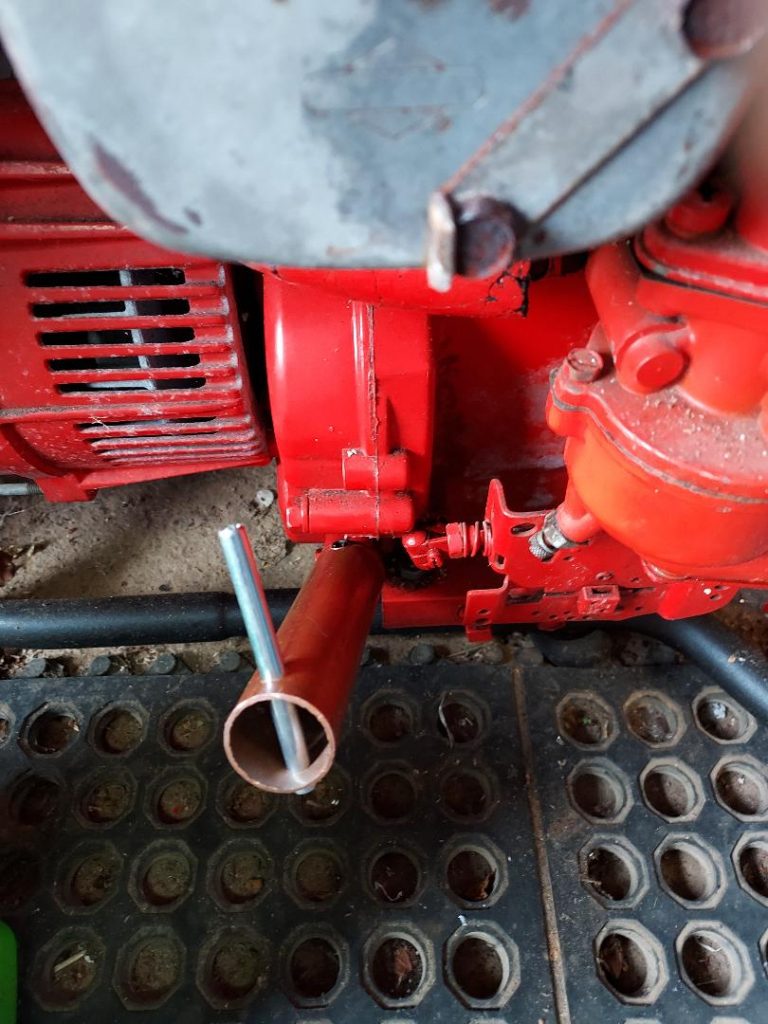
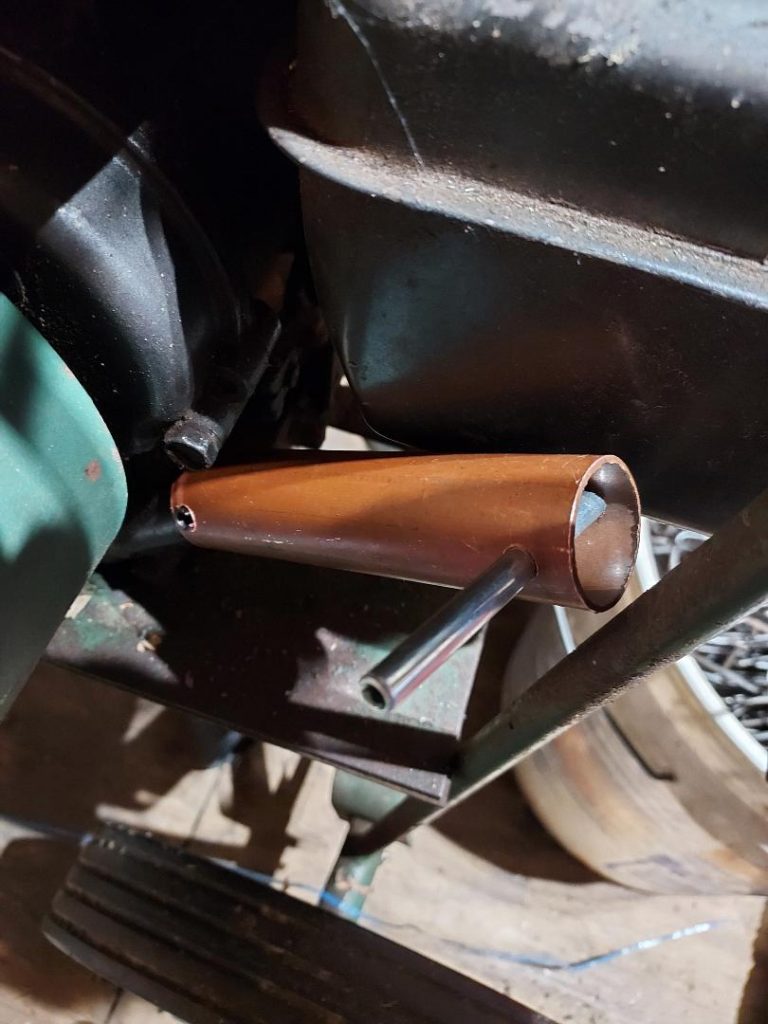
Small Engine Oil Cap Wrench
I’m sure you are familiar with the awkward routine of using a screwdriver or other tool held side ways to loosen and tighten this type of Briggs and Stratton oil cap in tight spaces. This is my homemade, inexpensive solution. I made this tool using a 4- 1/2″ piece of 1″ copper pipe, one 1-1/4″ X 1/4″ and one 3″ X 1/4″ roll pin. The inside diameter of the pipe fits over the oil cap top keeping the tool centered and the leverage applied against the raised posts equal, preventing slippage and damage.
The copper pipe will distort if you try to press or pound the roll pins in place so put a roll pin in a drill chuck and drill it through one side of the pipe using the roll pin as a drill bit. Then use a hammer to drive the roll pin tight in the other hole.
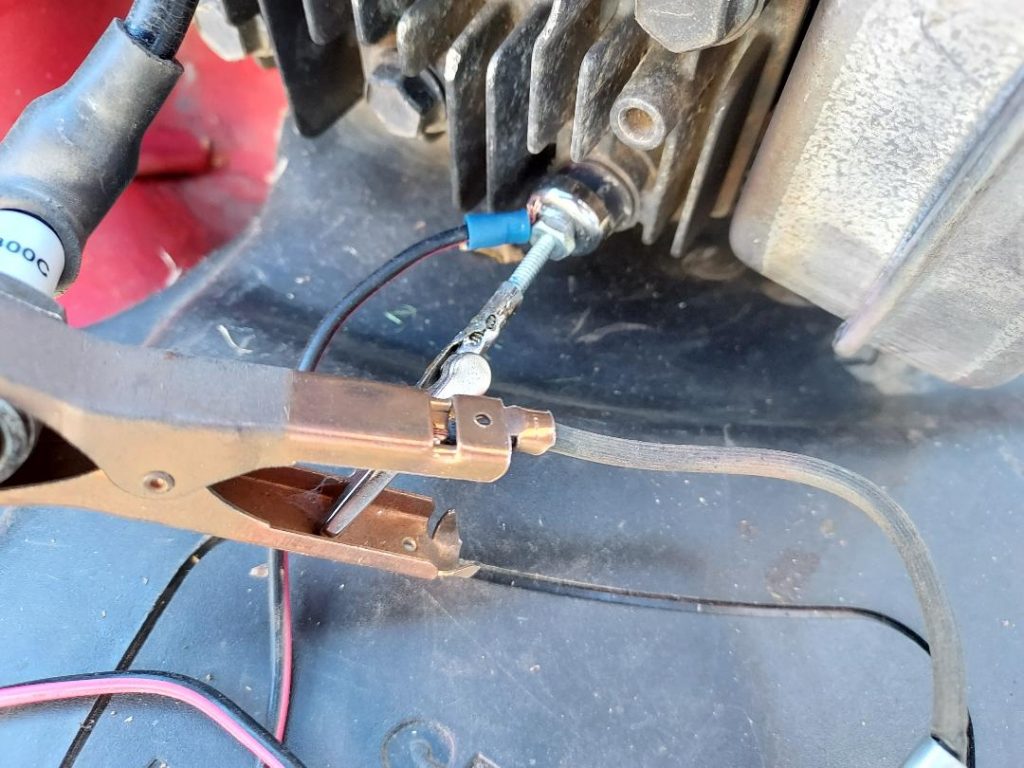
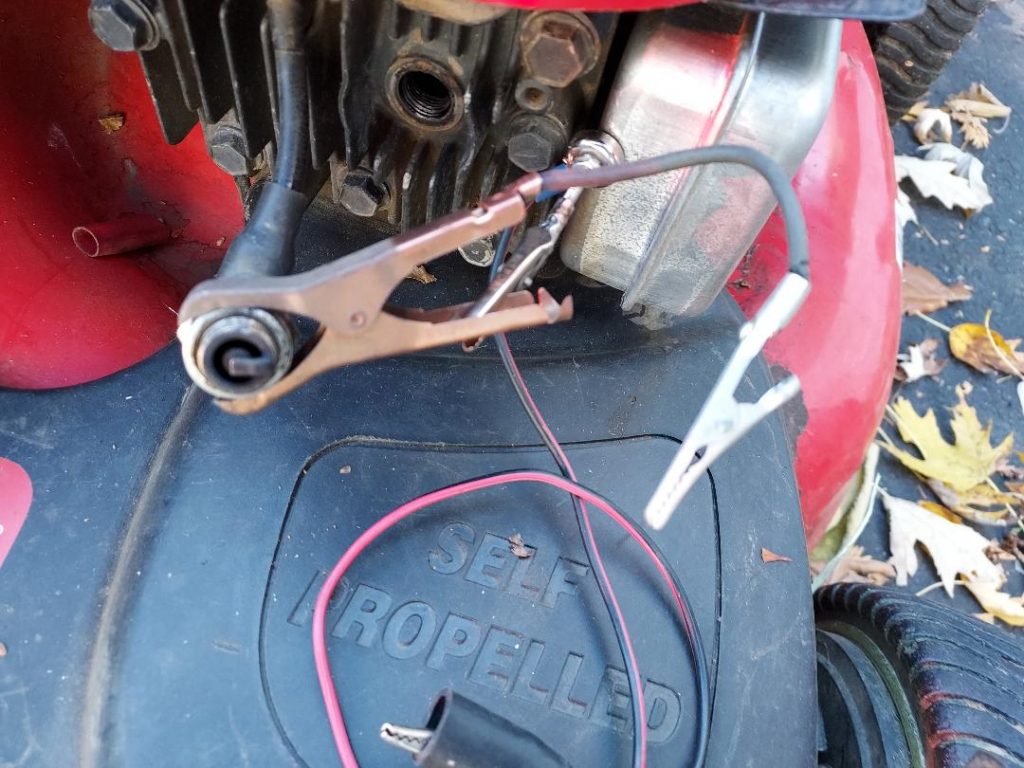
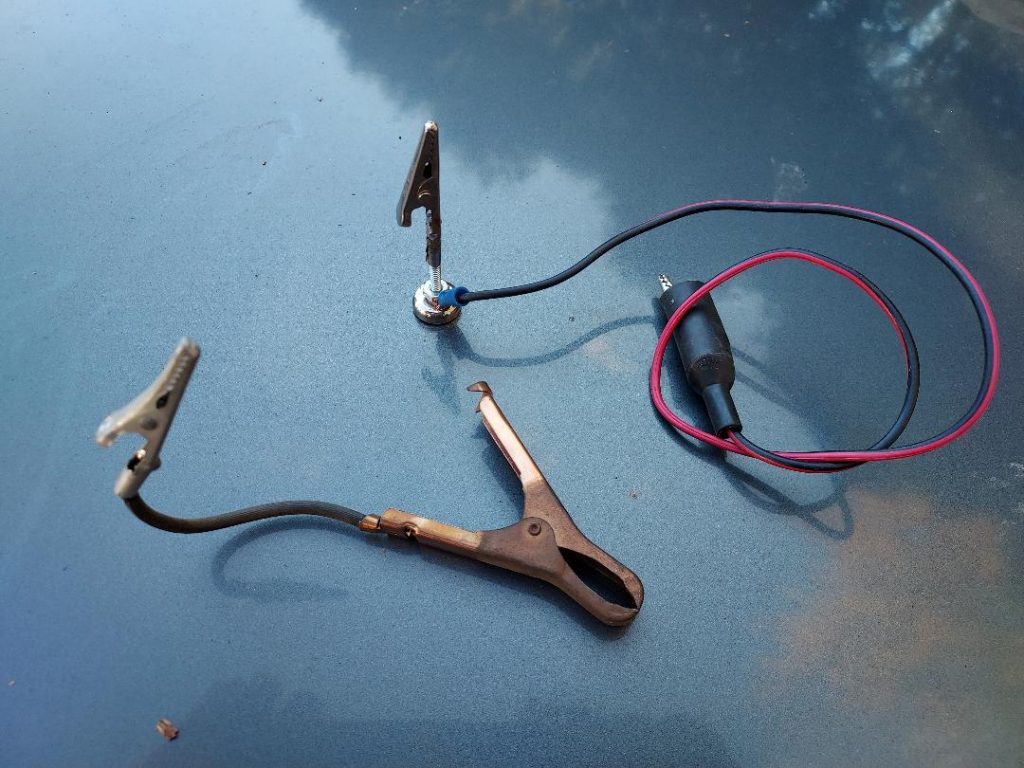
Spark plug holder/magnetic grounding jumper test kit
I use a battery charger terminal clip to securely clamp and position a small engine spark plug so I can easily see the spark. The magnetic post holds the battery charger terminal clip and provides the spark plug’s grounding path. Additional jumper wires and alligator clips are attached for alternative ground point attachment and other troubleshooting applications.
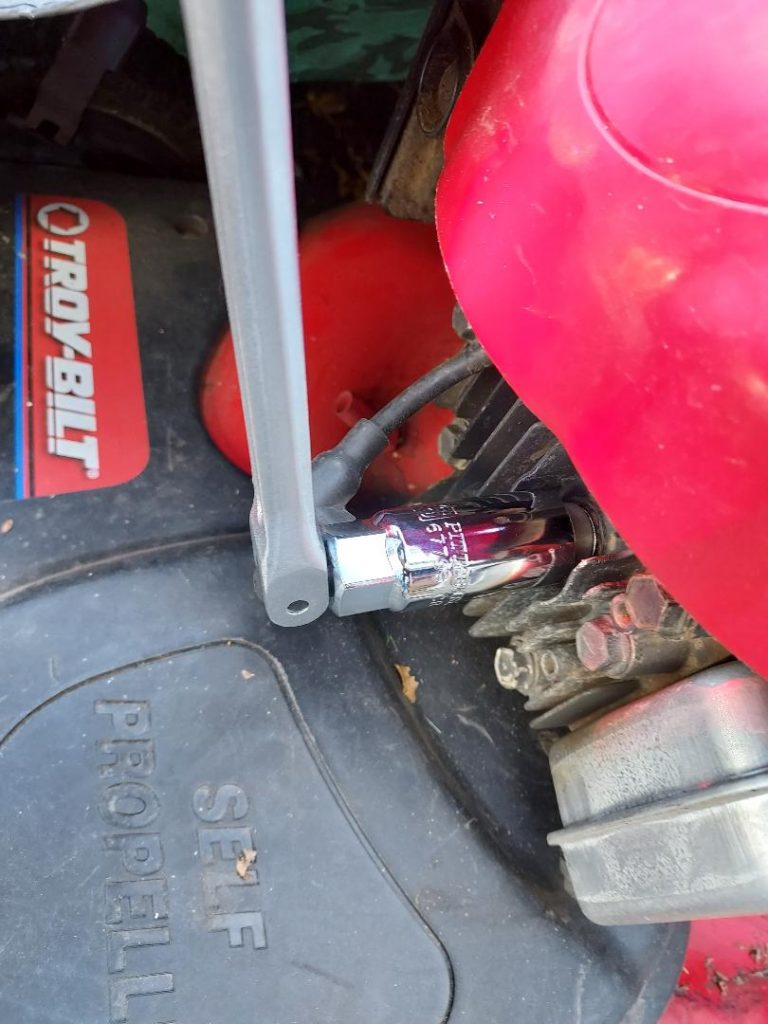
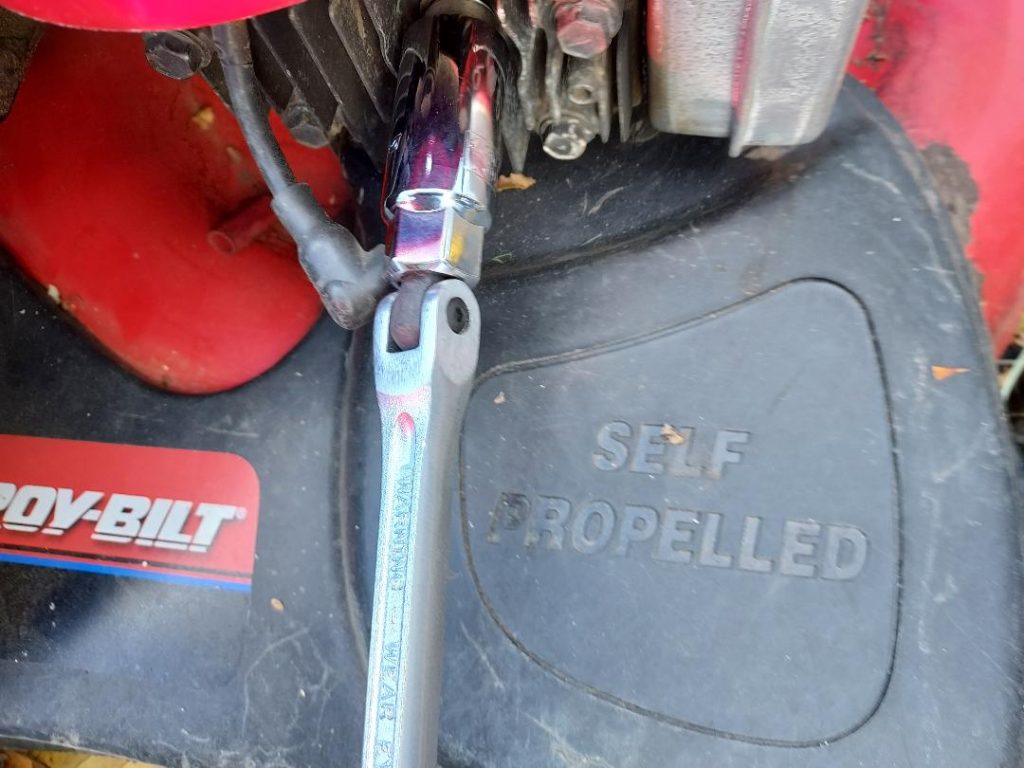
Faster spark plug removal/installation
I find that using a ratcheting socket wrench to remove and install spark plugs a little cumbersome so I use a short 3/8″ breaker bar instead. I can spin and change direction of the breaker bar faster than a ratchet and the bar can be positioned offset when needed. Give it a try!
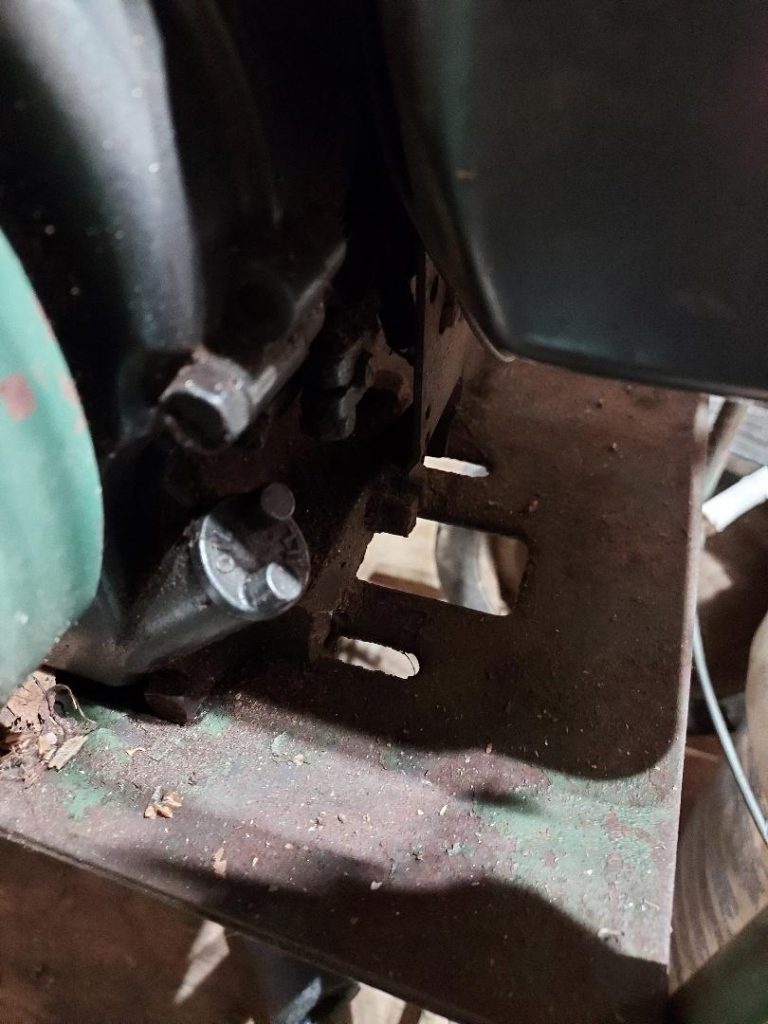
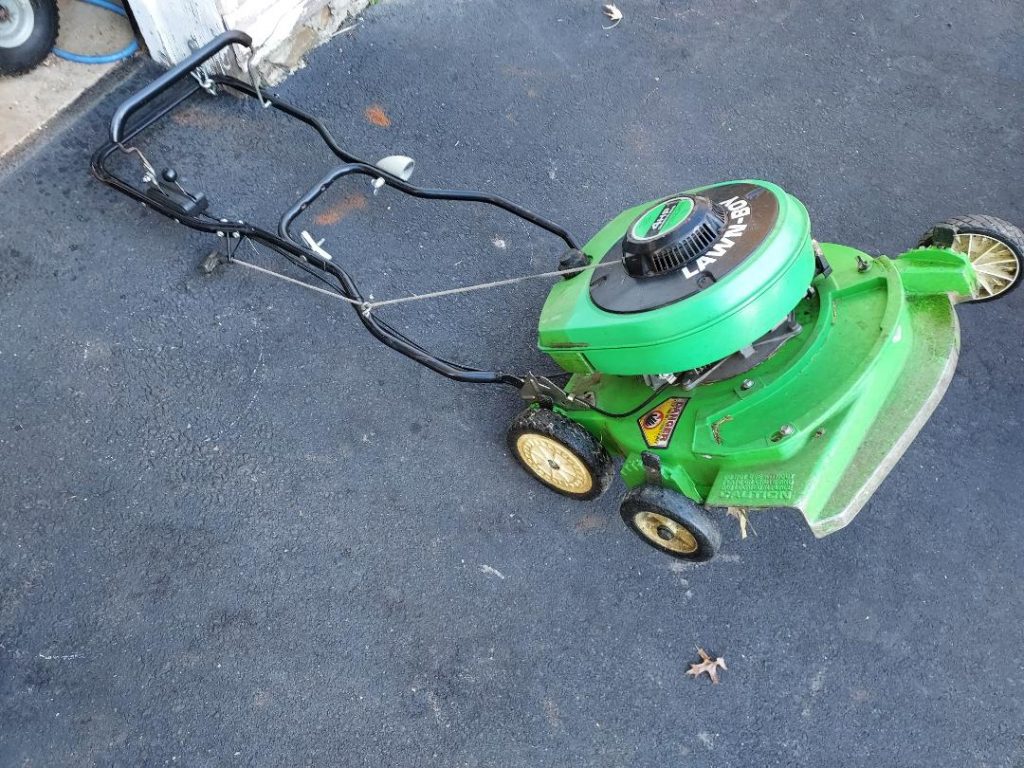
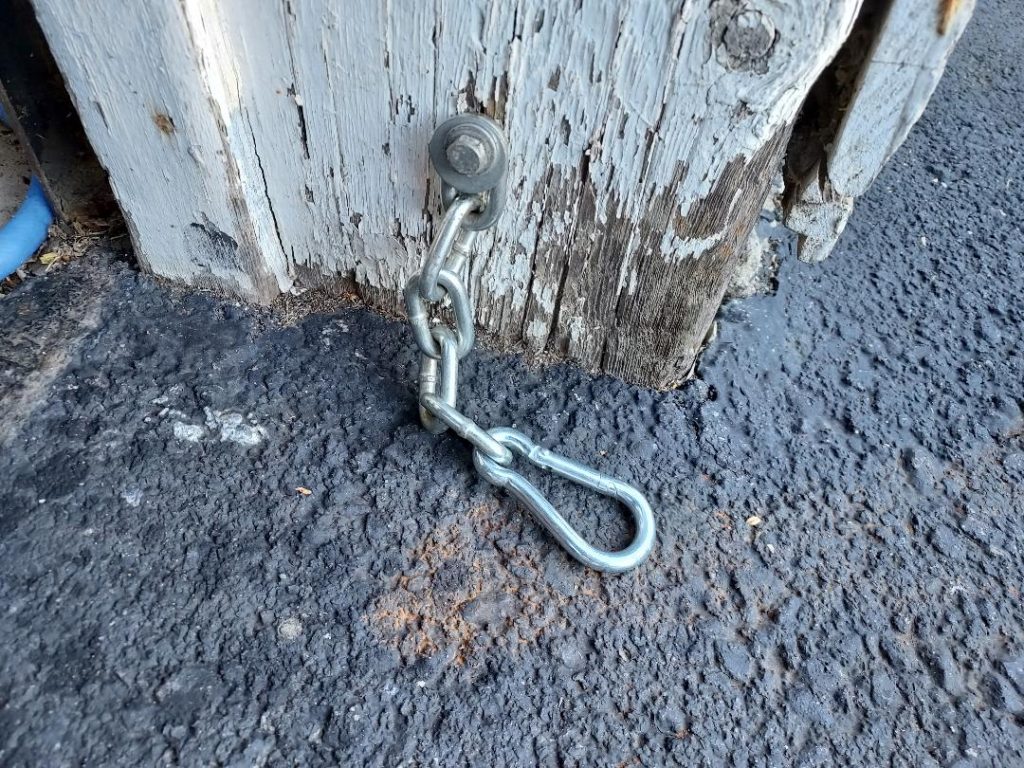
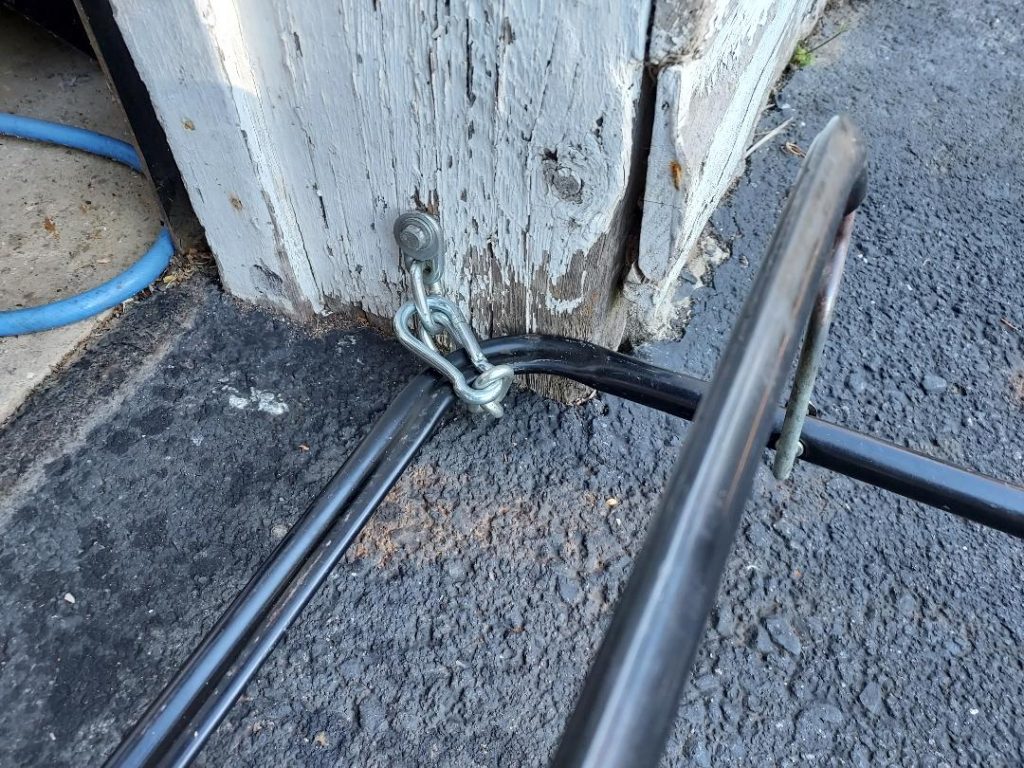
Push Mower Elevator
Here is how I securely elevate my push mower decks for maintenance. I mounted a short chain with a long lag bolt at the base of my garage door opening. An eye bolt and large carabiner would also work.
Electrical Work Ideas and Tips
Here are some of my ideas and tips I’ve used for home electrical installation and service work. As always, when working with electricity make absolutely sure the power source is turned off.
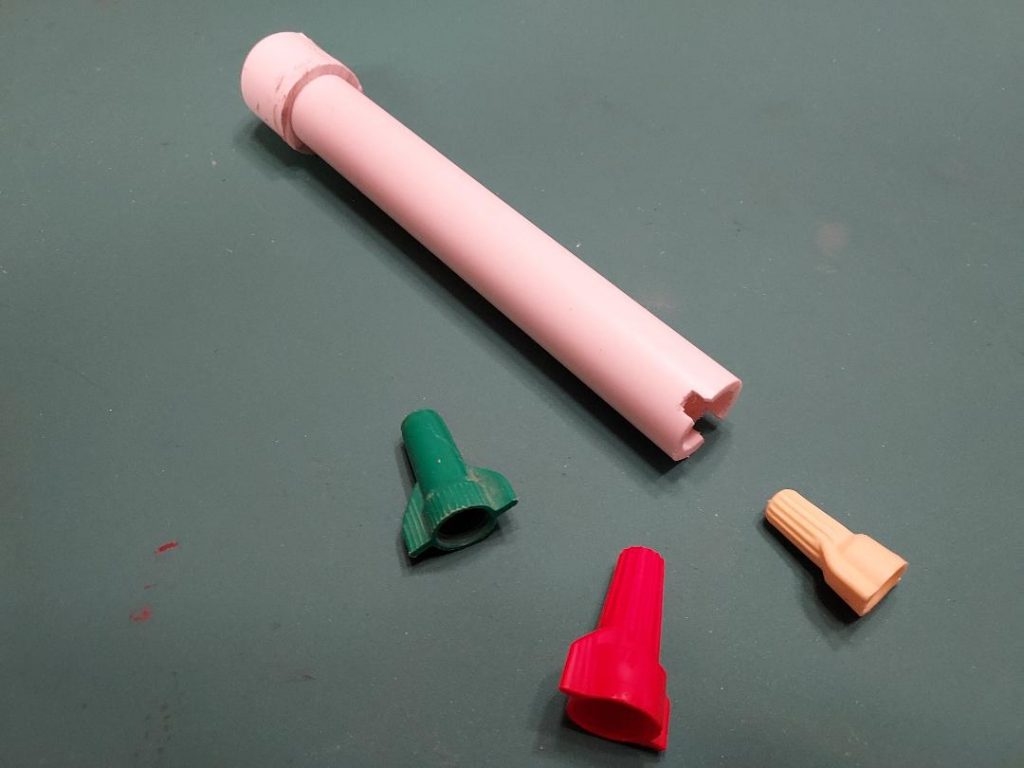
A winged wire nut tightening tool made from a 7 inch piece of 1/2 inch PVC pipe and cap. Cut or grind two shallow, opposing notches on the end. This tool is also useful for pushing wires toward the back of electrical boxes. It works with yellow, red/green and gray size winged wire nuts.
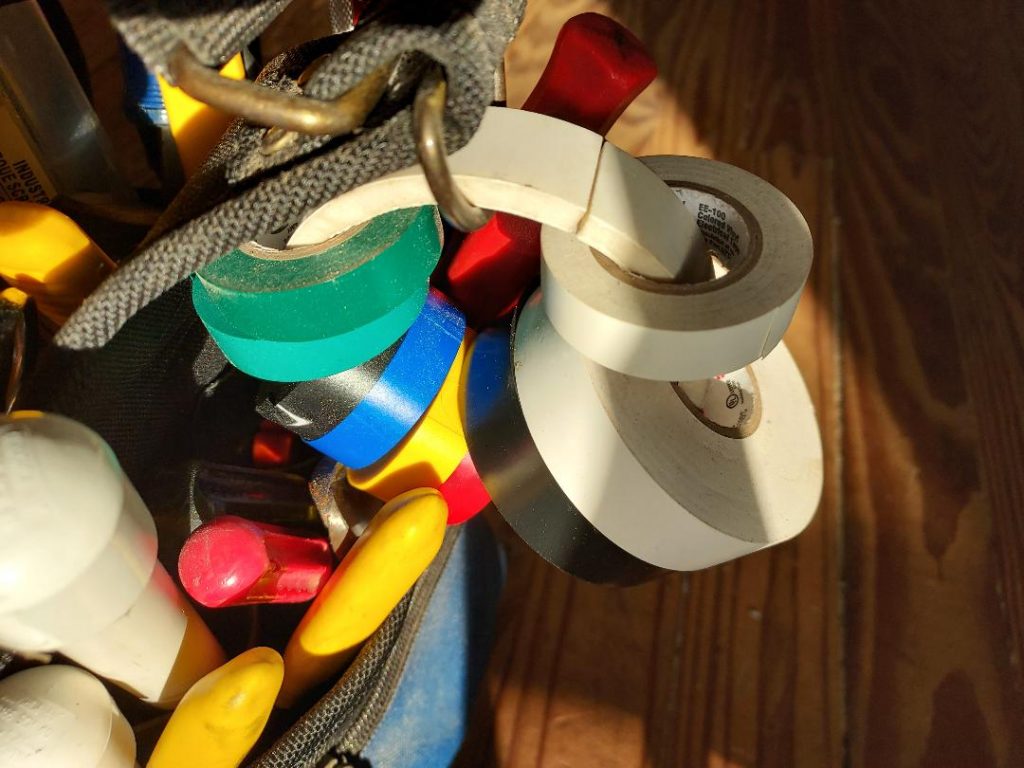
Electrical tape holder made from 3 inch PVC pipe. To remove a roll just slide the tape roll you need around the ring and position it next to the slit in the pipe. Pull the tape roll through the slit.
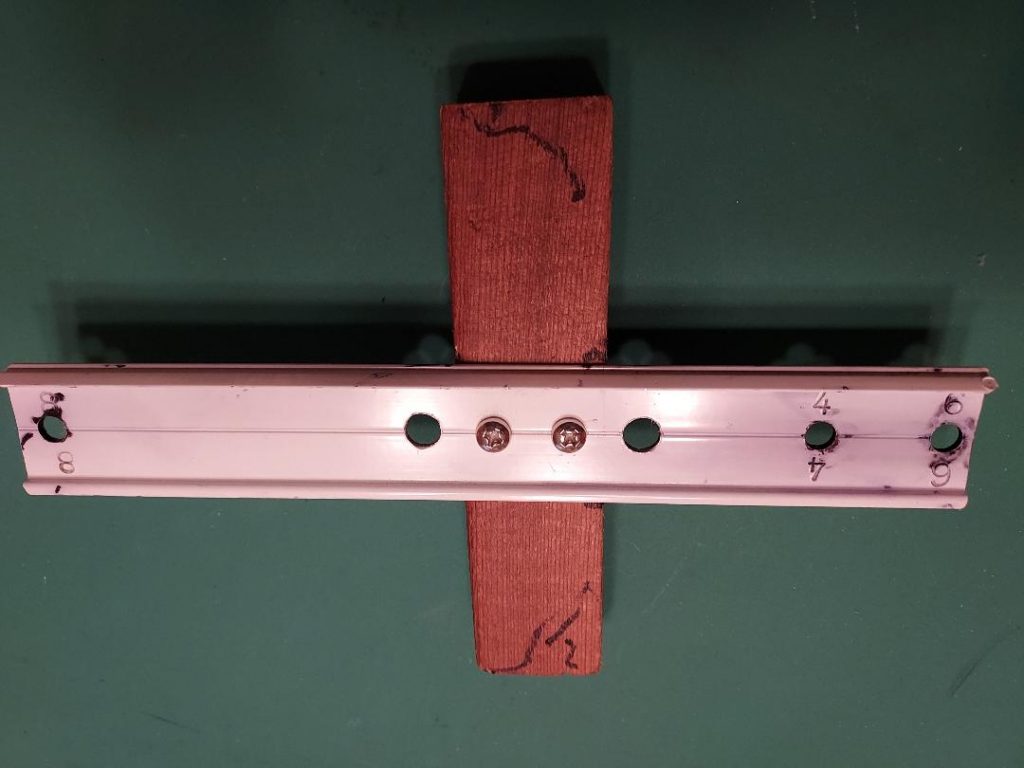
A stud center marking tool to rapidly find and mark the center of 2X4’s, 2X6’s and 2X8’s. The tool is short enough so it can be used even if one side of the wall is sheathed. The two holes closest to the handle are sight holes so you can align it with the edge marking on the stud. Drill the sight holes as close to the handle as possible. I used a piece of aluminum extrusion but other metal or thin material will work.
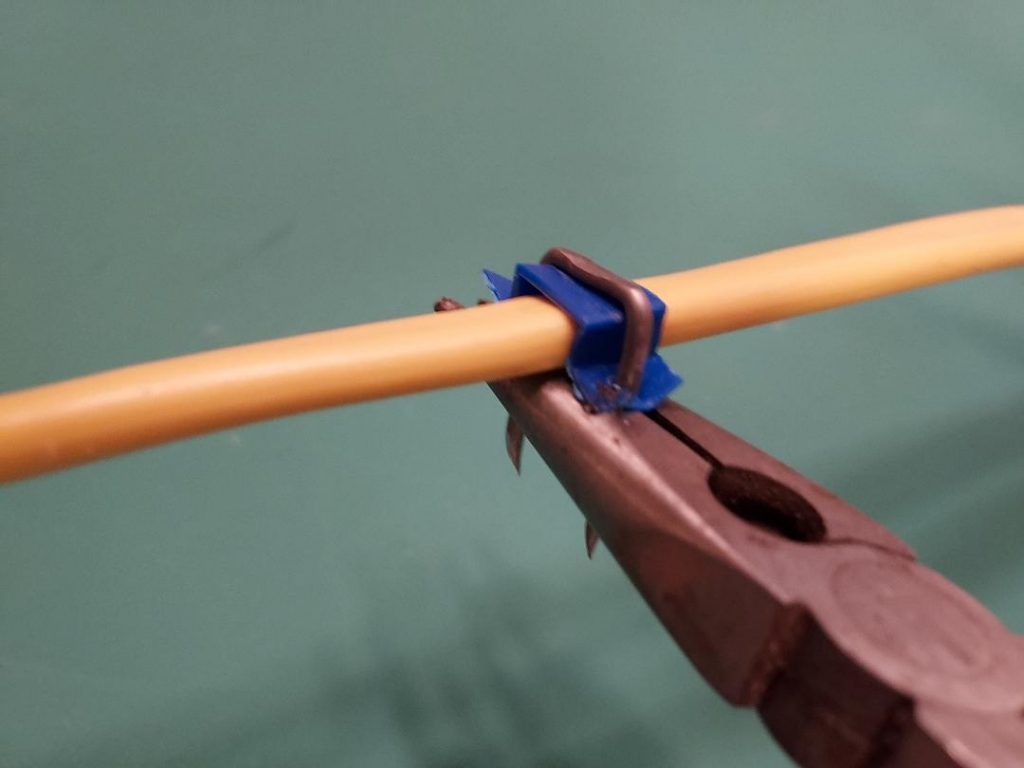
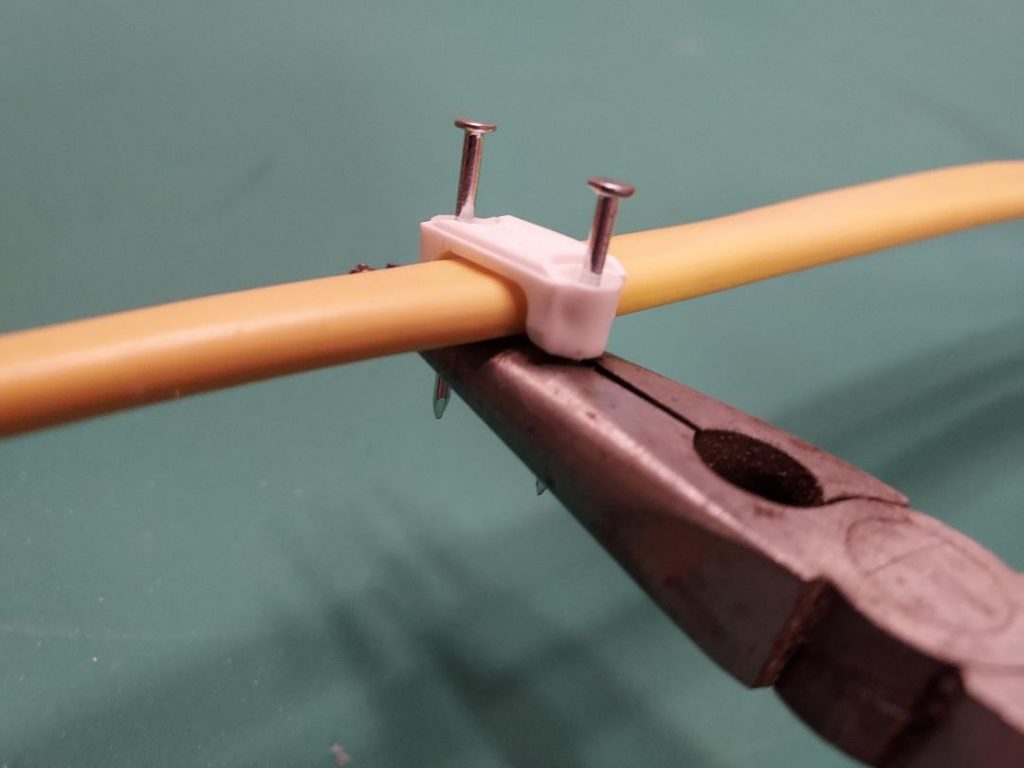
Cable staples, especially plastic staples can be hard to start in tight spaces or elevated positions so I use a back grab technique using long nose pliers that holds both the staple and wire together. Using extra long and/or offset pliers let you work from any angle.
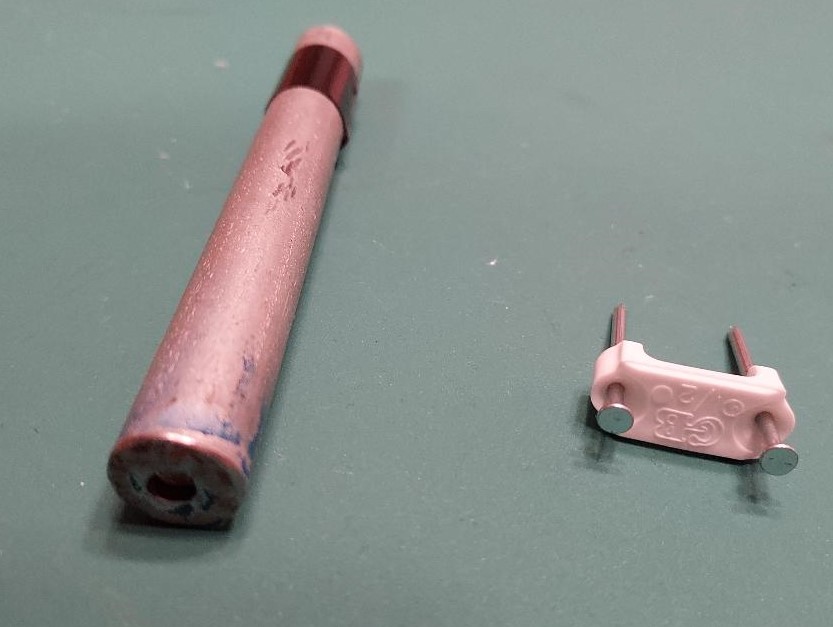
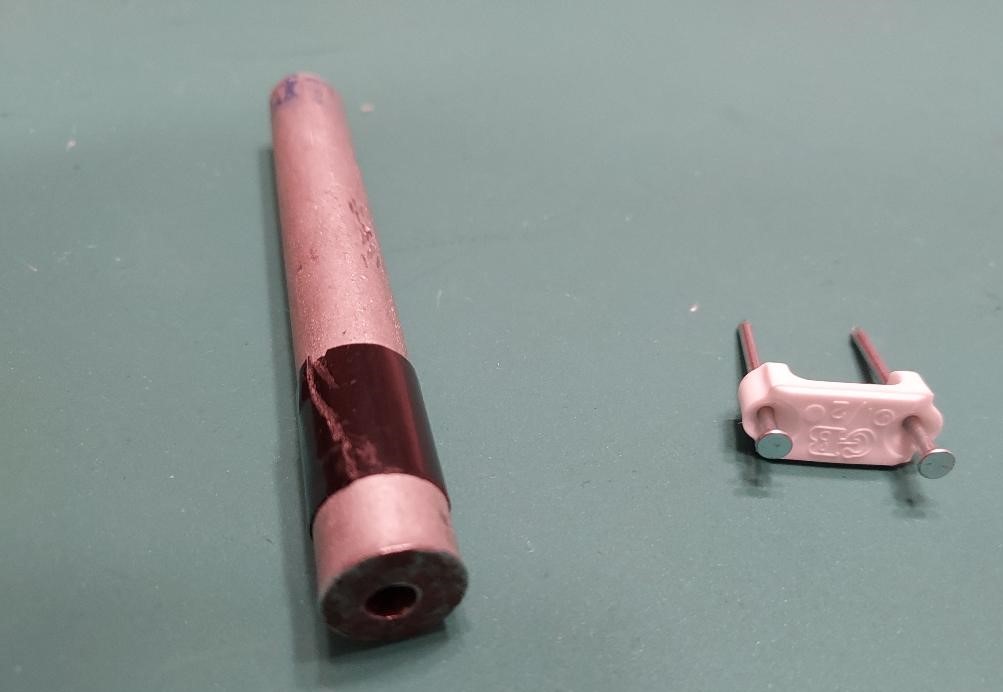
Plastic staples can be problematic when the nails bend due to a bad hammer strike or trying to nail into dense wood or near knots. I made this tool to help start and drive the nails straight. It is made from a round steel bar with a deep hole drilled in one end and a shallow hole drilled in the opposite end. Place the tool over a nail with the deep hole end and hammer it, flip the tool and finish hammering the nail with the shallow hole end. The tool also helps to straighten a bent staple nail. Place the deep hole end of the tool over the bent nail and use it as lever to straighten the nail.
Here is a fast, no nick way to cut cable jacket using an inexpensive sewing seam cutting tool. It can also easily make plunge cuts into the cable jacket so you can rip the jacket from any point. I first started using this sewing tool years ago for removing cable labels on video and network cables and recently found it to be equally useful for NM and low voltage cable jackets. Very useful when working in tight, close-in electrical panel and box work too! Keep one in your tool bag!
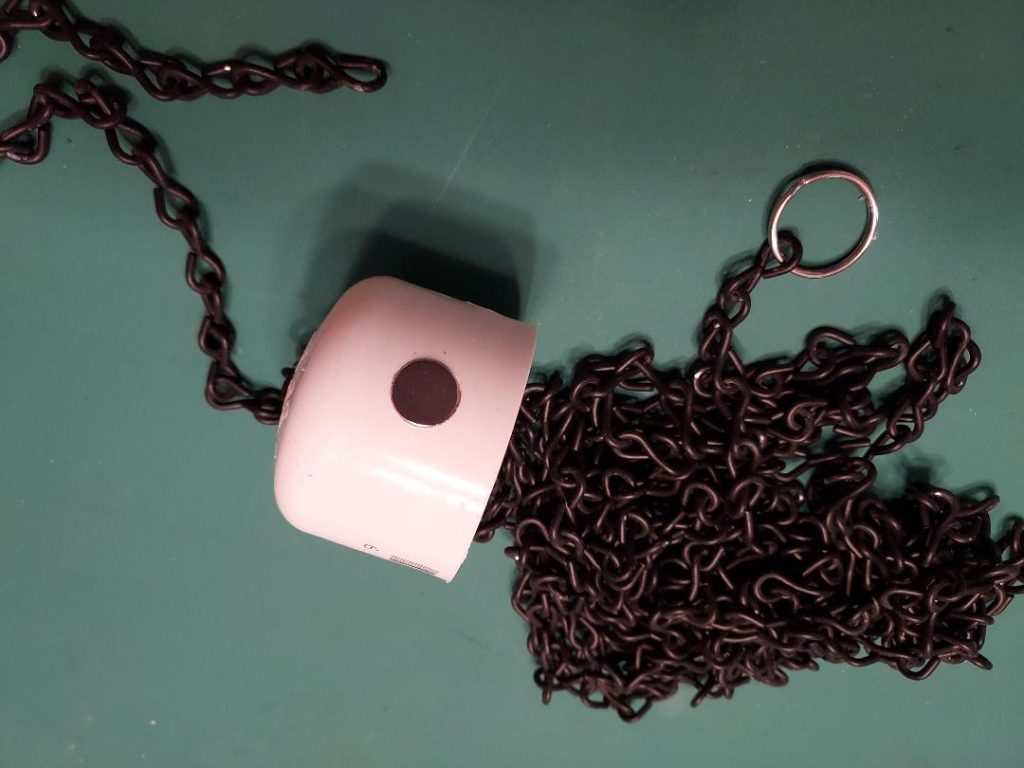
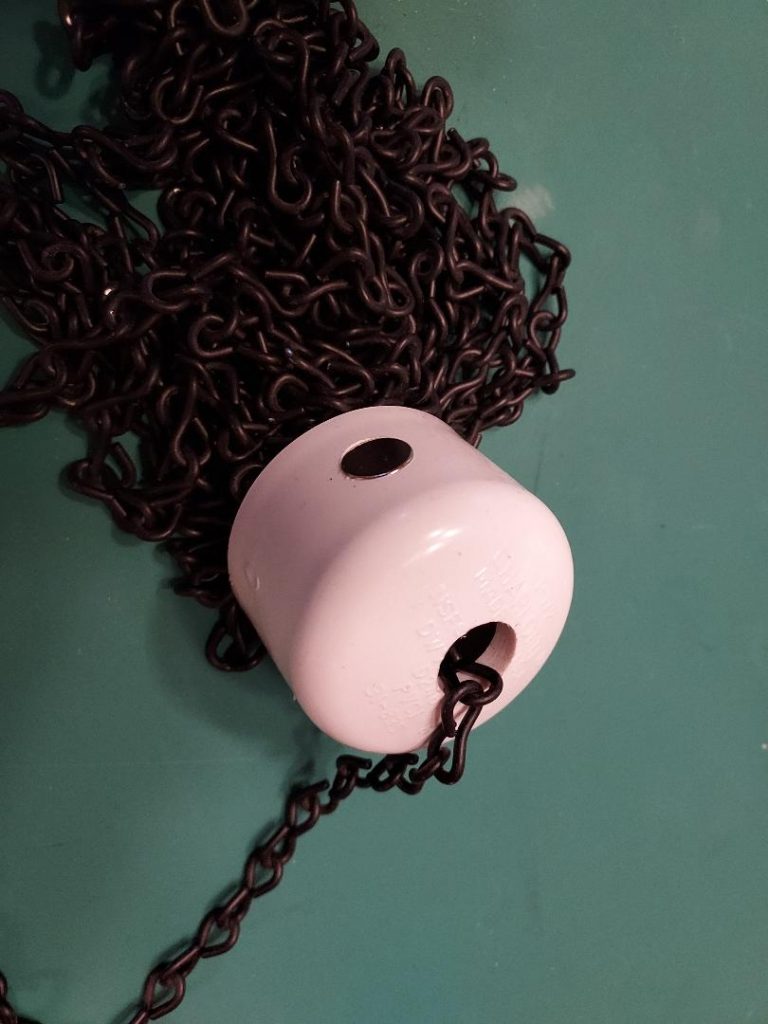
This is how I store my wall fishing chain. I made the storage/dispensing container using 1- 1/2 inch PVC pipe, two PVC caps, 16 feet of smooth steel chain and a key ring. One cap has a 5/8 inch hole on the top and a recessed 1/2 inch magnet on the side. To dispense, pull out about a foot of the chain and it will pour out of the container. The magnet holds the loose end of the chain for storage.
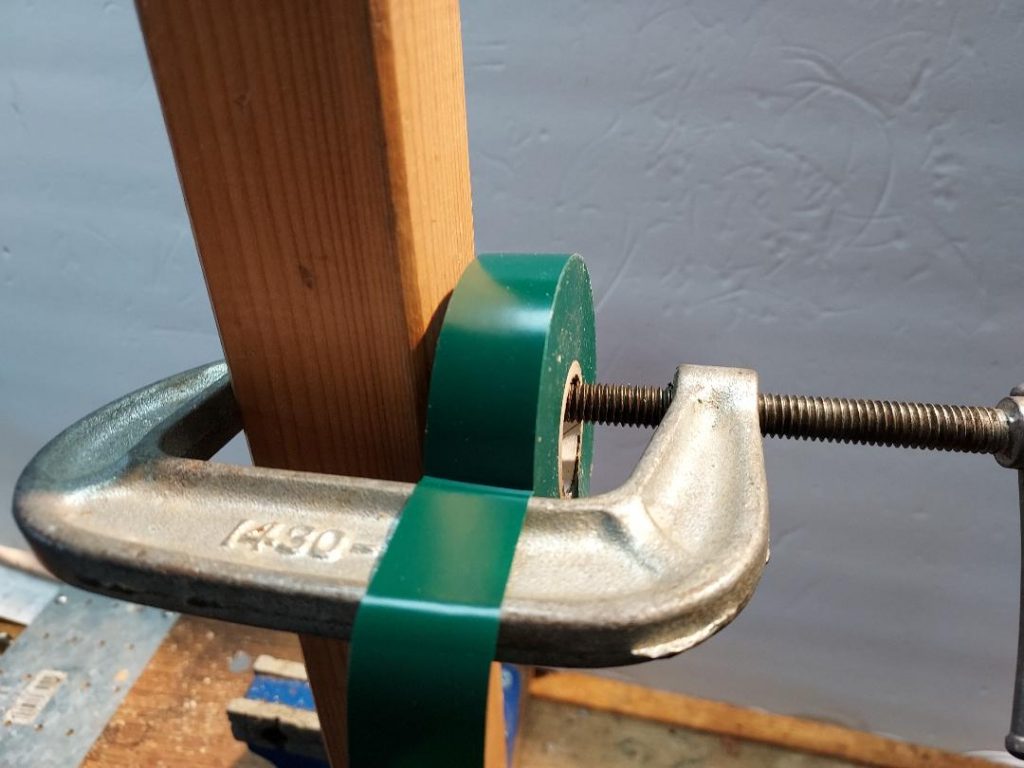
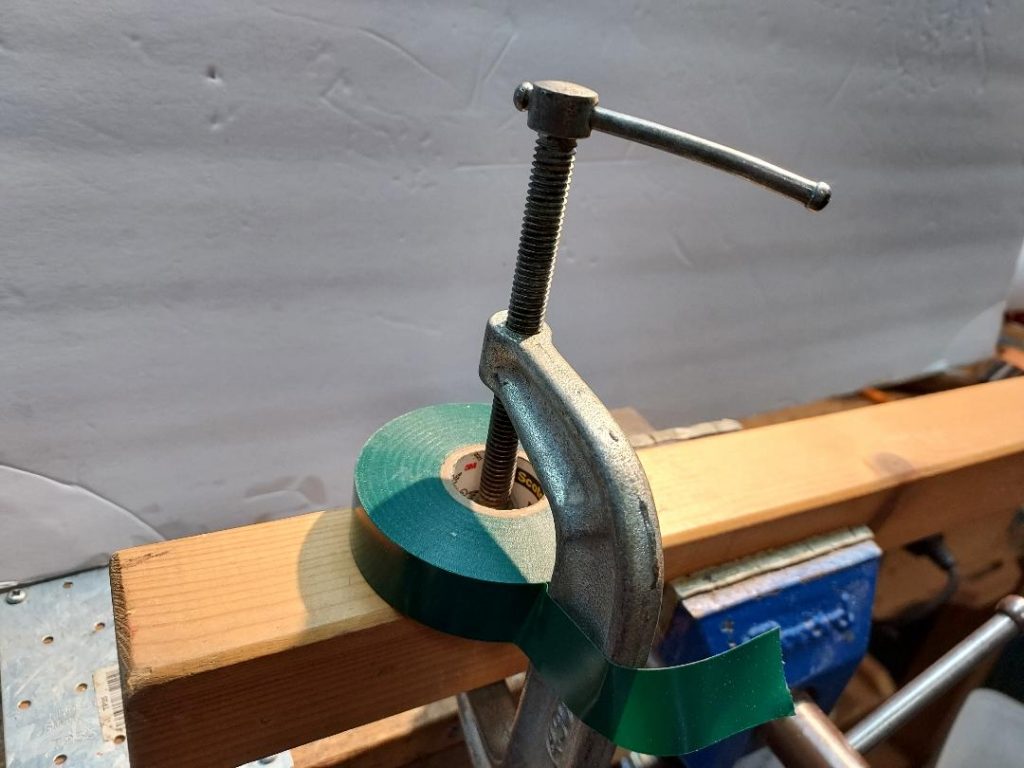
Here is a way to dispense electrical tape when you need to cut numerous pieces. Use a C clamp to both hold the tape to a stud or table top and to keep the tape extended from the roll. This makes it easier to extract and cut the tape with a knife, scissors or side cutter.
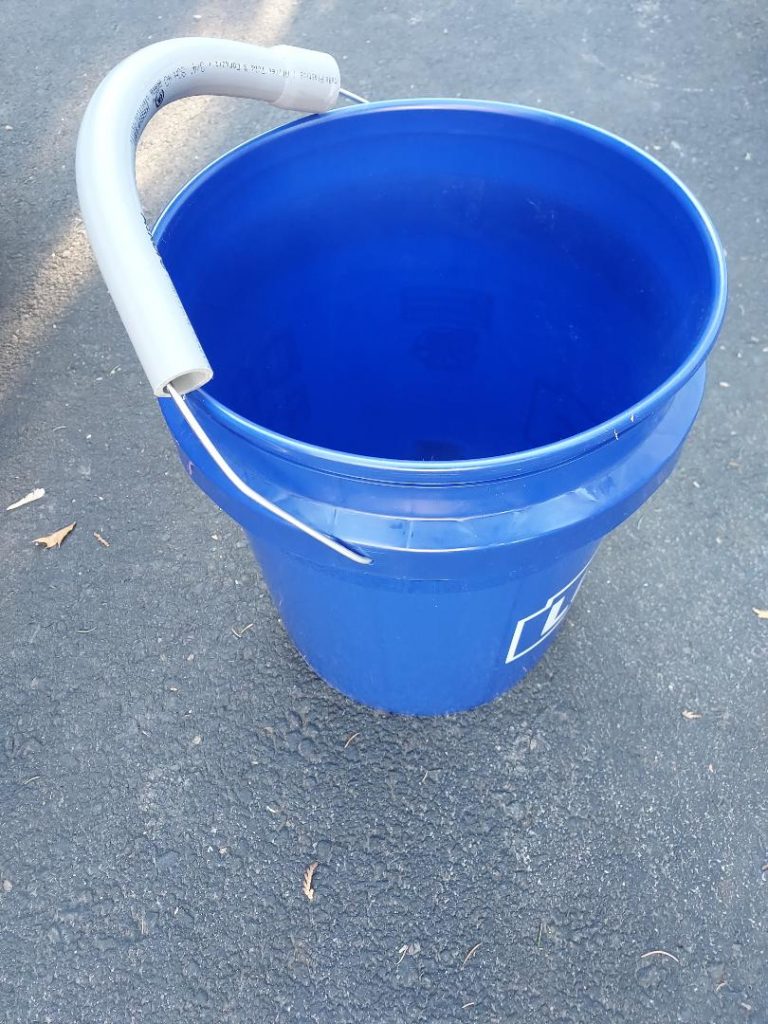
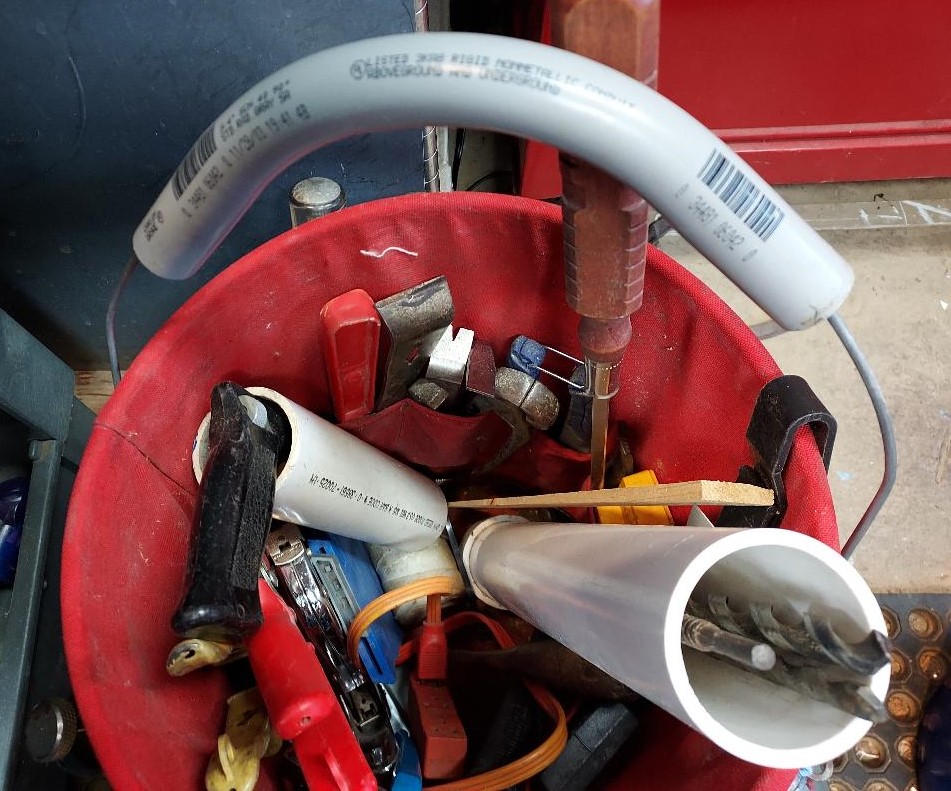
The thin wire handles on plastic buckets can be painful to lift and carry when the bucket is full of heavy stuff. Remove one end of the wire handle and slip a 3/4 inch PVC electrical 90 degree sweep over the wire handle. This modification greatly improves the handle’s grip and comfort.
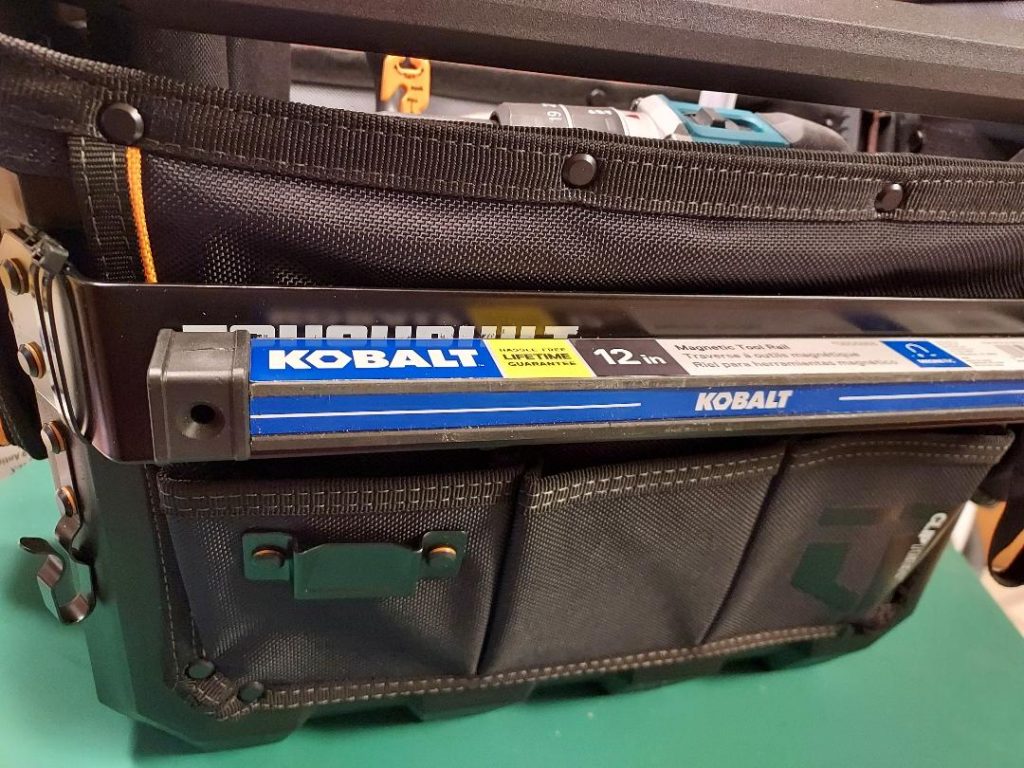
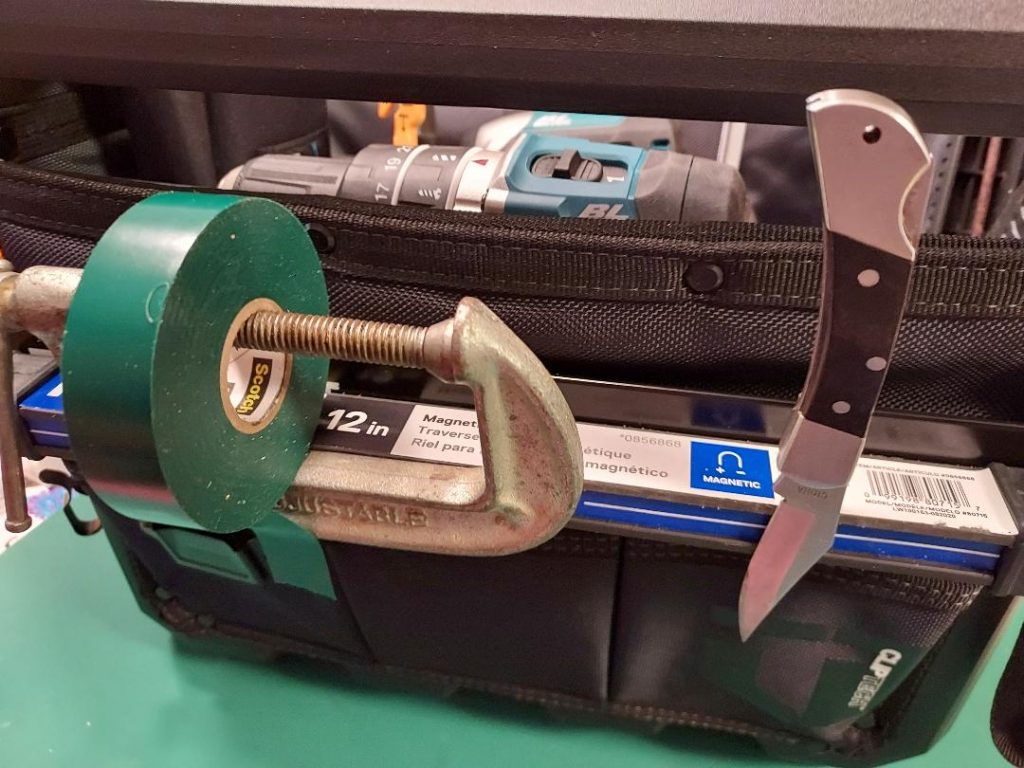
If you use TOUGHBUILT brand tool totes you can attach a magnetic bar to the metal strip on the tote to temporarily hold tools and parts.