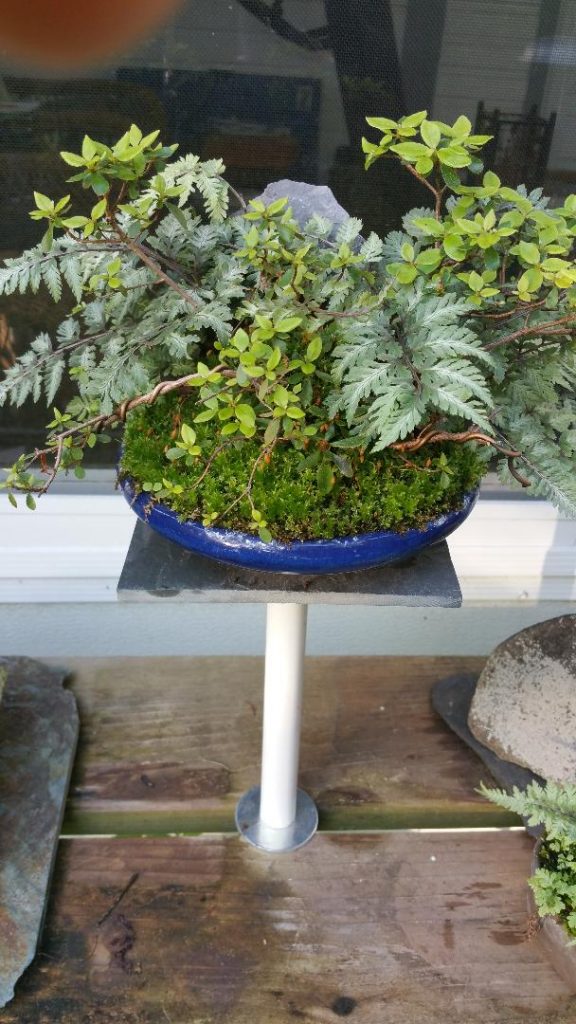
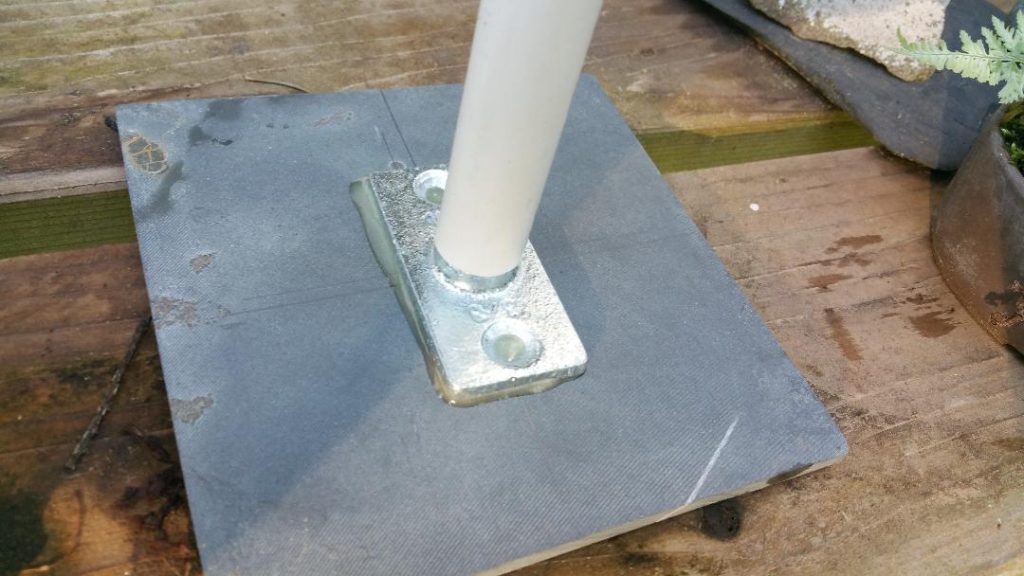
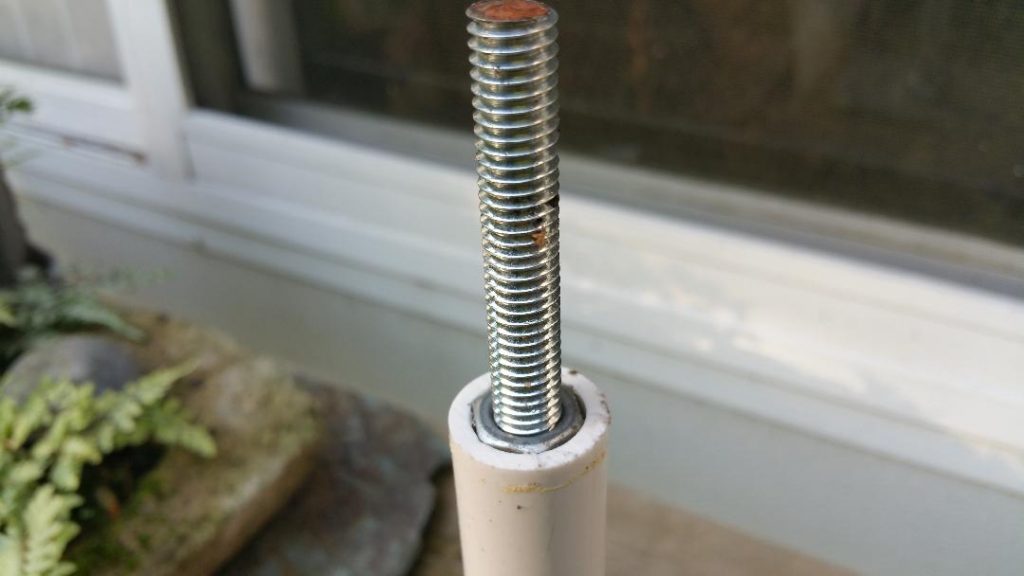
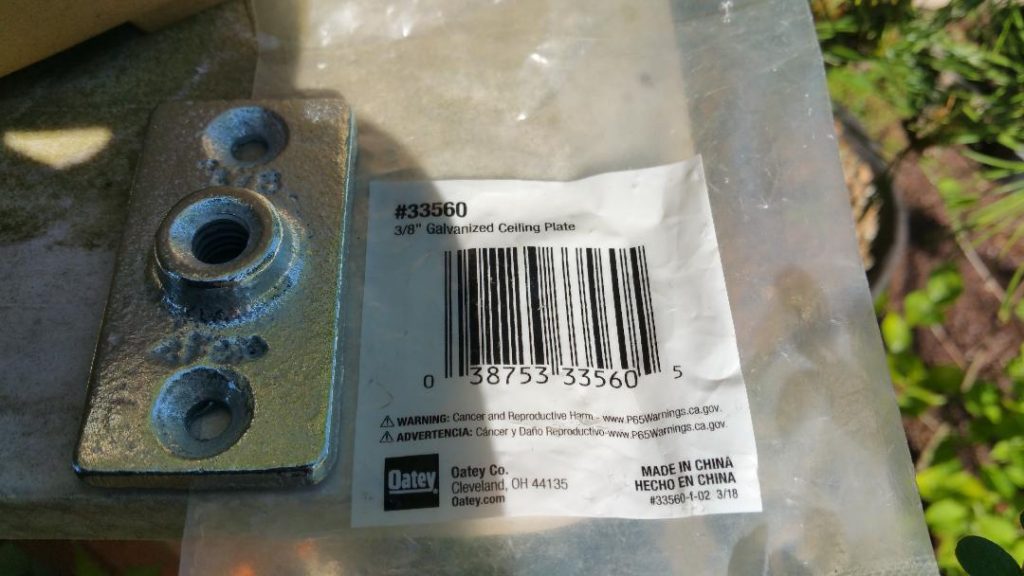
To maximize bench top space and highlight small bonsai you can make small, sturdy pedestals using 3/8″ threaded rod, 1/2″ PVC pipe, a threaded rod ceiling plate and your pick of slate, tile or wood. 3/8″ nuts are force fitted into each end of the PVC pipe then thread the rod through the pipe and both nuts. Use two thick 3/8″ fender washers and a third nut to mount to the bench top. The threaded rod ceiling plate is epoxied to the bottom of the platform. The PVC pipe can be painted or left bare.
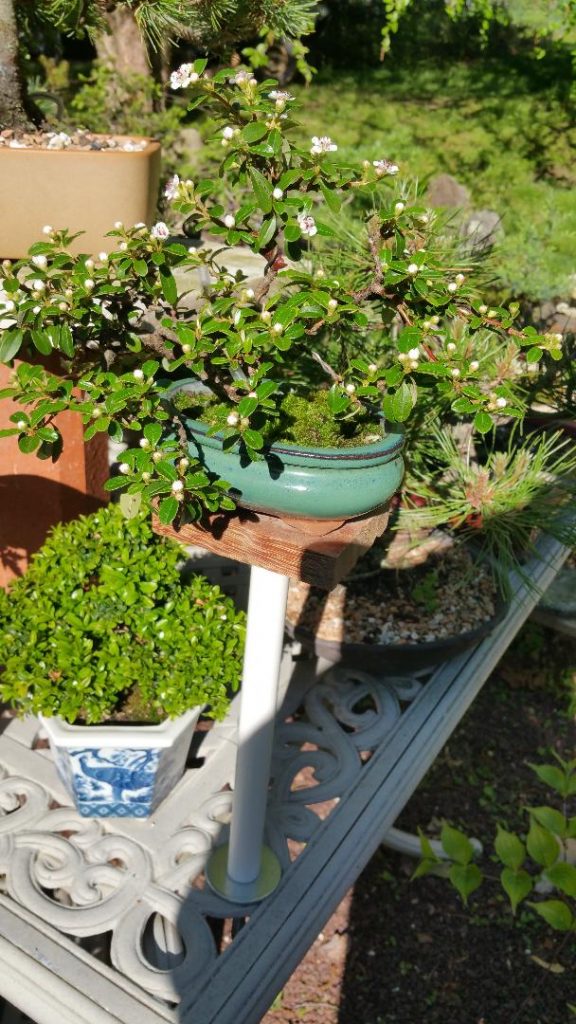
A slate tile used as the platform. The planting is composed of a miniature azalea‘Bixby’, Japanese painted ferns, moss and a stone.A small Cotoneaster about to fully bloom sitting on a teak (flooring) wood platform. The display pedestal is mounted to a garden table.The threaded rod ceiling plate is bonded to the platform with high strength epoxy.Note how a 3/8″ nut is inserted into the pipe ends.
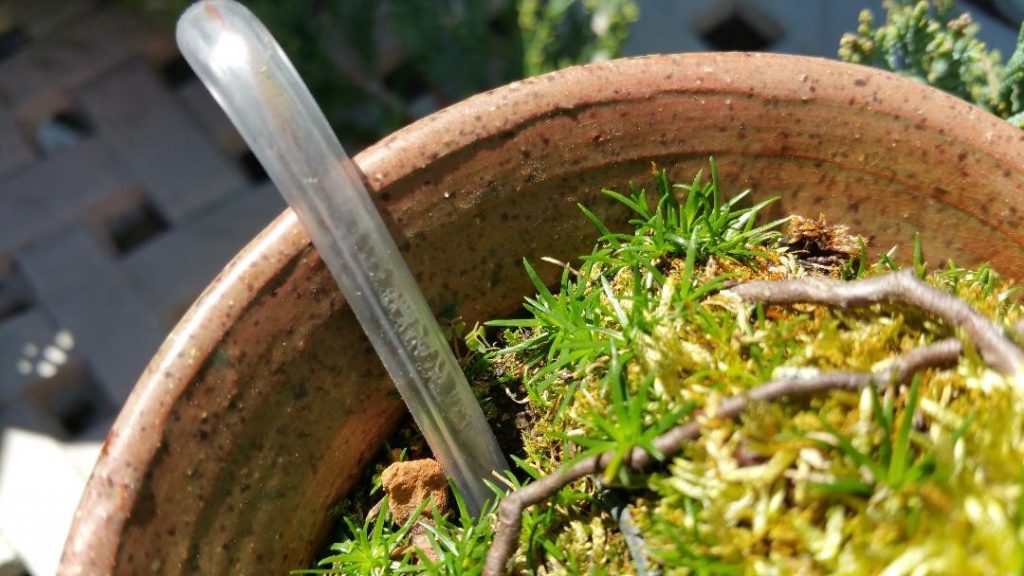
I’m not very confident in using a chopstick to detect bonsai soil moisture level in a bonsai pot because the chopstick has to be completely removed to check for dampness. Also, the porosity of the wood it is made from varies which affects the degree of moisture absorption and retention. So, I’ve been experimenting using clear plastic tubing as an indicator of soil moisture presence or absence. I am using pieces of narrow, flexible plastic medical grade tubing that is made for patient oxygen delivery.
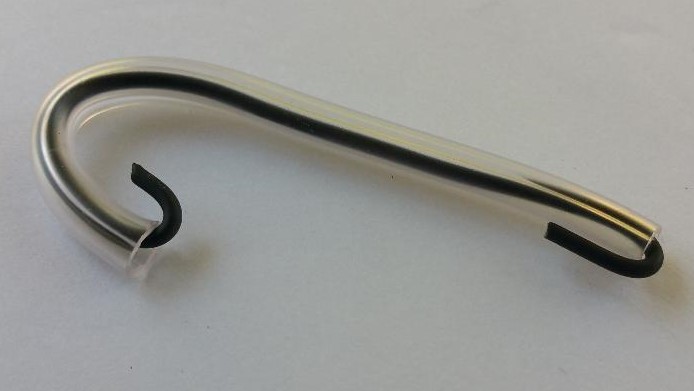
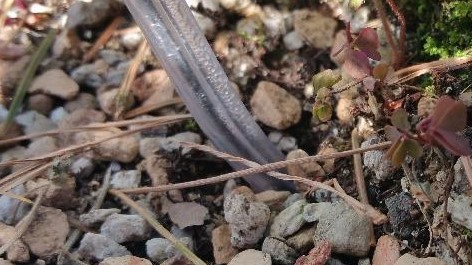
Place a stiff wire through a short piece of tubing and fold the wire over at each end to hold the wire inside of the tubing. Shape it like a candy cane. Make a hole in the soil with a chopstick and place the long end of the moisture probe into the hole at the desired monitoring depth. Retract the moisture probe just a bit to make sure the end of the tube is not obstructed with soil particles.
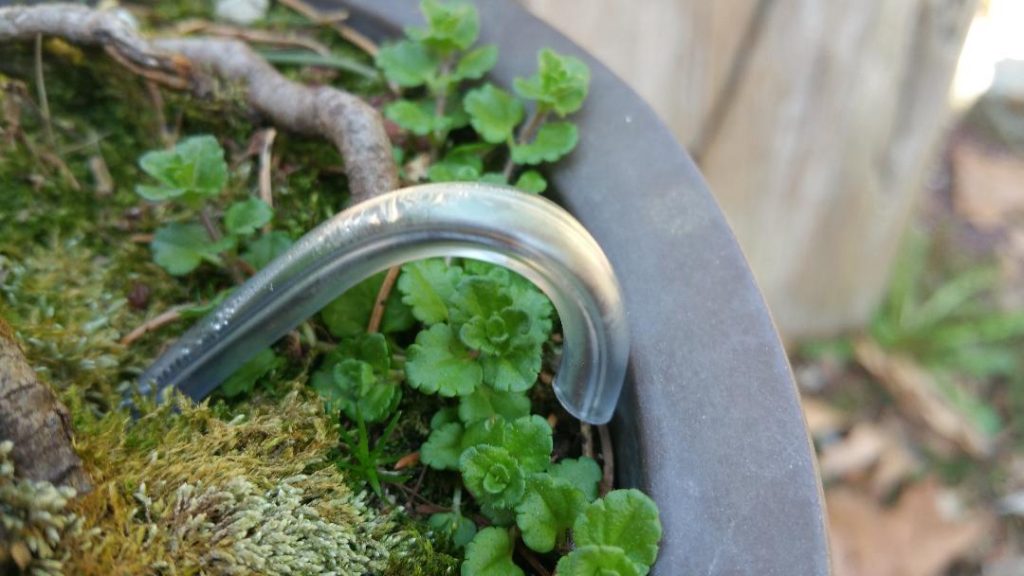
The water vapor in the soil passing through the tube condenses on the inside of the tube, visibly indicating the presence of soil moisture at the probe’s depth and location in the pot. The moisture probe is U-shaped so the end of the tube above the soil will not take in water from above. If there is no visible condensation in the tube above the soil’s surface slightly lift the probe out to see if condensation exists in the tube below the soil’s surface.
The preliminary results are encouraging. Give it a try and let me know if it works for you.
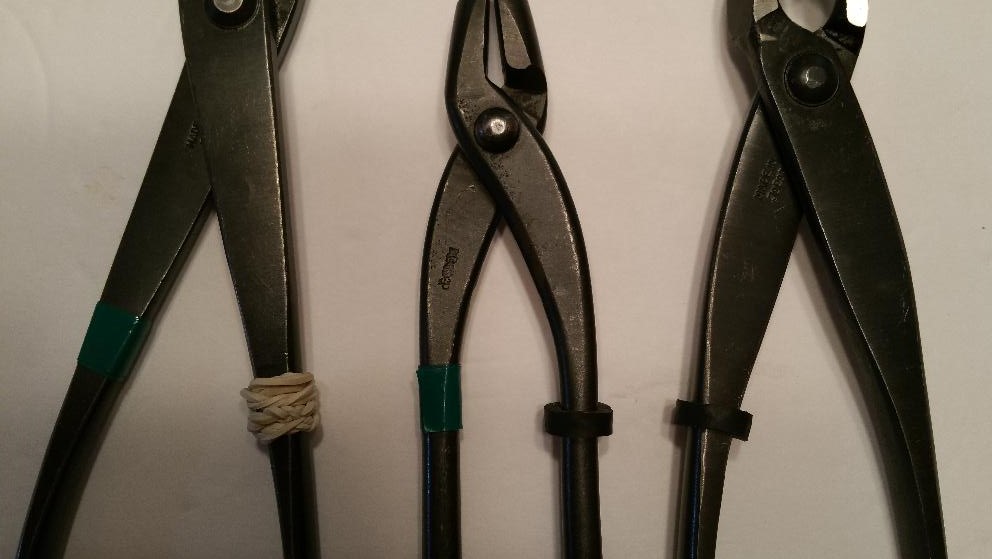
To improve handling my bonsai tools I’ve added pieces of 1/4″ fuel line or rubber bands to the handles where my index finger rests. This makes the bare metal handles less slippery and easier to grasp and manipulate. The nubs can be easily moved or removed for tool cleaning. Give it a try!
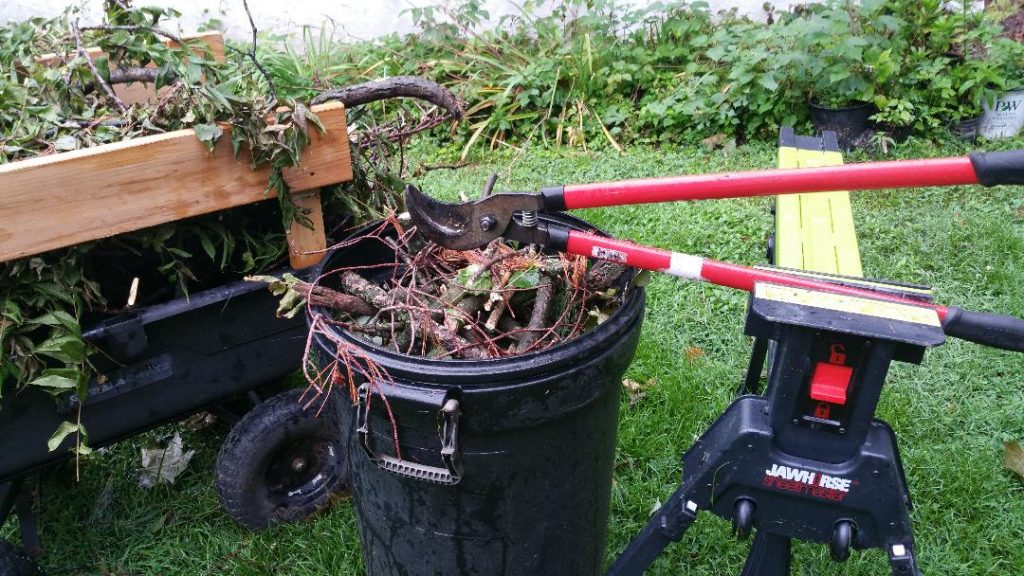
Using a Rockwell JAWHORSE to securely hold heavy duty pruning loppers makes an efficient setup to cut up fallen branches and brush into small pieces that fit in trash containers. This method alleviates using two hands on the loppers and bending over to cut up branches. Use one hand to feed the material and the other hand to operate the loppers.
The JAWHORSE also works great to hold large branches when using a chainsaw. Position your garden cart under the branch to catch the cut off pieces. No more bending over to pickup the pieces.
After straightening used wire pieces I store them on my outdoor bonsai work bench using a short length of 2″ PVC pipe that has three 1- 1/2″ holes and a smaller hole to hang it from using a 4″ deck screw. The bottom is covered using a discarded container cap that is epoxied in place. A standard PVC cap could also be used. Drill a small weep hole in the bottom to drain away any water.
I just made the rock composition as a gift for a family friend who will be graduating medical school in June. Congratulations Shawon!!!
The composition is made from a hand cut piece of Schist and an established Procumbens Nana Juniper cutting.
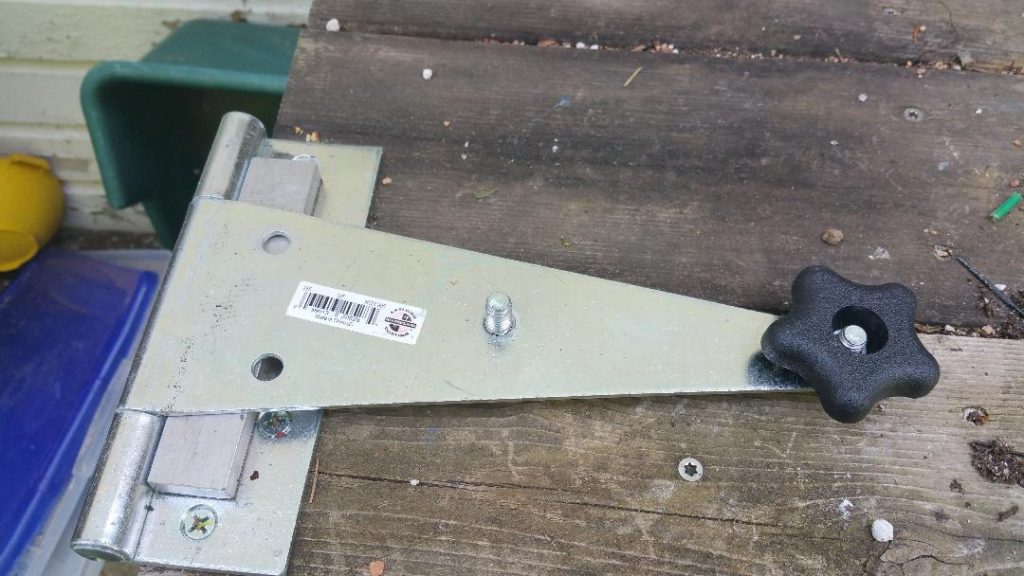
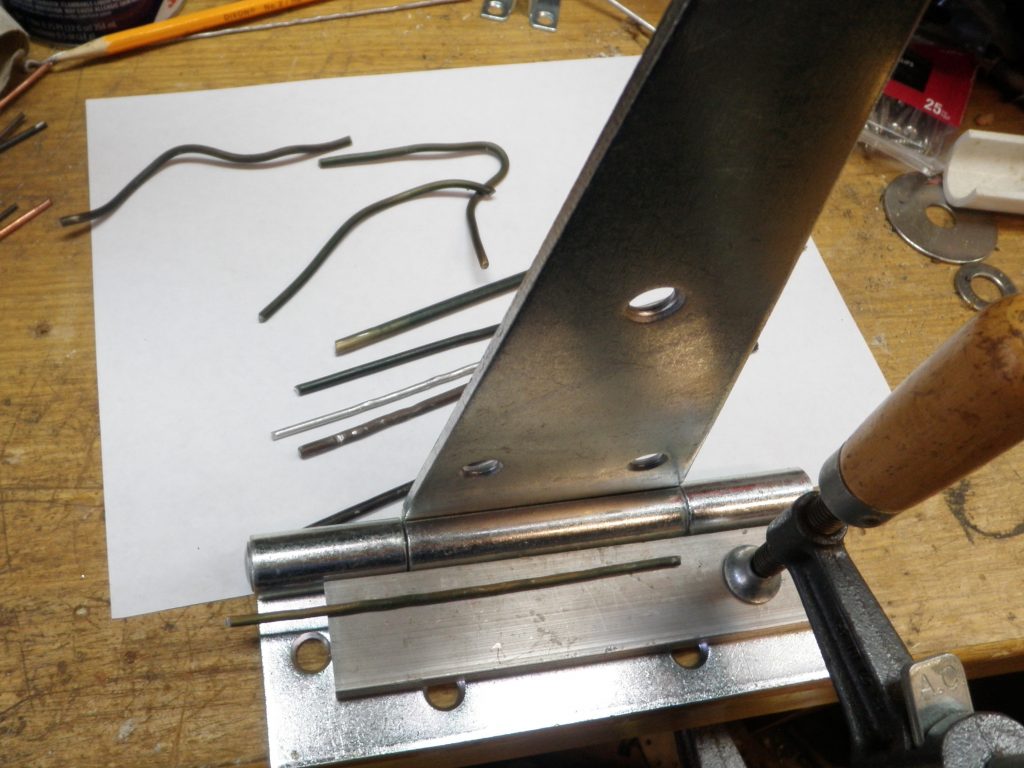
Bench Mounted Wire Straightener in the working and stored position
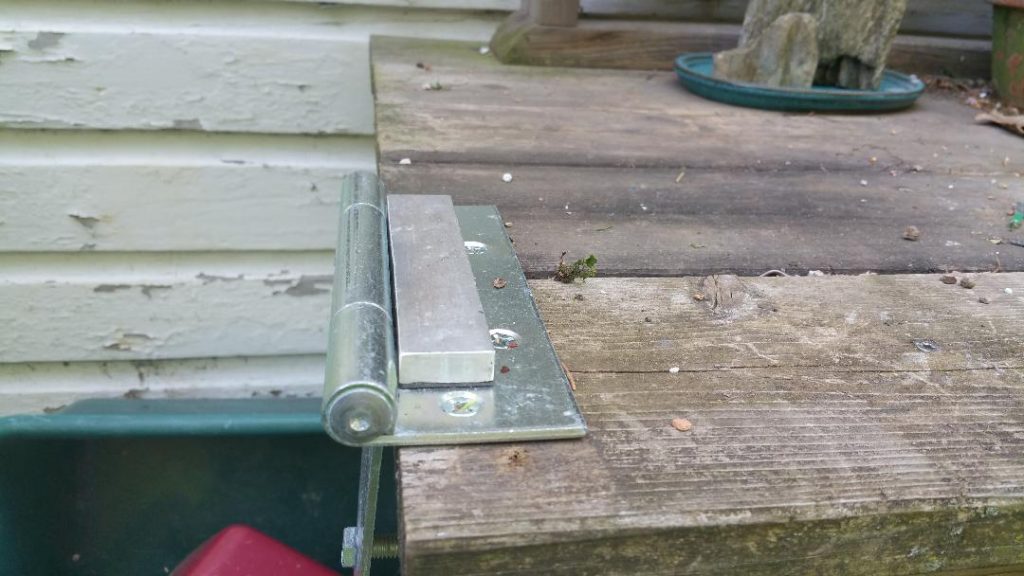
I mounted my Bench Mounted Wire Straightener on the left side because I’m left handed. It is made from a 10″ gate hinge, a couple of 1″ x 3/8″-16 hex head bolts, 3/8″-16 threaded knob, an aluminum flat bar spacer and high strength double sided adhesive rubber tape. The hinge is mounted to the bench top with 1″ flat head screws.
This has been my go-to heavy duty straightener/ bender for both small and large wire sizes. I simply swing it over the side when not in use. This device provides significant wire shaping and gripping strength! Make your own!
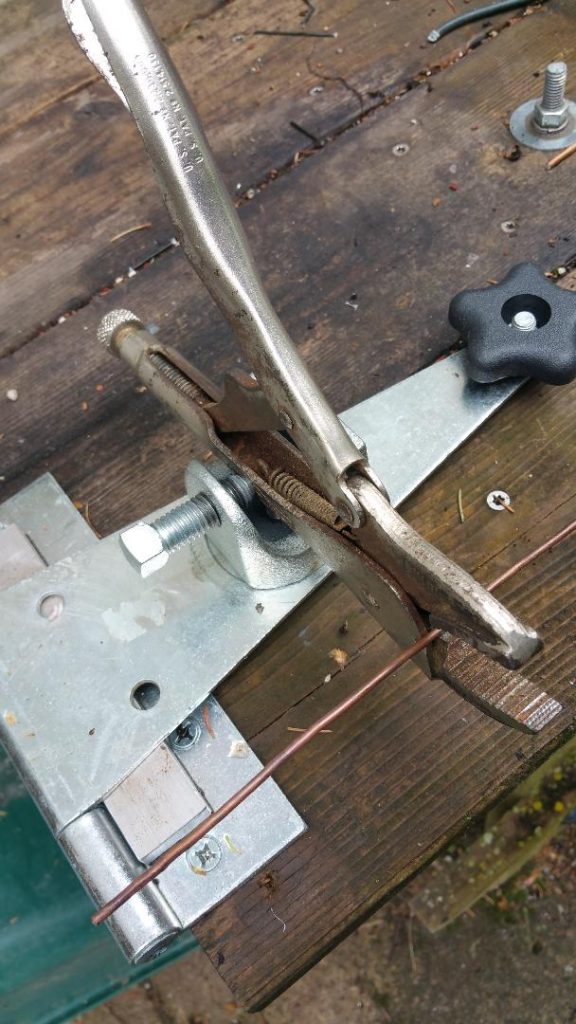
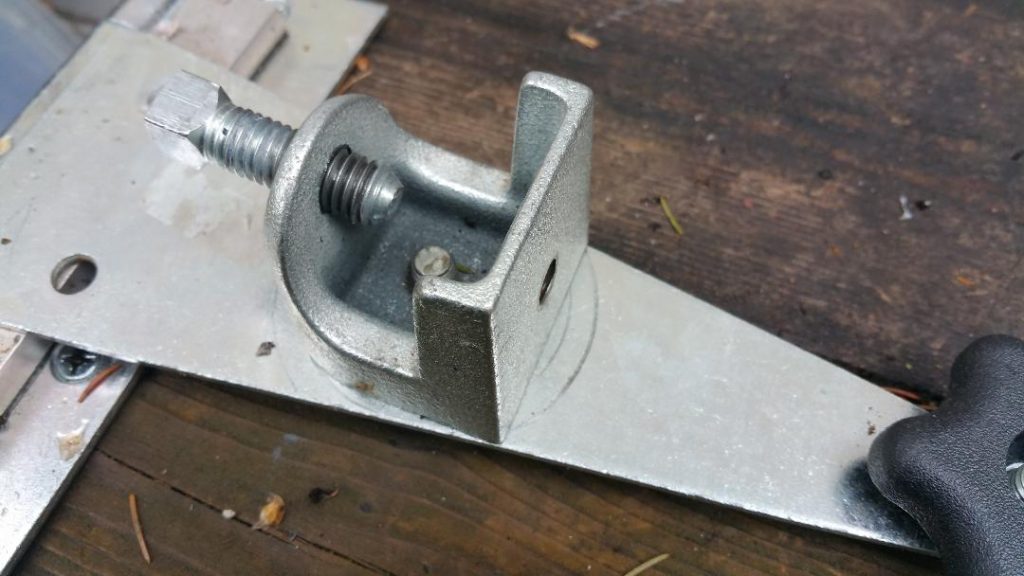
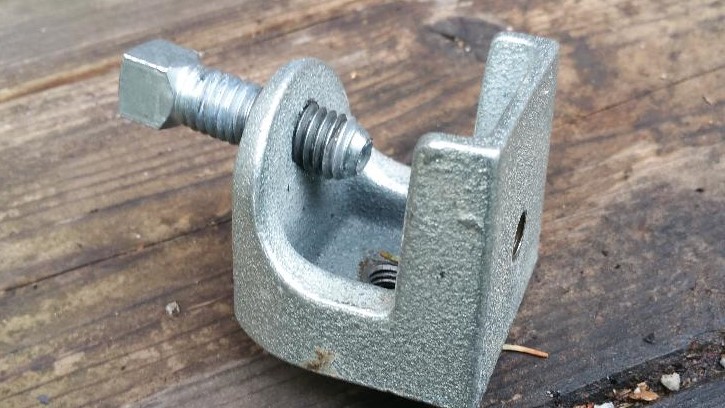
To increase the versatility you can add a beam clamp to hold locking pliers to cut wire or to firmly hold objects and free up your hands. Beam clamps are used to attach threaded rod to steel ceiling beams to in turn suspend conduit/piping and apparatus from building ceilings. You can find them in the electrical department at your hardware supplier. You’ll want one with 3/8″ threaded mounting holes. The beam clamp attaches to the Bench Mounted Wire Straightener with a 1″ x 3/8″-16 bolt. Use the existing middle hole in the hinge. I used an older pair of locking pliers which I’ll leave outdoors. You’ll want to use locking pliers that have a built-in wire cutter.
You can also mount the beam clamp directly to the bench top. Note the bolt protruding through the bench top in the upper right of the picture.
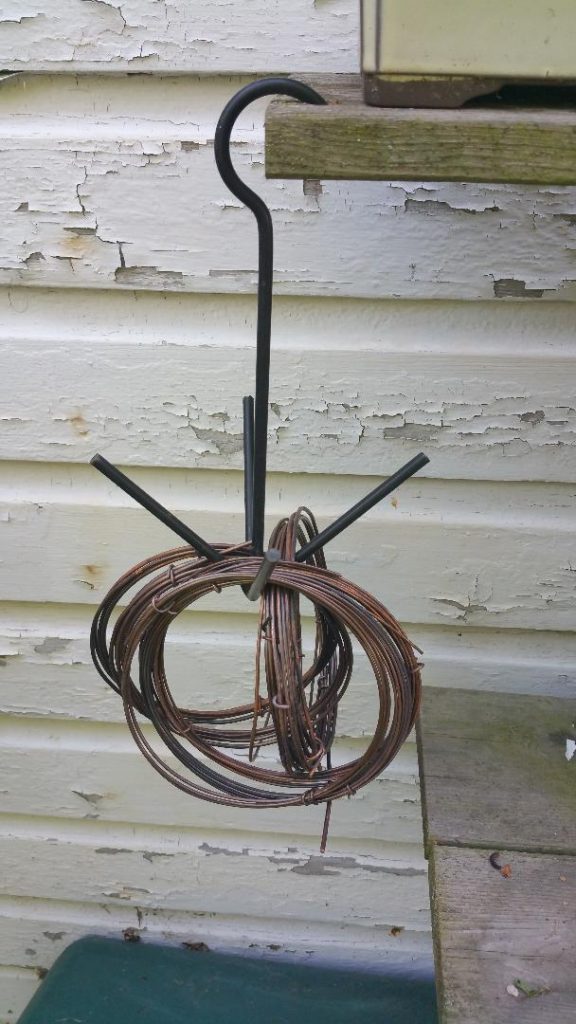
3/8″ Beam ClampWire Hanger
An Oriole fruit feeder doubles a convenient outdoor wire hanger for my recycled annealed copper electrical wire.
What is the Gracie Mower Blade Snagger and what does it have to do with gardens? Well, there is lawn in many gardens, and where there is lawn there are machines to mow the lawn. And all lawn mowing machines need regular maintenance. For me, removing and re-installing mower blades for re-sharpening or replacement is never an easy task. I have found that using wood blocks to jam the blade to be too cumbersome, requires different size wood blocks for different mower decks, fall out of place, and so on. I also avoid removing my riding mower decks whenever possible. So, this is why I’ve created the Gracie Mower Blade Snagger to solve these blade maintenance problems on different lawnmower models.
For order inquires please contact us at graciebonsai4@gmail.com
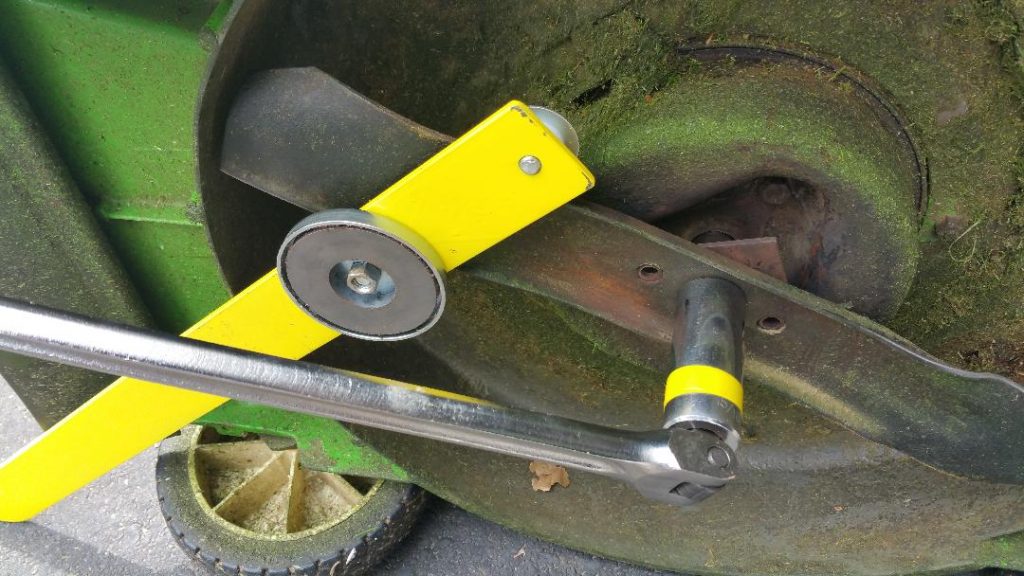
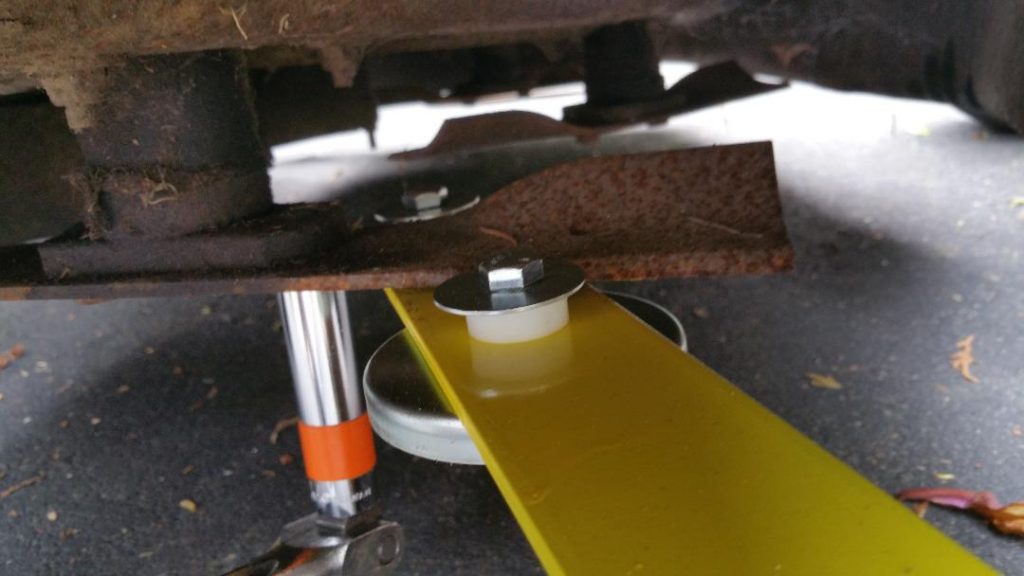
Here is the Gracie Mower Blade Snagger being used to hold the mower blade while removing the mower blade retaining nut on my old Lawnboy push mower. The Gracie Mower Blade Snagger counteracts the leverage applied by the breaker bar wrench while keeping the blade in a fixed position and your hands in a safe working position. The blade contact points are protected by thick nylon spacers. The nylon spacers are reposition-able to extend their life and are also easily replaceable.
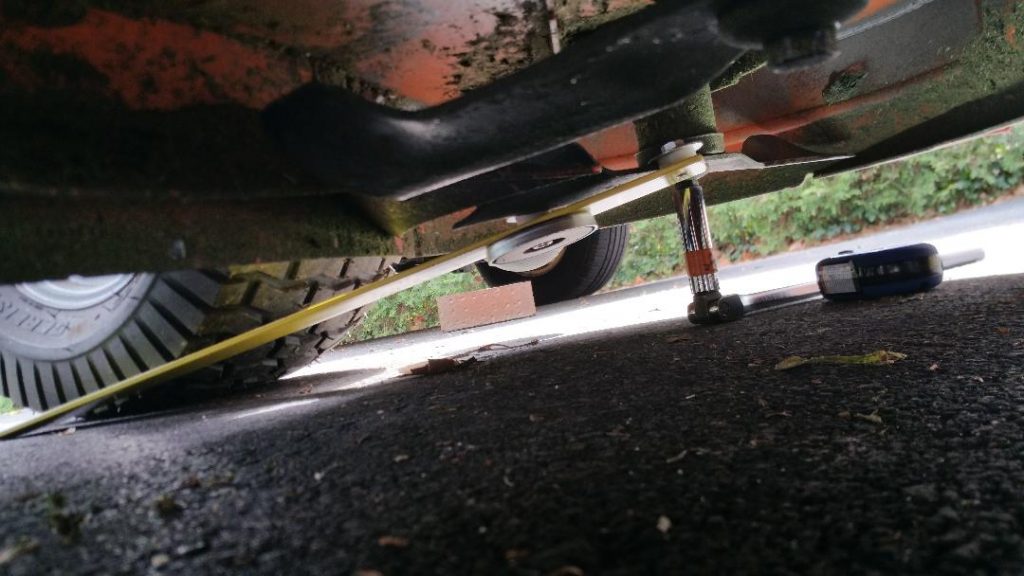
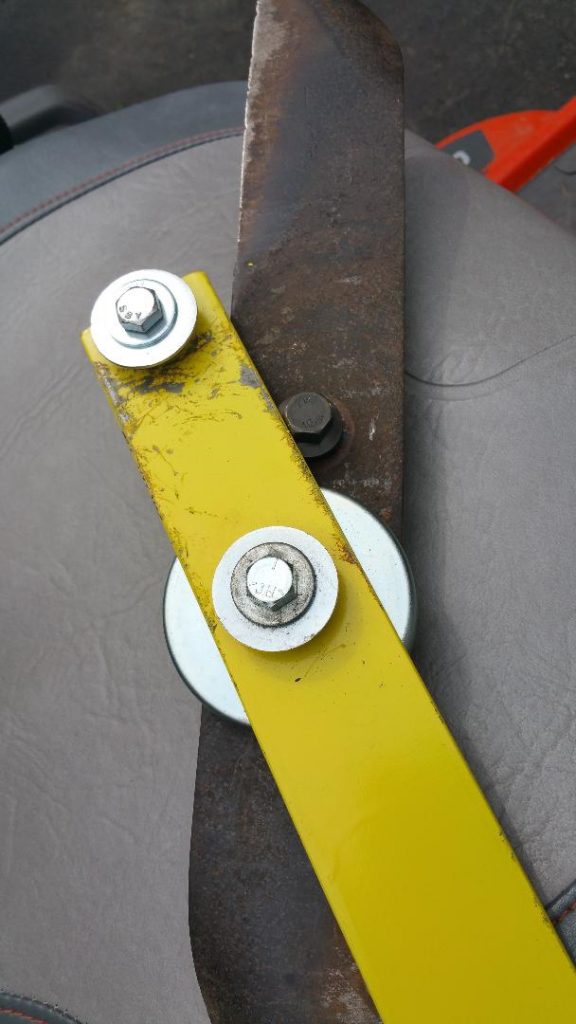
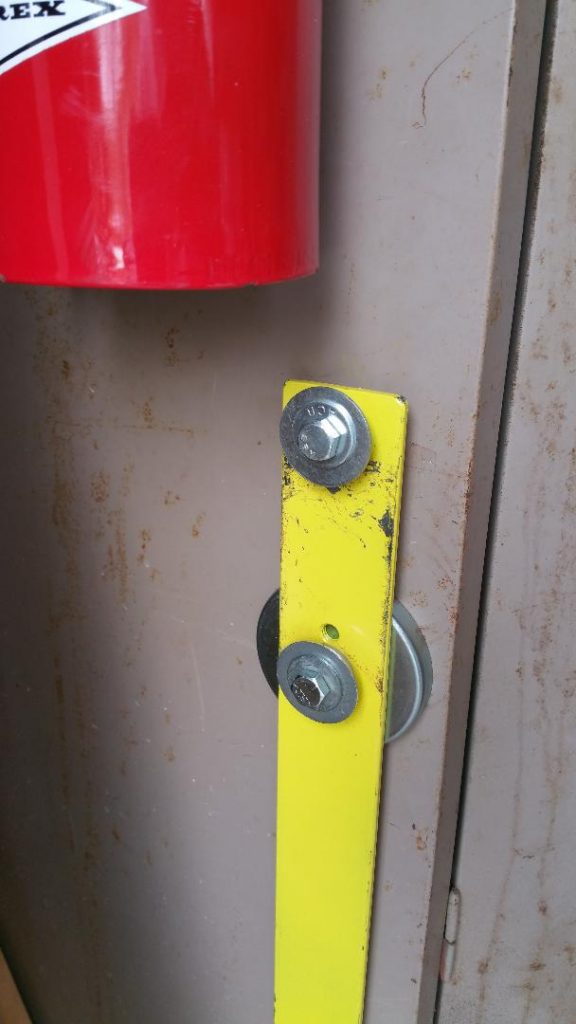
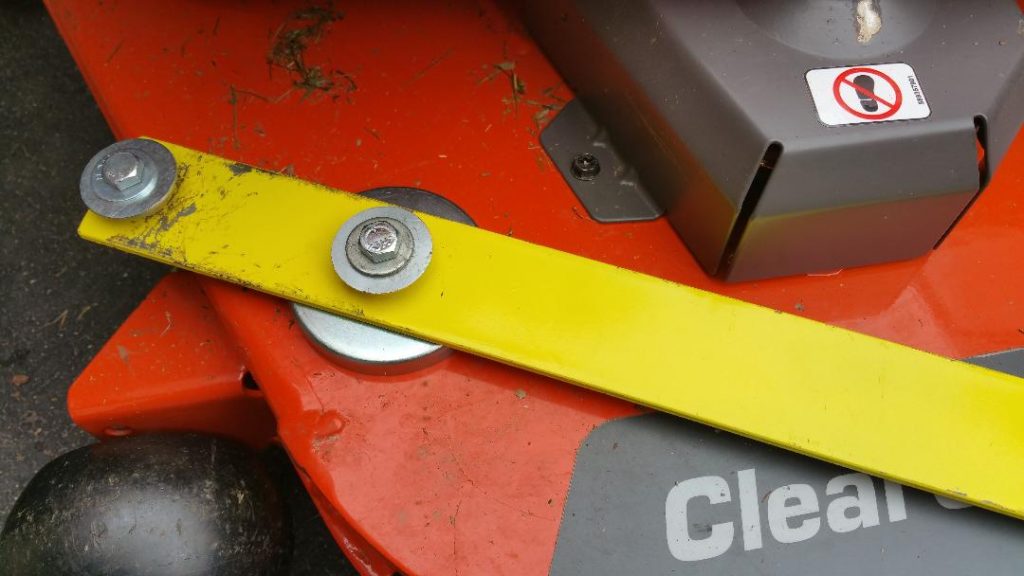
Here are some other examples of the Gracie Mower Blade Snagger being used on my riding mower decks.
Husqvarna TS348D, operator’s left side blade removal.Mid 70’s Sears ST16 blade removal. A two bolt blade attachment is used on this older deck style.
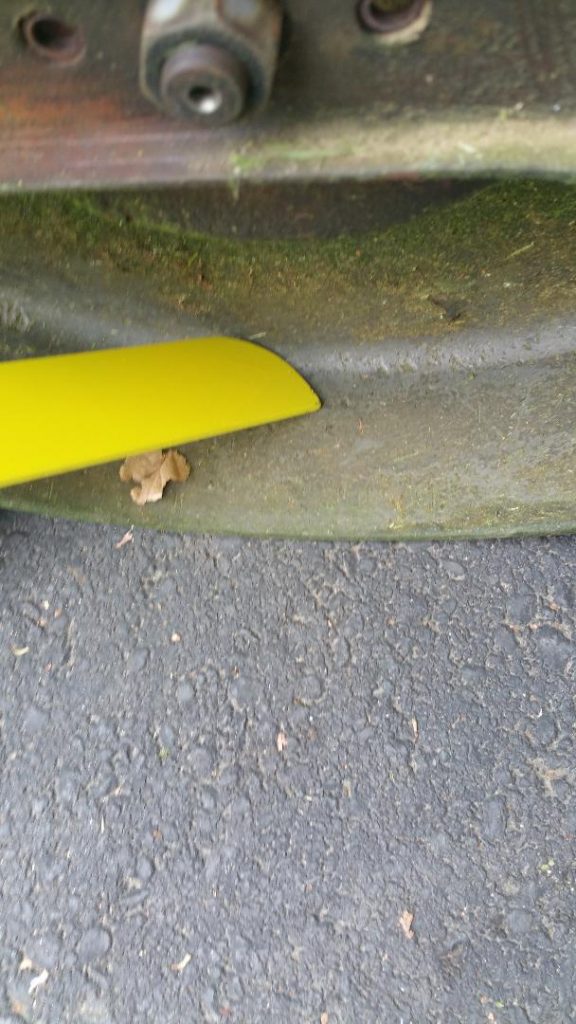
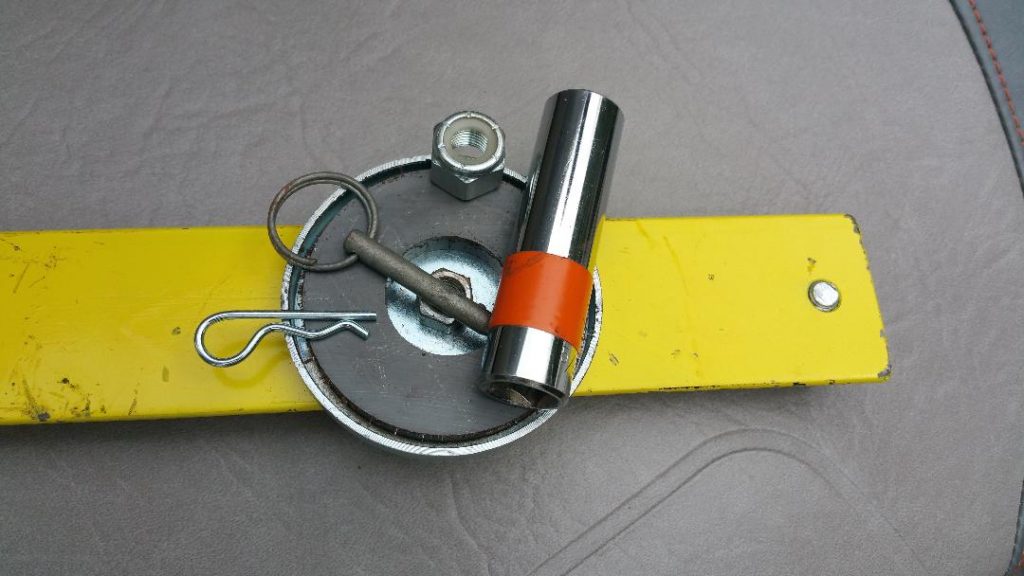
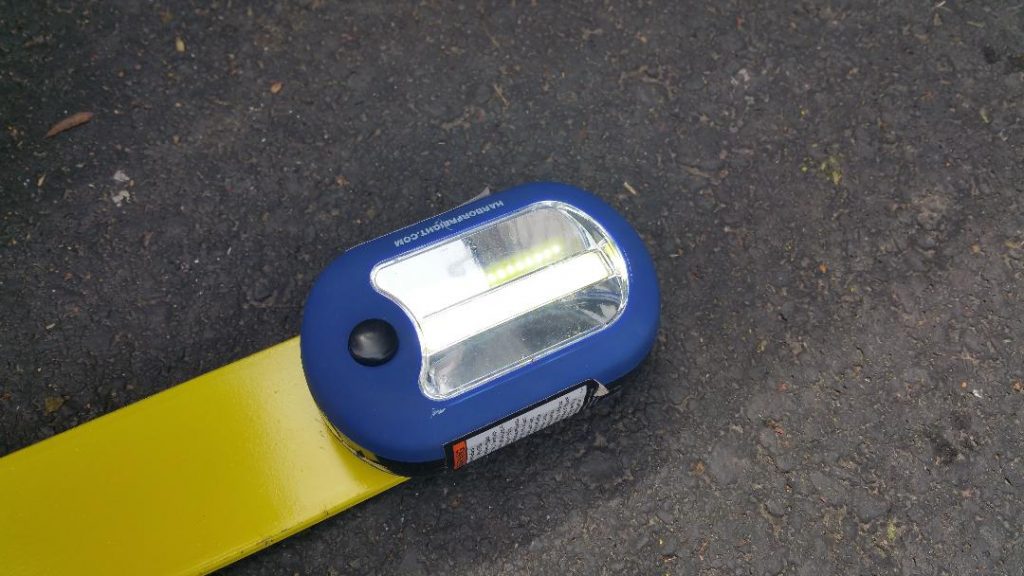
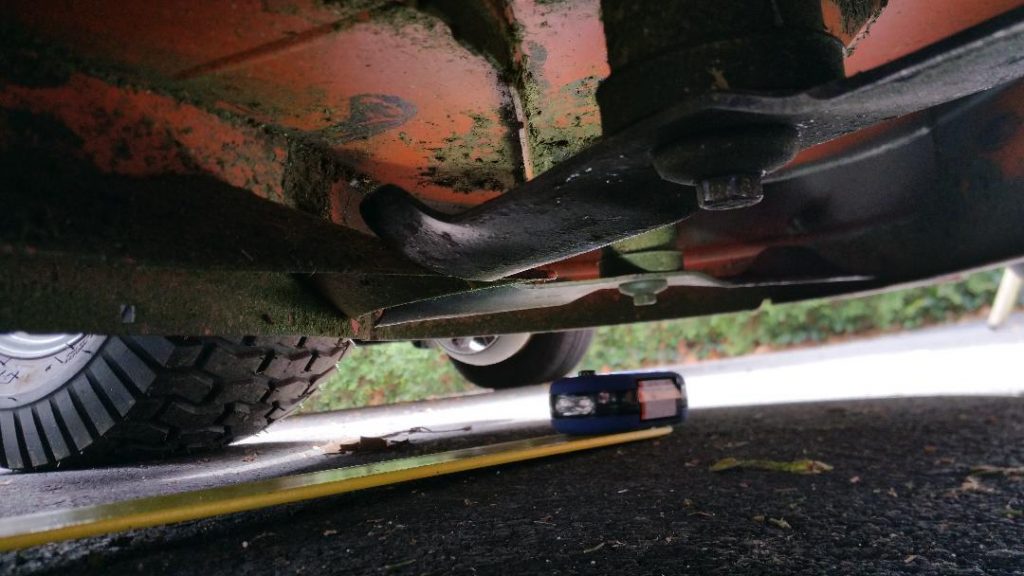
Other features of the Gracie Mower Blade Snagger include an under deck scraper, a heavy-duty magnet to hold blades and blade bolts in place for long reach installation, retrieving out of reach tools or parts on the ground and easy storage. The tool also allows you attach a small magnetic mount light for quick under deck inspections.
You can also use the rounded end of the tool to help with installing or removing tight belts!
Under deck scraper tool end is useful for both concave and right angle deck surfaces.How to hold a blade and blade bolt together prior to spindle attachment. Toro 17-44 HXL blade.Retrieve out of reach parts and tools while lying on the ground with the magnet. Sweep the work area for lost parts. A user supplied inexpensive Harbor Freight Tools magnetic LED light is easily attached to the end of the tool.Under deck illumination using the Harbor Freight Tools magnetic LED light to inspect for clipping build up, blade and spindle condition.Easy vertical storage on magnetic metal surfaces.Readily at hand for the blade removal and re-installation task.
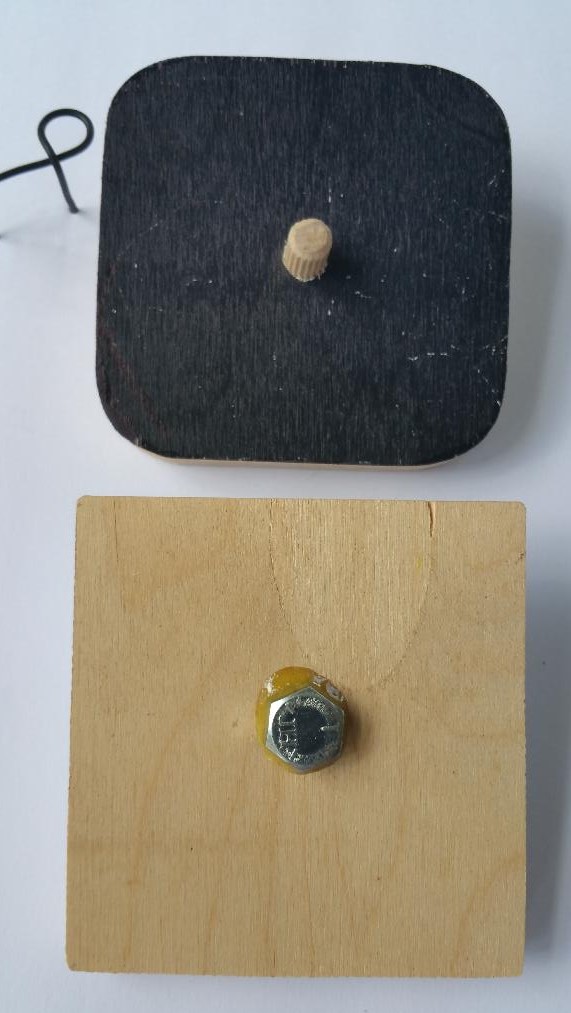
I thought I’d share an easy to make version of the Bonsai Wire Bending Grip. While not as versatile or durable as the original Bonsai Wire Bending Grip, the junior version will make equally well formed looped drainage screen retainers of different sizes and wire gauges. A piece of 1/2 ” thick by 3- 3/4″ square plywood, a 3/8″ diameter wood dowel or bolt and some epoxy is all that is needed. Dimensions are not critical and can be sized for the comfort of your hand and the diameter of the loops you prefer to use.
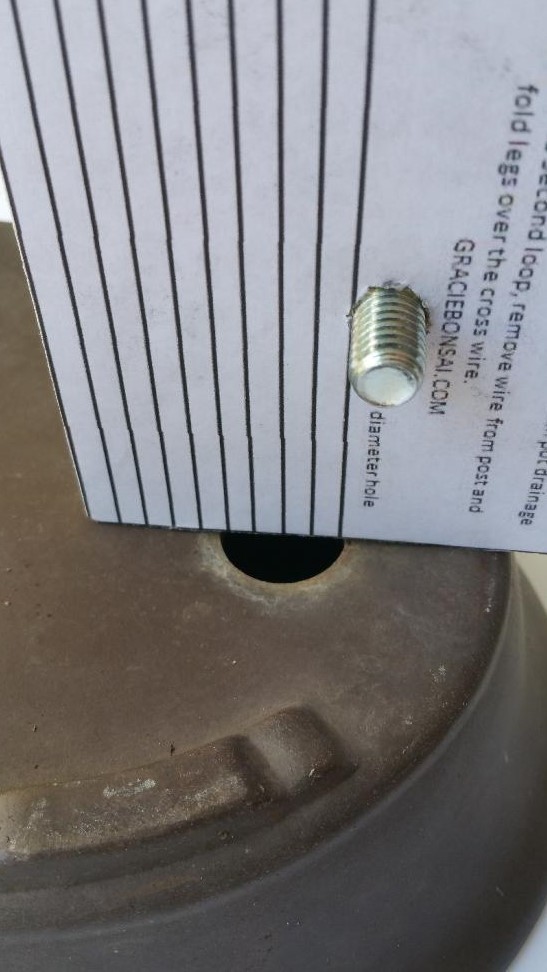
The concept of the design is the same. A calibrated scale referenced to the edge of the post that allows you to make accurately sized drainage screen retainers, fast. Use the scale (as shown below) to determine the diameter of your pot drainage opening(s) and the length of the wire legs and the spacing set between the wire legs. Refer to the instructional YouTube video on page 3 of this website for the basic procedure.
If you have any questions or would like to request a free template, feel free to email us at graciebonsai4@gmail.com.
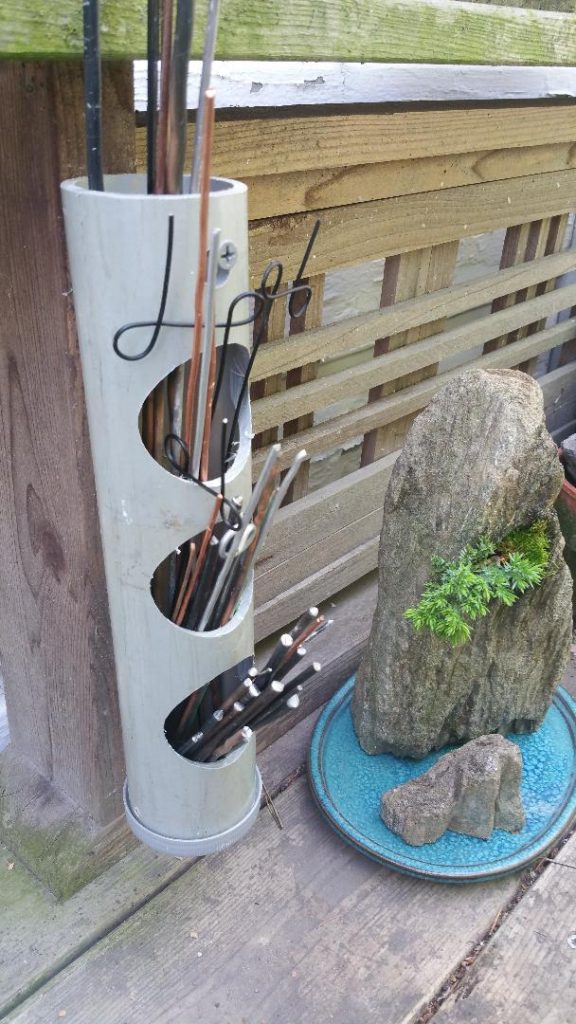
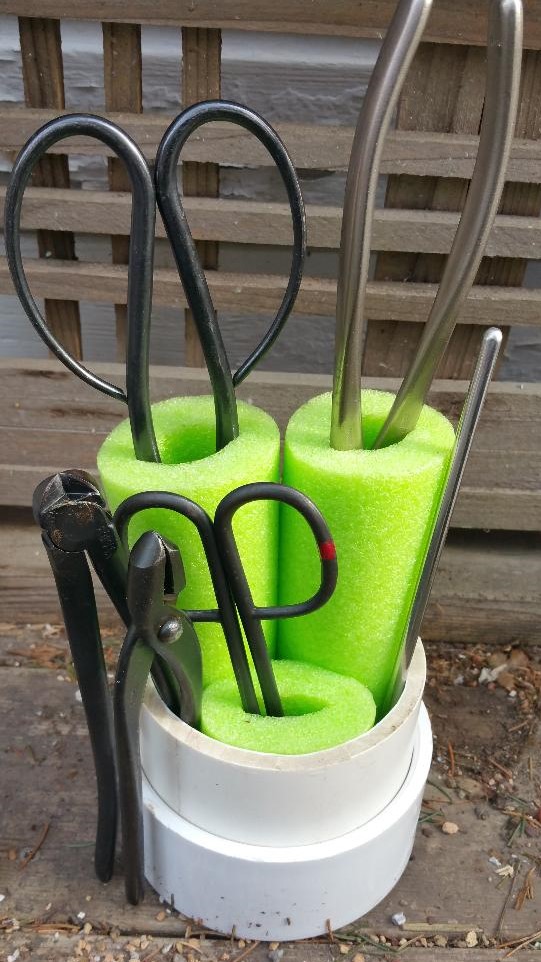
This is how I keep my bonsai tools protected and readily available to grasp on my cluttered bench top. The sharp, pointed tools go face down in the foam tubes and the blunt tools hang from the rim. It is made with a 4 inch (flat type) PVC cap fitting, a short piece of 4 inch PVC pipe and three pieces of foam swimming pool noodle. Foam pipe insulation can also be used. The weight of the PVC keeps it very stable.
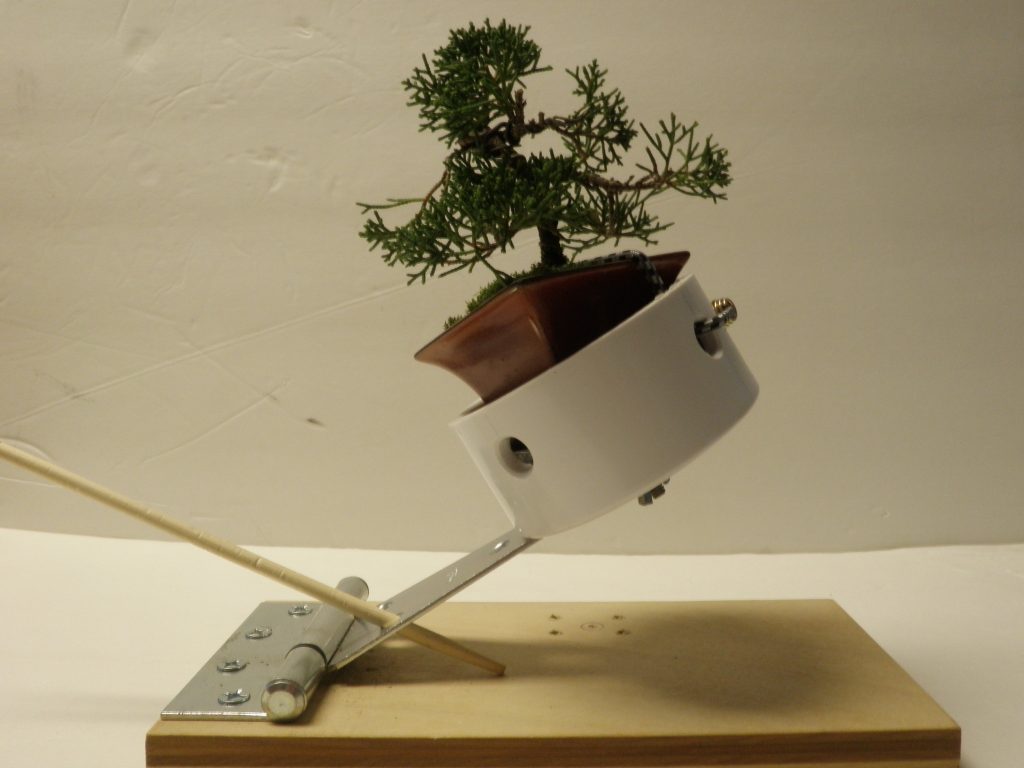
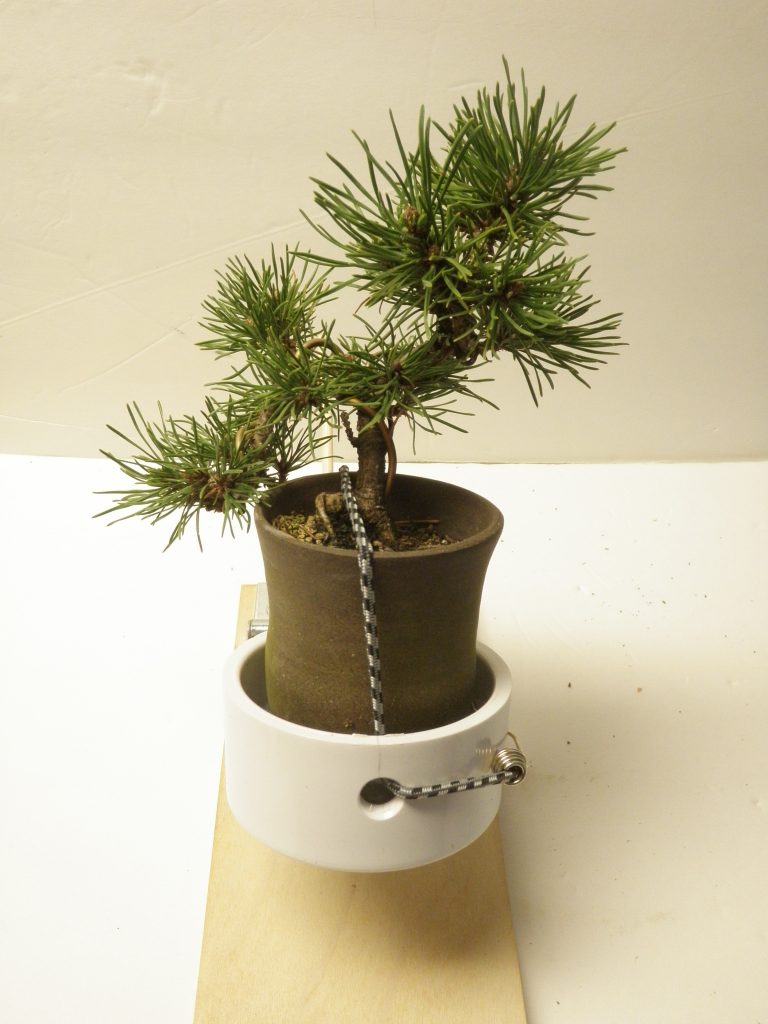
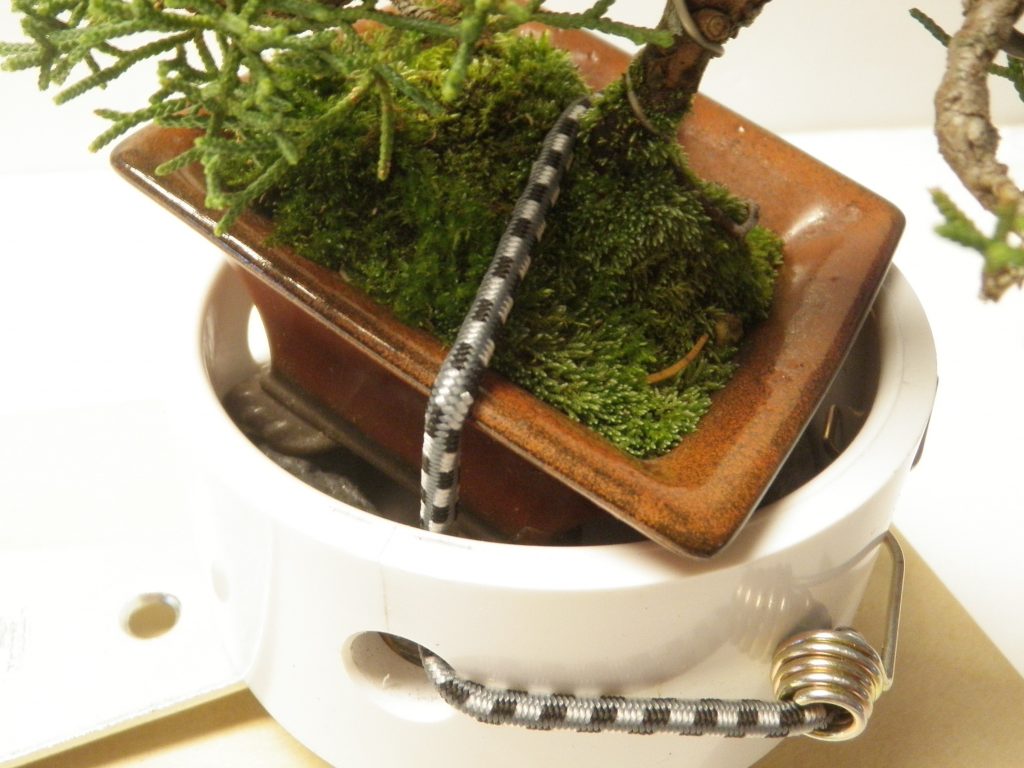
Secure, tilt, elevate and rotate your miniature bonsai with this unique setup. It gives you plenty of room for your hands to get close in for pruning and wiring. Turn it like a turntable and lock it in place by tightening the wingnut under the cap.
Here’s how to make it:
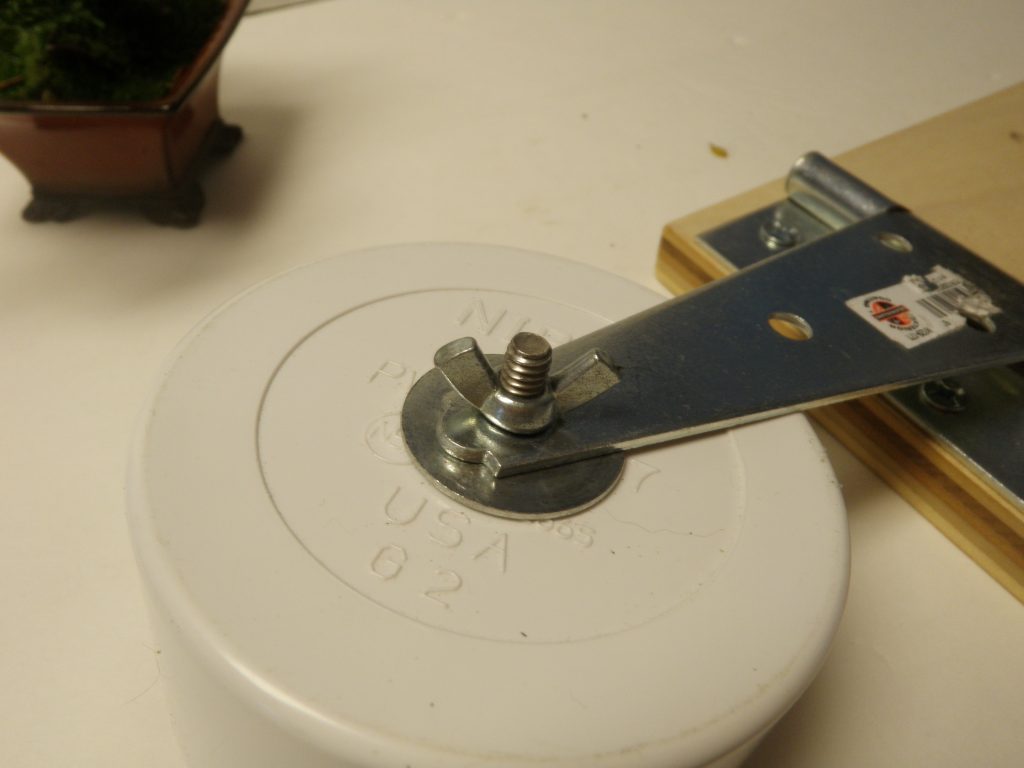
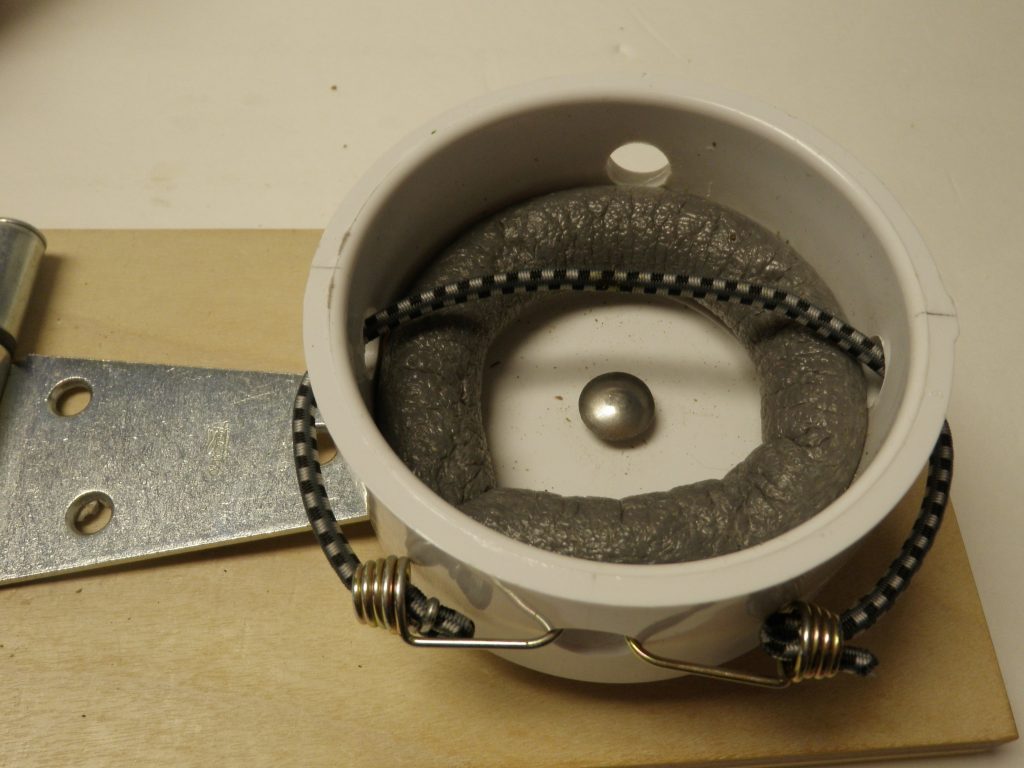
Using the small bonsai wire straightener design in the previous post below, remove the knob and replace it with a flat 3″ PVC pipe cap that has been drilled with four 1/2″ holes equally spaced around the circumference and a smaller hole in the center bottom of the cap to use a small carriage bolt, washer and wingnut to attach to the hinge. The large 1/2″ holes allow routing mini bungee cords in and out to create taut hold down cords. Rubber bands or wire can also be used. Line the inside of the cap with a piece of round gap sealing poly foam, a sponge or cloth. This allows you to place the pot in any position while being firmly secured by the hold down cord(s).
Use a chopstick, dowel or long threaded bolt to adjust the elevation of the hinge as shown below. Use a 4″ cap for larger bonsai or a 2″ cap for the smallest bonsai.
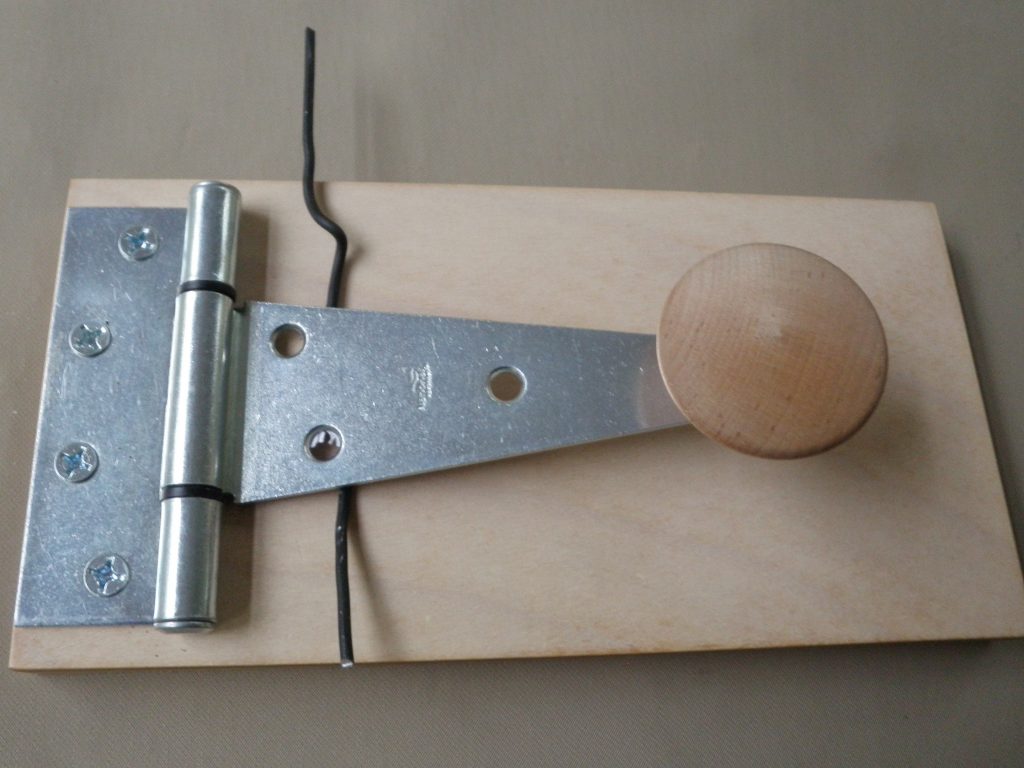
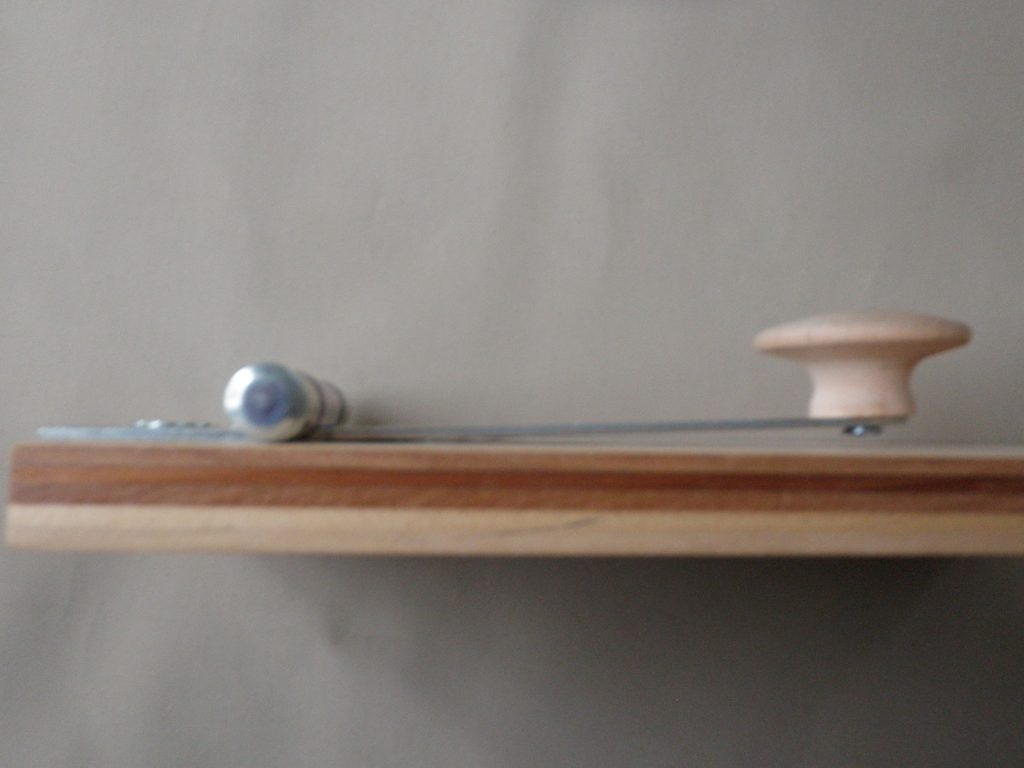
Here’s a way to straighten short, used pieces of bonsai wire using a hinge. The material consists of a 7″ long, heavy duty gate hinge mounted to a piece of 3/4″ X 5″ X 10″ cabinet grade hardwood plywood using five #12-3/4″ flat head wood screws. A wooden cabinet knob is attached to the end of the hinge with a screw.
How to use it:
Place the kinked wire under the hinge parallel and close to the hinge pin. Press down on the lever knob then release pressure and rotate the wire. Do this repeatedly moving up and down the length of the wire until it is straightened. For the greatest compression strength place the wire against the hinge pin joint.
Use it as a quick release vise to quickly grip the wire end letting you pull and manipulate the other end of the wire with pliers.
Yes, it does resemble a Morse code key!
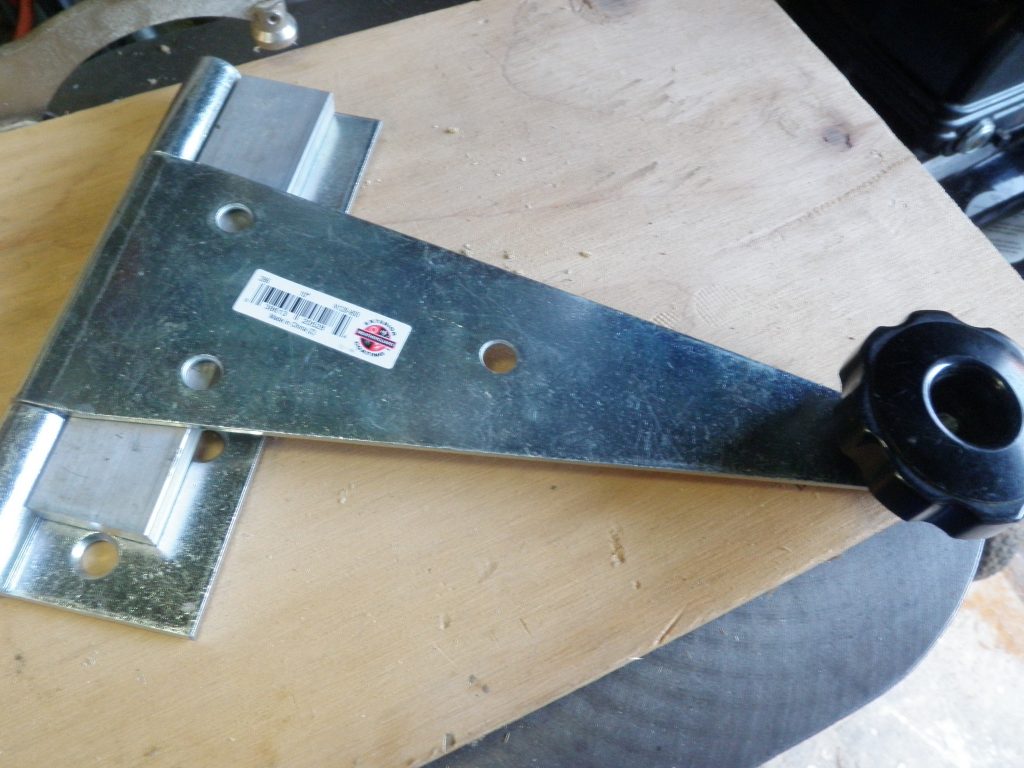
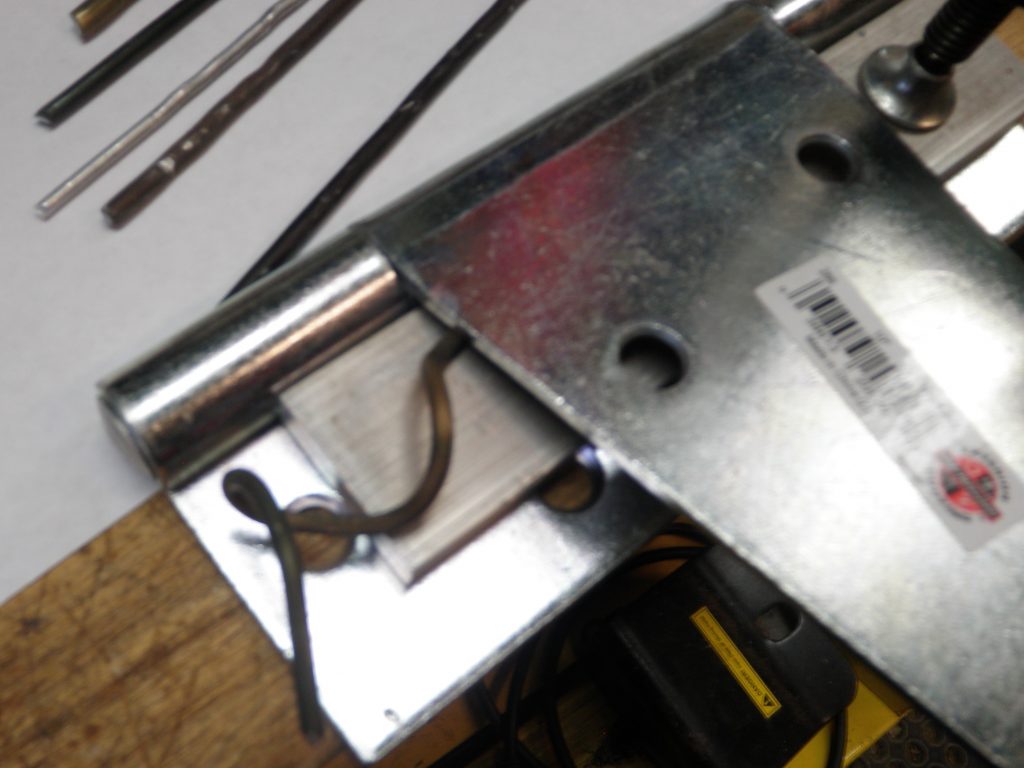
Let’s take it up a notch for big wire!
Use a 10″ heavy duty gate hinge, an aluminum or steel bar stock spacer and a knob of your choice. Attach the spacer to the hinge with double sided tape. Temporarily mount the straightener to your work surface with a clamp or mount it permanently with screws.